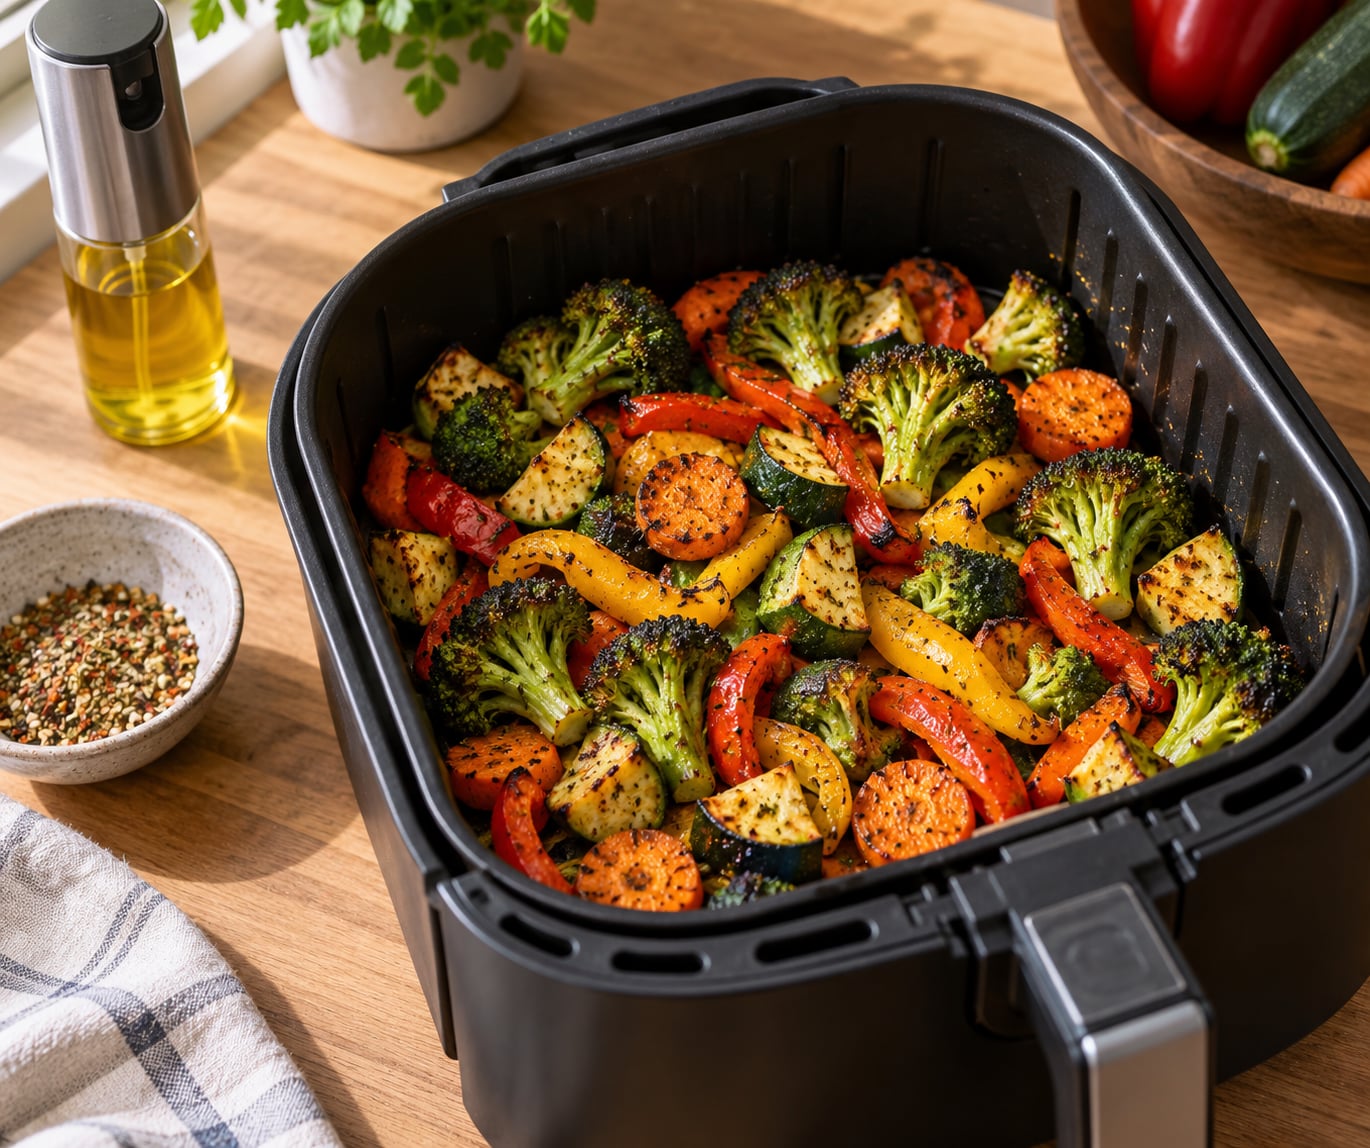
An air fryer cooks vegetables with rapidly circulating hot air, so they brown and crisp like oven roasting without a deep-frying bath. Cut everything to the same bite-sized pieces, toss with about 1 tablespoon of oil per 2 cups plus seasoning, spread it in one uncrowded layer, and air fry at 375-400°F (190-205°C) for 8 to 20 minutes. Shake the basket halfway through.
The whole method takes about 15 minutes of prep and 15 minutes of cooking. It is a weeknight-level skill: once you get the cut size and the crowding right, you stop needing a recipe at all.
Most disappointing air-fried vegetables share one cause. They steamed instead of roasted because the pieces were wet, crowded, or cut into wildly different sizes. Fix those three things and the rest is seasoning.
Table of Contents
- What You Need
- Do you cook vegetables in an air fryer?
- Which vegetables air fry well, and which to skip
- A note on basket liners
- Step-by-Step
- 1. Cut every vegetable to the same size
- 2. Dry the pieces before anything else
- 3. Season lightly, and watch when you salt
- 4. Load the basket in a single layer
- 5. Set the temperature, and preheat only when it helps
- 6. Shake the basket halfway through
- 7. Check doneness by look and feel, not the timer
- Air fryer vegetable temperature and time cheat sheet
- Frozen vegetables: add 2 to 5 minutes
- Blanch the fibrous ones, skip it for the starchy ones
- Air fry setting or bake setting?
- Seasonal produce that air fries well
- Storing and reheating cooked vegetables
- Common Mistakes
- Overcrowding the basket
- Skipping the dry step
- Unevenly cut pieces
- Using too much oil
- Not shaking the basket
- Cooking every vegetable at one temperature
- Frequently Asked Questions
- Do you need oil to air fry vegetables?
- Should I preheat the air fryer for vegetables?
- How long do vegetables take in an air fryer?
- How do you get crispy vegetables instead of soggy ones?
- Can I air fry frozen vegetables without thawing them?
- How do I reheat air-fried vegetables so they stay crisp?
- Conclusion
What You Need
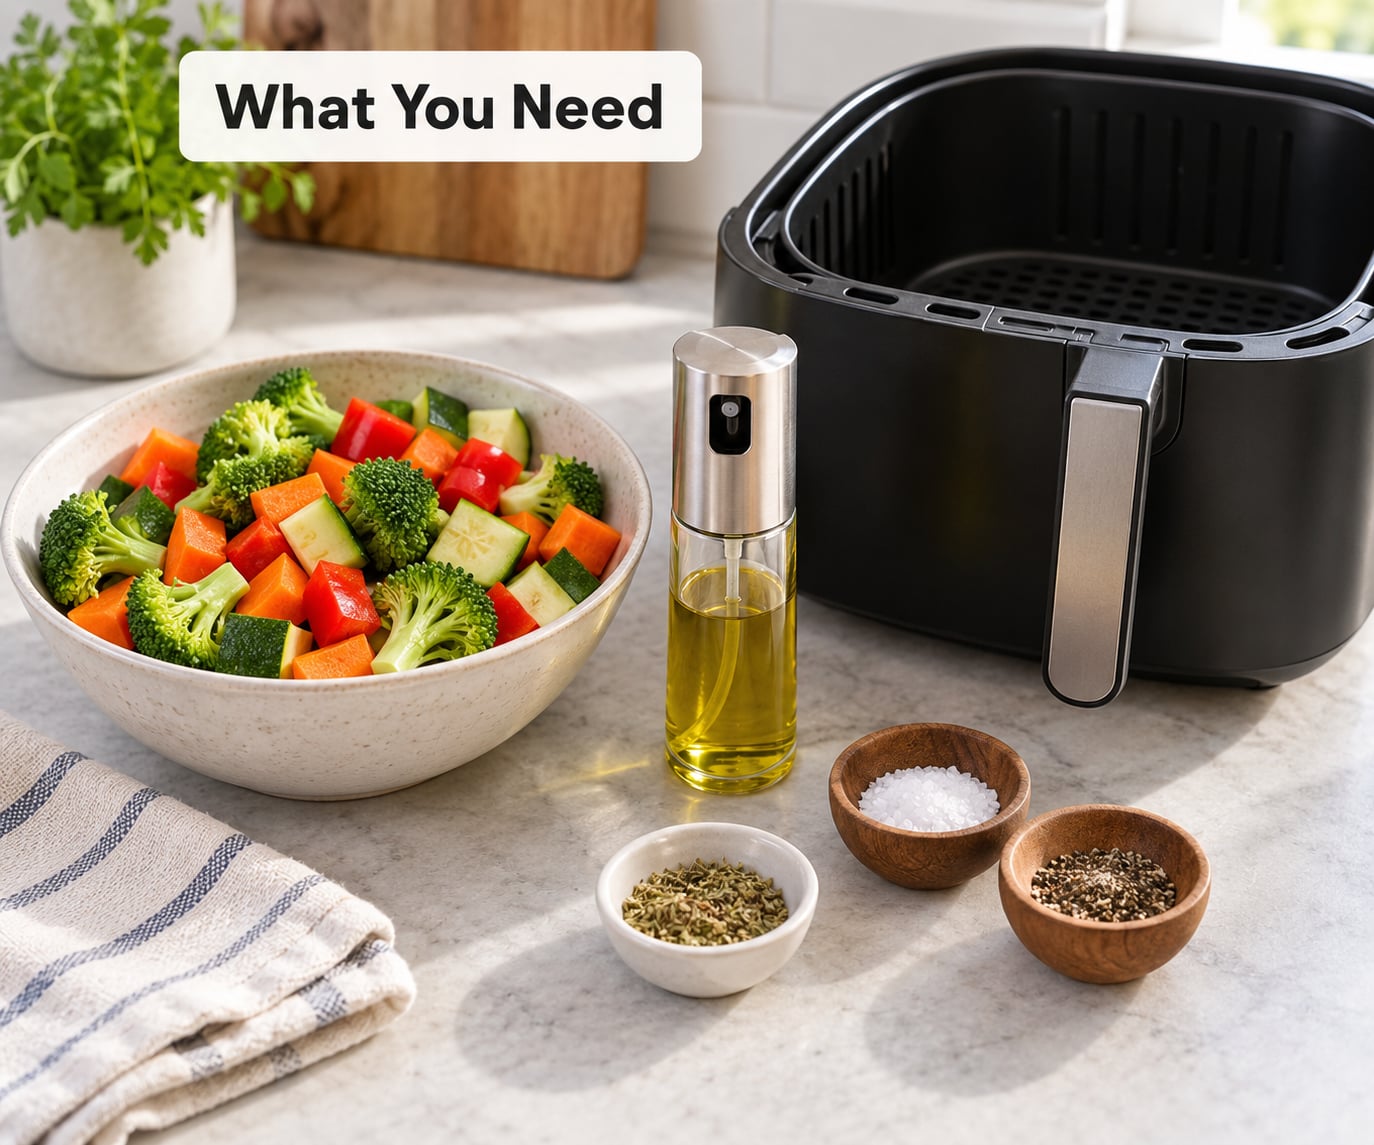
You need very little. Most of the “equipment” is already in your kitchen.
- An air fryer. Any basket or toaster oven works. A 3 to 5 quart basket holds about two-thirds of a full layer of 1-inch pieces, which is roughly the amount of vegetables one person eats as a side.
- Vegetables. Firm, dense ones hold up best: potatoes, sweet potatoes, carrots, broccoli, cauliflower, Brussels sprouts, squash, green beans, peppers, onions, mushrooms.
- Oil. About 1 tablespoon per 2 cups of vegetables. Olive oil and avocado oil are the usual choices, but any high-heat oil works.
- Seasoning. Salt, black pepper, garlic powder, smoked paprika, cumin, or Italian seasoning. Finely powdered spices land on damp surfaces better than coarse salt.
- Tongs or a silicone-tipped spatula for turning and lifting.
- A paper towel or clean kitchen towel for drying the cut pieces. This is the least glamorous tool on the list and the one that matters most.
- Optional: a wire rack or second basket so you can cook two batches without the first one sitting there getting soft.
A light coating of oil is what improves browning. Oil carries heat into the surface of the vegetable and keeps the exterior from drying out before the sugars can caramelize. Skip it entirely and you get pale, papery edges. Use too much and you get greasy, heavy food, plus smoke.
Do you cook vegetables in an air fryer?
Yes, and vegetables are arguably the food an air fryer is best at. The combination of fast-moving hot air and a small basket puts concentrated heat on cut surfaces, which is exactly what browning needs. Dense vegetables like potatoes and carrots come out in minutes, and a full basket usually cooks faster than a sheet pan in a conventional oven because the pieces sit closer to the heating element and the air has less distance to travel.
The word “fryer” does a lot of damage here. You are not shallow-frying or deep-frying; nothing is submerged. You are roasting with moving air, which is why the whole method takes one tablespoon of oil instead of a cup.
Which vegetables air fry well, and which to skip
The pattern is simple. Vegetables with dense flesh, starch, or layered structure survive high heat and brown well. Vegetables that are mostly water or thin leaves do not.
- Excellent: potatoes, sweet potatoes, carrots, parsnips, butternut and acorn squash, broccoli, cauliflower, Brussels sprouts, zucchini, eggplant, bell peppers, red onion, green beans, mushrooms, asparagus, corn on the cob.
- Works with a trick: asparagus, broccoli, green beans, and leafy kale. Blanch them briefly in boiling salted water, then shock them in ice water. The blanch sets the outside so they brown instead of deflating.
- Best skipped: spinach, chard, lettuce, and other tender greens. They have almost no structure to crisp, they release water fast, and they go from wilted to burnt inside three minutes.
One thing to know about eggplant: salt the sliced cubes, wait 10 minutes, and blot the beads of moisture off before they go in. That single step is the difference between roasted eggplant and a soggy one.
A note on basket liners
Air fryers need airflow. Do not line the basket with foil, and do not cover it with a solid sheet of parchment without holes in it, because blocking the vents can overheat the unit. A perforated parchment liner made for air fryers is fine. It keeps the basket from getting sticky and makes clean-up quick, and it does not change the cooking time.
Step-by-Step
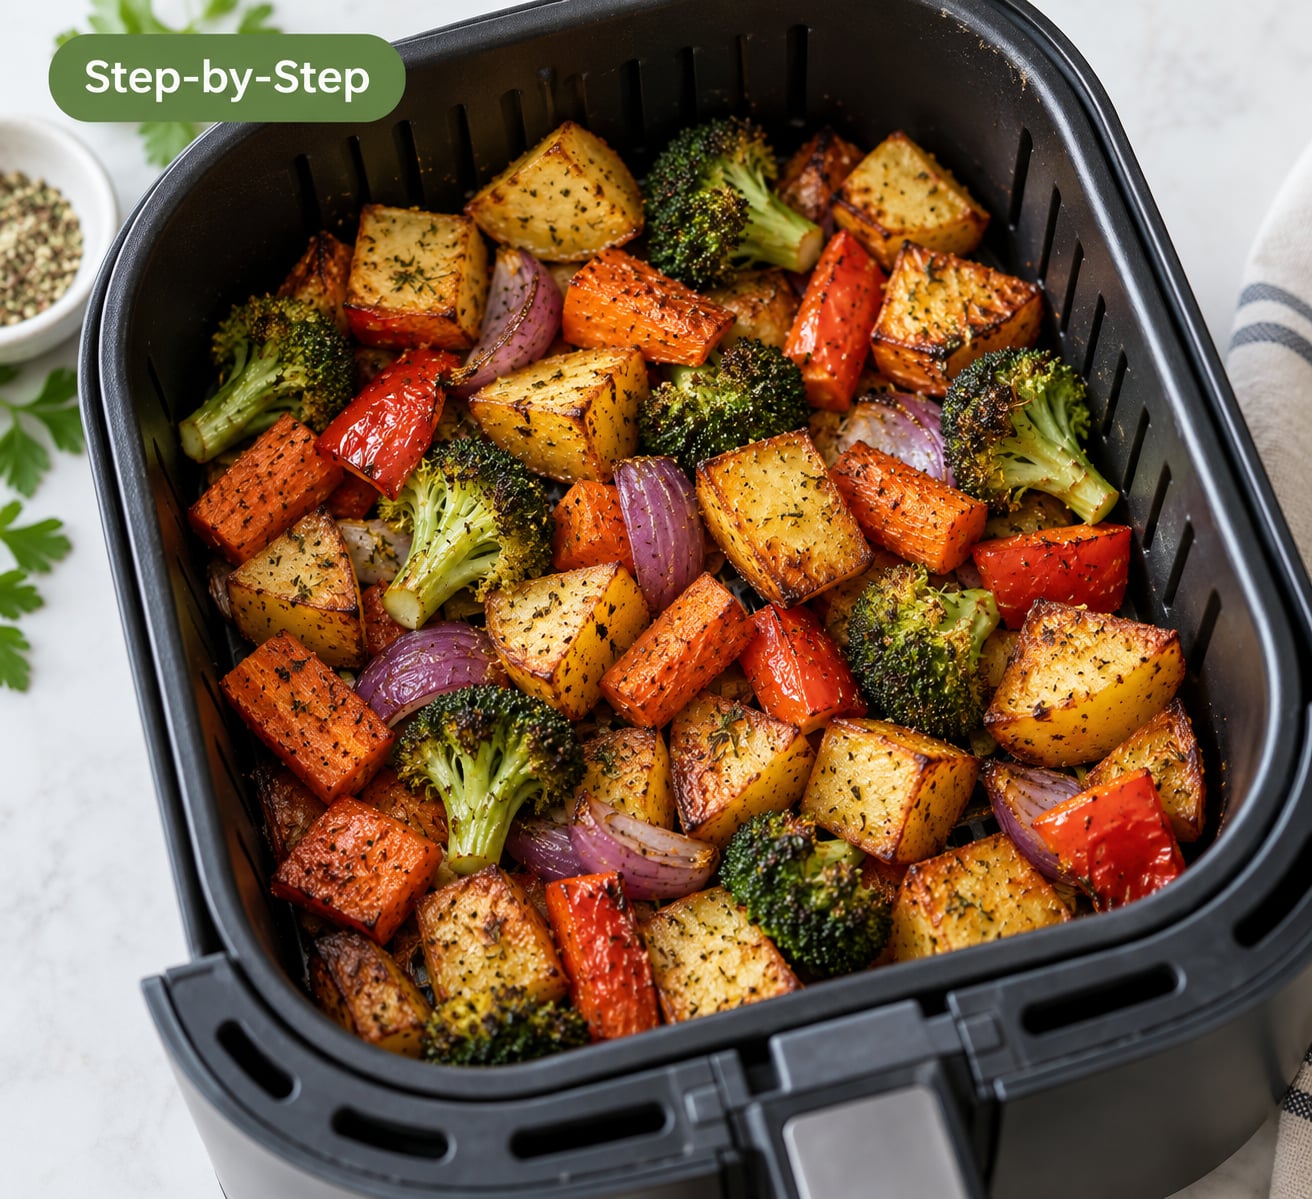
1. Cut every vegetable to the same size
This is the step that decides whether you get good results. If you cube a squash and leave a carrot whole in the same basket, the carrot is still raw when the squash is ash. Aim for pieces of roughly one size so everything reaches doneness together, and keep everything around 1 inch thick.
Thick vegetables need slicing and sometimes pre-steaming. A whole small potato takes far longer than one you cut in half, so cut it and let it join the rest.
2. Dry the pieces before anything else
Pat the cut vegetables with a towel. Surface water has to boil off before browning can start, and every drop takes time and heat you would rather spend on the food. Wet pieces in the basket turn into a steam bath, and steaming is the opposite of what you want.
For mushrooms specifically, this matters most. Their surface holds water like a sponge, and they will not brown until that is gone.
3. Season lightly, and watch when you salt
Put your cut vegetables in a bowl or directly in the basket, then drizzle with about 1 tablespoon of oil per 2 cups. Add your seasonings and toss with your hands until every piece looks lightly coated and evenly dusted.
On salt timing, there is a real trade-off. Salt before air frying draws water out of the vegetable cells, which softens the surface. Salt after air frying seasons the interior but never seasons the outside. The workable compromise: use a small amount of salt before cooking for flavor, then finish with a pinch after.
For breaded vegetables, a light mist or a tablespoon of oil keeps the crumbs adhered and even. Panko, plain breadcrumbs, crushed crackers, or rolled oats all brown well.
4. Load the basket in a single layer
Spread the vegetables out flat so air can move around every piece. Pieces should not touch or pile up. When the basket is full, use two batches rather than one crowded layer. A crowded basket traps moisture, and moisture is why the bottom layer turns grey and soft while the top layer browns.
A wire rack inside the basket, or a second basket that swaps out, lets you cook more per round without stacking. Leave the basket breathing room and you will notice better browning within one cooking.
5. Set the temperature, and preheat only when it helps
Most vegetables cook well between 375°F and 400°F (190-205°C). Potato wedges and mushrooms like the top of that range because they need aggressive browning; green beans, asparagus, and leafy items like the lower end because they have less water to lose before they scorch.
Lower temperature plus longer time is the more forgiving approach. It develops deeper flavor without the scorched edges you get from cranking to 425°F and hoping.
On preheating, the honest answer is that it matters less for vegetables than most guides admit. Skip it for thin, quick-cooking vegetables at lower temperatures: the 2 to 3 minutes of preheating adds nothing to the total cook. Do preheat when you are roasting potatoes, squash, or anything that needs a serious blast of heat to brown, or when your air fryer has a small basket that loses temperature fast when you open it.
The vegetable presets on the panel are rough. Setting the temperature and time yourself gives you a result you can repeat. Air fryer vegetable temperature is the single setting you should learn to trust.
6. Shake the basket halfway through
At the halfway point, pull the basket out and shake it, or turn the pieces with tongs. Air fryers have a fan behind the element, and even circulation still leaves the pieces nearest the back and the edges slightly behind the ones in the middle. Shaking evens that out.
Do not skip this step because you opened the door once already. It is the cheapest way to fix uneven browning.
7. Check doneness by look and feel, not the timer
Here are the visual cues to look for: the surfaces have turned golden to deep brown, the edges are darker and dry rather than glossy, and a piece you press with tongs gives slightly or bends without feeling rubbery. Pierced with a fork, a carrot or potato should meet almost no resistance.
If the pieces are pale but tender, put them back for two minutes and watch them. Browning happens in the last stretch, and vegetables can go from pale to burnt within sixty seconds, so stay nearby at the end.
Air fryer vegetable temperature and time cheat sheet
All times assume pieces cut to about 1 inch, lightly oiled, in a single uncrowded layer, at the middle of the basket. Times vary with basket size and how full it is, so treat the table as your starting point.
| Vegetable | How to cut | Temp | Time |
|---|---|---|---|
| Russet or Yukon potato | Wedges, 1 inch thick | 400°F / 205°C | 10-15 min |
| Potato cubes | 1-inch cubes | 400°F / 205°C | 15-20 min |
| Sweet potato | 1-inch cubes | 380°F / 195°C | 12-16 min |
| Carrots | Coins or thick sticks | 400°F / 205°C | 12-15 min |
| Broccoli | Florets, dry | 380°F / 195°C | 8-10 min |
| Cauliflower | Florets, dry | 380°F / 195°C | 10-14 min |
| Brussels sprouts | Halved, loose outer leaves removed | 375°F / 190°C | 12-16 min |
| Green beans | Whole, trimmed | 375°F / 190°C | 8-10 min |
| Zucchini | 1-inch cubes or half-moons | 380°F / 195°C | 8-10 min |
| Bell peppers | Strips or 1-inch squares | 375°F / 190°C | 8-10 min |
| Mushrooms | Halved or quarters, patted dry | 400°F / 205°C | 6-9 min |
| Red or yellow onion | Wedges | 380°F / 195°C | 10-14 min |
| Asparagus | Spears, ends snapped | 375°F / 190°C | 7-9 min |
| Corn on the cob | Cobs cut in half | 380°F / 195°C | 12-15 min |
| Butternut or acorn squash | 1-inch cubes or half-moons | 390°F / 200°C | 15-20 min |
| Eggplant | Salted, blotted cubes | 375°F / 190°C | 12-15 min |
| Mixed roast | Everything at 1 inch, grouped by density | 380°F / 195°C | 18-22 min |
For a mixed roast, add dense vegetables first and let them get a head start. Mushrooms, peppers, and zucchini go in for the last five minutes so they do not dry out while the potatoes finish.
Frozen vegetables: add 2 to 5 minutes
Frozen works, and it works well for broccoli, cauliflower, green beans, and mixed blends. There is no need to thaw first, which is the nice part. Spread the frozen pieces in a single layer and do not stir them into a solid block.
Two adjustments matter. Add 2 to 5 minutes to the times in the table, because frozen vegetables start colder and hold ice inside the pieces. And give frozen vegetables a lighter coating: a thinner oil layer is enough once the ice is melting off them.
Season frozen vegetables after shaking rather than before, so the seasoning does not clump and dissolve into the meltwater in the bottom of the basket.
Blanch the fibrous ones, skip it for the starchy ones
Broccoli, asparagus, green beans, and kale contain enough water and loose fiber that direct high heat dries them out before they brown. Blanching for 2 to 3 minutes in heavily salted boiling water, then an ice bath, sets the outer structure and holds the water in. Pat dry thoroughly afterward.
Skip blanching for potatoes, sweet potatoes, squash, carrots, and cauliflower. Those need time to cook through, and pre-steaming just puts them one step closer to falling apart. The advice on both sides of the blanching debate fits: blanch for vegetables you want crisp, skip it for vegetables you want tender all the way through.
Air fry setting or bake setting?
Most units have both. Air fry runs the fan at full blast with high heat, which gives you browning fast but dries food out quickly. Bake uses gentler fan airflow and is slightly more forgiving on delicate vegetables.
For crusty items like potatoes and cauliflower, use air fry. For tender vegetables like zucchini, peppers, and asparagus, the bake setting holds more moisture in the center and shades you from the outside scorching. If you only ever learn one, learn air fry and shorten the time by a minute or two.
Seasonal produce that air fries well
Highland and Appalachian kitchens have a short, sharp produce season, and most of what grows in it likes high heat. Summer squash and zucchini go in at 380°F for about 10 minutes with garlic powder and a little vinegar added at the end. Green beans and late corn handle 375-380°F without any special treatment.
Fall brings sweet potatoes, butternut squash, and late broccoli. Those are the 380 to 400°F, 12 to 20 minute vegetables, and they are the ones that reward browning. If you are working through a glut of ramps or tender greens, blanch and fry them fast, in small batches, while the oil is hot.
Storing and reheating cooked vegetables
Move cooked vegetables to a container lined with a paper towel and keep them refrigerated for up to three or four days. The paper towel draws out condensation, which is the main reason stored roasted vegetables turn soft.
To reheat, skip the microwave if you have a choice. Put them back in the air fryer at 350°F (175°C) for 4 to 6 minutes, shaking once, and they come back close to their original texture. A microwave reheats them evenly and also softens them. Five minutes of reheat is enough; they rarely need more.
Common Mistakes
Overcrowding the basket
Piled vegetables trap their own moisture, and trapped moisture boils instead of evaporating. The outside stays pale, the inside goes watery, and the whole batch tastes steamed. Fix: one uncrowded layer, and a second batch rather than a deeper one. If the pieces touch, they are overlapping.
Skipping the dry step
Water on the surface of a vegetable has to turn to steam before anything else happens, and that both delays browning and lowers the temperature at the surface. Fix: pat everything dry after cutting, and after blanching, and before seasoning.
Unevenly cut pieces
Different sizes mean different cook times, and you either pull the batch while the small pieces are still firm or leave it while the large ones are burned. Fix: cut everything to about 1 inch, and cook dense vegetables like potatoes and squash separately from quick ones like peppers and mushrooms.
Using too much oil
Excess oil pools in the basket, and the food at the bottom fries in it while the top stays dry. Fix: 1 tablespoon per 2 cups, tossed in a bowl first so it distributes instead of pouring onto one spot. A mister is useful for a final light mist on breaded surfaces.
Not shaking the basket
The fan circulates air well but not perfectly, and the pieces nearest the back and the walls brown slower. Fix: shake or turn at the halfway mark. This is the difference between evenly roasted and evenly pale with a few dark spots.
Cooking every vegetable at one temperature
A single setting is fine for one vegetable but wrong for a mixed basket. Thin, watery vegetables scorch at 400°F while dense roots are still raw. Fix: use the cheat sheet, start dense items first, add quick items partway through, and lower the temperature when you are relying on a longer cook for flavor.
Frequently Asked Questions
Do you need oil to air fry vegetables?
You can air fry vegetables without oil, and they will still cook through, but they rarely brown well. Oil carries heat into the surface and keeps the exterior from drying out before the sugars caramelize, which is what creates browning. A light mist or about 1 tablespoon per 2 cups of vegetables gives you the roasted, crisp edges most people are after.
Should I preheat the air fryer for vegetables?
Usually not, for most vegetables. Preheating adds two or three minutes and does not change the result for thin items like green beans, peppers, or asparagus. Do preheat when roasting potatoes, squash, or cauliflower, since those need a strong burst of heat to brown, and when your basket loses heat quickly as you load it.
How long do vegetables take in an air fryer?
Most vegetables take 8 to 20 minutes at 375-400°F (190-205°C). Soft, fast vegetables such as peppers, green beans, and mushrooms run 6 to 10 minutes, while dense ones like potatoes, carrots, and butternut squash run 12 to 20 minutes. Frozen vegetables need 2 to 5 minutes added. Check with a fork and your eyes rather than trusting the timer alone.
How do you get crispy vegetables instead of soggy ones?
Four things do most of the work. Pat the cut pieces dry, spread them in a single uncrowded layer, cook in batches instead of piling, and shake the basket at the halfway mark. Use about 1 tablespoon of oil per 2 cups to help the surface brown. If the pieces are pale but tender at the end, give them two more minutes and watch them closely.
Can I air fry frozen vegetables without thawing them?
Yes, and you do not need to thaw them. Frozen broccoli, cauliflower, green beans, and mixed blends air fry well straight from the freezer. Spread them in a single layer without breaking up any ice blocks, add 2 to 5 minutes to the fresh timings, and season after shaking so the seasoning does not wash into the meltwater.
How do I reheat air-fried vegetables so they stay crisp?
Use the air fryer rather than the microwave. Set it to 350°F (175°C) and heat the cooked vegetables for 4 to 6 minutes, shaking the basket once. That is enough to drive off stored condensation and bring back the edges. Store them refrigerated in a container with a paper towel for up to three or four days.
Conclusion
Start with one tray of evenly cut vegetables, season them lightly with about a tablespoon of oil per two cups, and set the temperature to 380°F before you load the basket. Keep the pieces in a single layer and watch for golden, dry-looking edges rather than counting minutes. The cut size and the crowding are what separate roasted vegetables from steamed ones, and once you control those two, the rest is just seasoning.