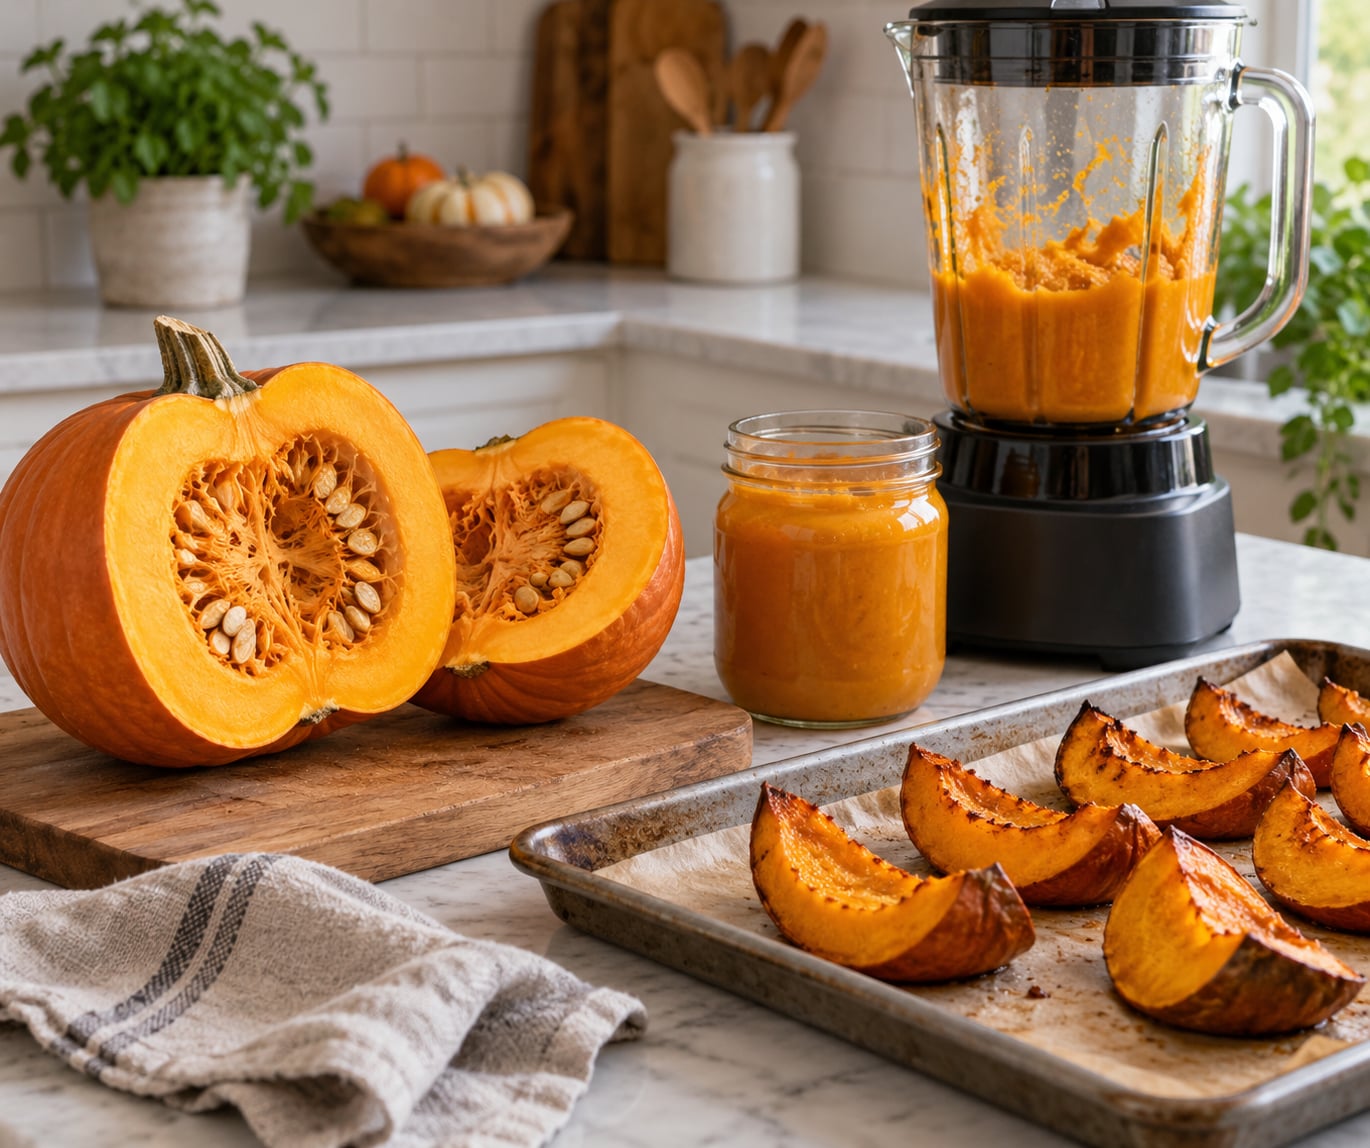
To make pumpkin puree from a fresh pumpkin, roast the flesh at 400°F cut-side down until a fork slides in with no resistance (35 to 45 minutes for most 3 to 5 pound pie pumpkins), scoop the soft flesh away from the skin, and blend it until completely smooth. Plan on 15 minutes of prep and about an hour and a quarter from start to finish.
The reason to do it yourself is flavor. Roasting drives off water and concentrates the pumpkin’s own sugars, so the puree tastes noticeably sweeter and more caramel-like than anything from a can, and it carries nothing but pumpkin. That same roast also explains the two complaints I hear most: pale color and thin texture, both of which are normal and both of which are fixable.
A medium sugar pumpkin gives you roughly 2 to 3 cups of puree, which is one or two pies depending on how generous you are with the filling. Roasting is the method most recipes land on, but boiling and pressure cooking work, and I compared them below.
Table of Contents
- What You Need
- Step-by-Step: How to Make Pumpkin Puree from a Fresh Pumpkin
- 1. Choose and Prepare the Fresh Pumpkin
- 2. Roast the Pumpkin Until Fork-Tender
- 3. Blend the Roasted Pumpkin Smooth
- 4. Season and Check the Texture
- 5. Use or Store the Pumpkin Puree
- Roast, Boil or Steam: Which Method Should You Use?
- Common Mistakes
- Frequently Asked Questions
- Do I have to roast a fresh pumpkin before making puree?
- Can I make pumpkin puree without peeling the skin?
- What is the best type of fresh pumpkin for puree?
- How long does homemade pumpkin puree last in the refrigerator?
- Can I freeze pumpkin puree made from a fresh pumpkin?
- Why is my pumpkin puree watery or stringy?
What You Need
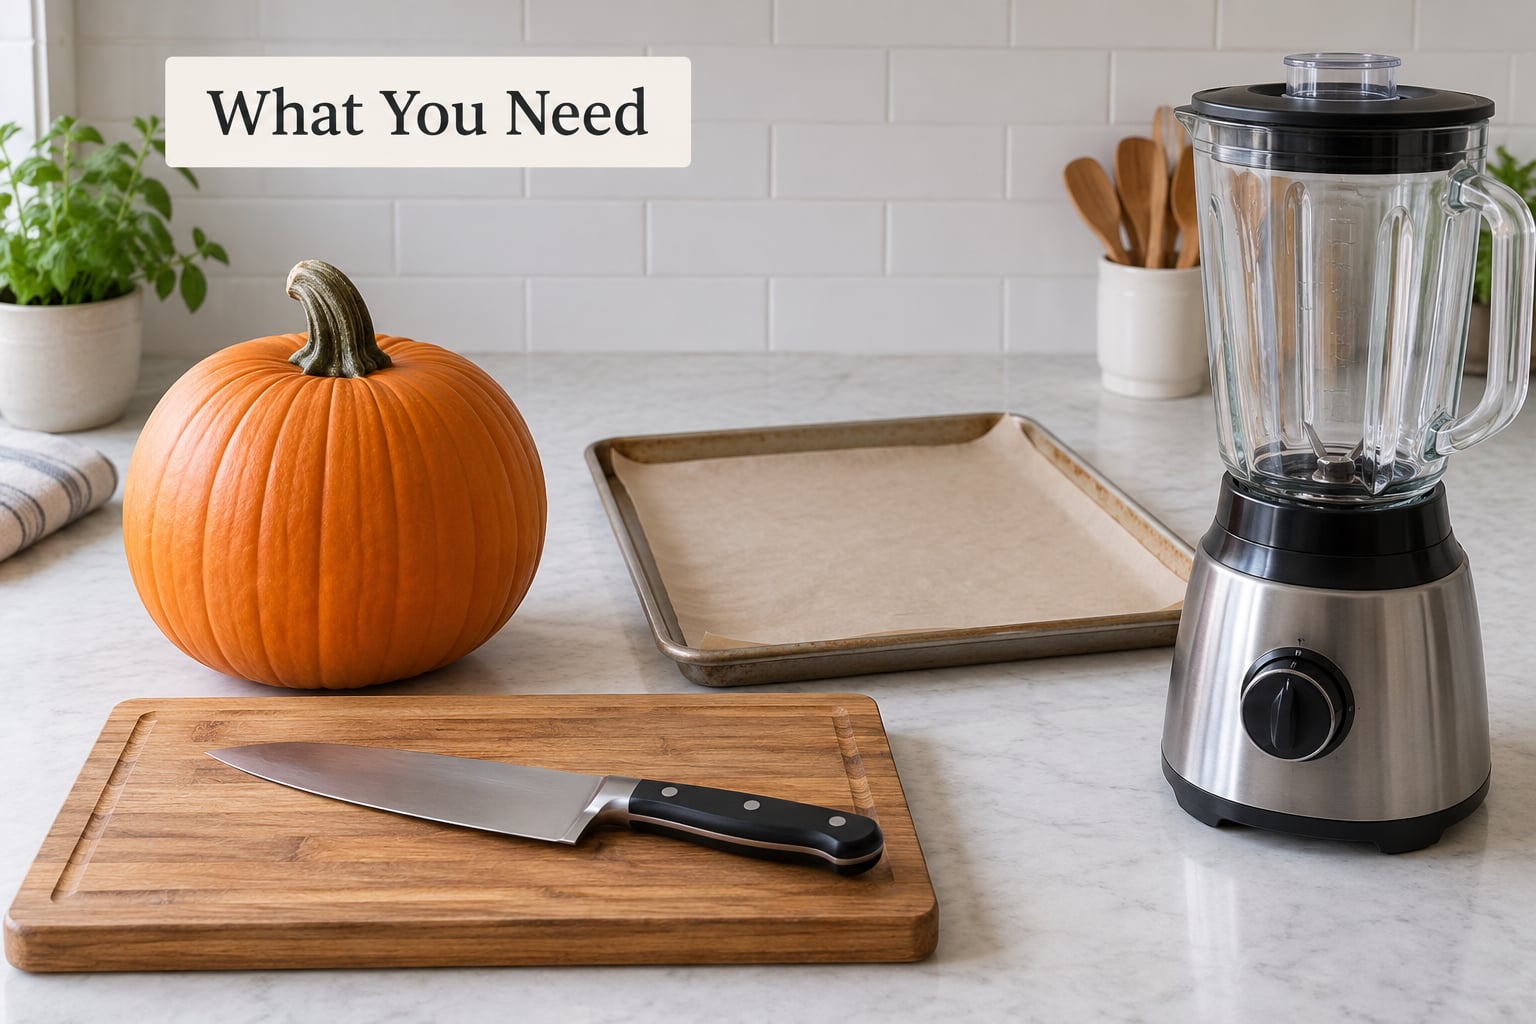
Almost nothing special. A sheet pan and a blender are the only pieces that matter.
- The pumpkin: one 3 to 5 lb sugar pumpkin or pie pumpkin. Look for a hard shell, a stem that feels solid, and no soft spots or dark patches.
- Cutting gear: a sturdy chef’s knife, a large cutting board, and a towel underneath the board so it does not slide. Pumpkin is dense and slippery, and it is the most common place to nick a finger.
- Pan and lining: a rimmed baking sheet plus parchment paper or a silicone mat. Cut pieces release their liquid as they roast, and a bare pan makes that cleanup stubborn.
- Scooping tool: a sturdy spoon or an ice cream scoop. Both handle seeds and stringy pulp better than a paring knife.
- Blending gear: a food processor gives the most control. A blender works in batches, an immersion blender works in the pot or right in the baking dish, and a potato masher or a ricer is a decent no-machine fallback.
- Extras: oven mitts, a spatula, and a fine-mesh sieve or a piece of clean cheesecloth for straining.
Optionally, a tablespoon of oil and a pinch of salt. They are not traditional and the puree does not need them, but a little oil helps the edges caramelize and salt sharpens the sweetness after roasting.
Step-by-Step: How to Make Pumpkin Puree from a Fresh Pumpkin
1. Choose and Prepare the Fresh Pumpkin
Wash the whole pumpkin under cool water and scrub the shell, since you will be cutting through it. Set the pumpkin on the flat side of the cutting board or cut a small lid off the top first, then work your knife in at a slight angle and press down with controlled force rather than sawing sideways.
Cut it in half, scoop out the seeds and the stringy pulp with your spoon or scoop, and scrape the inside walls clean. Those strings are the source of fibrous bits later, so it pays to be thorough. Do not try to peel the flesh at this stage; that is the most common wasted step.
Then cut each half into wedges, two or three inches thick at the center, and remove the seeds from the wedges themselves. Even thickness is what makes the pieces finish cooking at the same time.
2. Roast the Pumpkin Until Fork-Tender
Heat the oven to 400°F. A hotter oven at 425°F works too and gets you there a little faster, but going above that dries the outside before the middle gives up its water. Arrange the wedges cut-side down on the lined sheet, drizzle lightly with oil, and season if you like.
Roast until the flesh gives completely. Expect roughly 25 to 45 minutes depending on how thick you cut and how heavy the pumpkin is. The only test that matters is the fork: push it into the thickest part near the skin and it should slide through with no resistance at all.
If you can see the flesh wrinkling and pulling away from the skin at the edges, it is done. If the fork meets any resistance, give it another five minutes. Pulling it early is the number one cause of grainy puree.
3. Blend the Roasted Pumpkin Smooth
Let the pan cool for about ten minutes, then scrape the soft flesh out with a spoon and discard the skin. The skin peels away cleanly now; if it resists, the piece was undercooked. You should have 2 to 3 cups of cooked flesh for a 3 to 5 lb pumpkin.
Put the flesh in the food processor and pulse first, then run it continuously until there are no visible lumps. Scrape down the sides a couple of times. With a blender, work in small batches and never more than half full, or the hot puree will push the lid off.
If the puree is too thick to move in the machine, add liquid a tablespoon at a time. Water is fine, but the liquid that collected in the roasting pan has more flavor. Broth works for savory dishes; keep it plain for pie.
4. Season and Check the Texture
Taste it. Fresh puree should be sweet on its own, and if it tastes flat, that usually means underroasting rather than a missing ingredient. Add a pinch of salt and taste again before reaching for anything else.
Cinnamon, nutmeg, ginger, cloves, or a small splash of maple syrup are for the plate, not the jar. Most recipes stir spices into the filling at the pie stage so the seasoning can be adjusted later.
The finished texture should be the consistency of thick yogurt, glossy and spoonable. Too thin? Strain it through a fine-mesh sieve or cheesecloth, or simmer it in a saucepan for 10 to 15 minutes to drive off water. Too thick? Loosen it with a little warm liquid, never with cold water, which dulls the flavor.
5. Use or Store the Pumpkin Puree
Cool the puree before it goes anywhere near a container, and get it refrigerated within two hours. In an airtight container it keeps in the refrigerator 3 to 4 days. For longer storage, freeze it in portions sized to what you actually cook with, since a frozen block is hard to break up.
Leave an inch of headspace in any jar or rigid container. Puree expands as it freezes, and a glass jar filled to the brim can crack or shatter in the freezer. Flat freezer bags or a silicone tray that freezes in a thin layer work well and let you break off exactly what you need.
Frozen puree keeps 3 to 6 months in good condition. Thaw it in the refrigerator overnight, or drop the frozen portion into a saucepan over low heat and stir until it loosens. For pies, gently warm it and use it straight from the pan so it does not go watery again.
Homemade puree is not something to home can. Pumpkin is a low-acid vegetable and a puree is exactly the kind of product the low-acid canning rules were written to keep out of a water-bath canner. Freeze it instead.
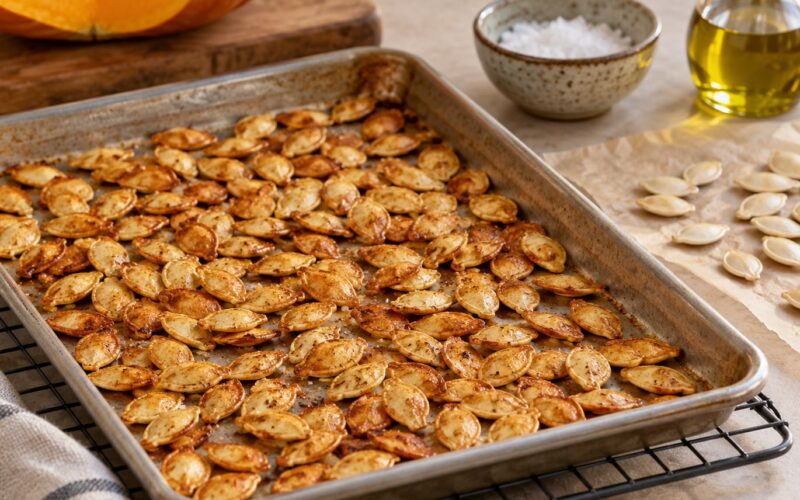
Once the puree is done, the seeds and the fibrous pulp are worth keeping too. Rinse the seeds, toss them with oil and salt, and roast them at 350°F for about 15 minutes until they pop. The inner pulp is edible; a small spoonful stirred into soup or chili adds body that most people never think to try.
Roast, Boil or Steam: Which Method Should You Use?
Roasting wins for pie and baking because it concentrates flavor without adding water. Boiling is faster but leaches sweetness into the pot, and the resulting puree is thinner and paler.
| Method | Time | Water added | Result | Best for |
|---|---|---|---|---|
| Roast at 400°F | 35-45 min | None | Dense, sweet, caramelized | Pie, muffins, bread |
| Boil | 20-25 min | Yes, plenty | Thin, milder, paler | Soup, chili, quick puree |
| Steam | 15-20 min | Condensation only | Soft, watery on blending | Not recommended |
| Microwave | About 7 min per pound | None | Uneven, needs turning | Small batches |
| Pressure cooker | 15 min high, 5 min release | About 1 cup | Soft, smooth, fast | Weeknight baking |
If you boil, cut the flesh into even chunks, simmer it in just enough water to cover for 20 to 25 minutes, then drain well before blending. You can expect to lose some sweetness down the drain, which is why nearly every pie recipe that starts with fresh pumpkin roasts first.
The pressure cooker is the compromise most people end up liking. Fifteen minutes at high pressure with about a cup of water, then a five-minute natural release, gives you soft flesh in a fraction of the oven time. Blend it right in the pot with an immersion blender and the texture is very close to the roasted version.
Common Mistakes
Cutting into yourself. Almost everyone slices toward their body while working around the curve of the rind. Halve the pumpkin first, then cut the flat halves into wedges. It is slower and safer.
Peeling before roasting. Raw pumpkin skin is nearly impossible to peel cleanly, and you will lose flesh to the peeler. Roast it on, then scrape the skin off after it softens.
Underroasting. Firm flesh that still fights the fork blends into a coarse, grainy puree that no amount of processing will fix. Give it the extra five minutes.
Leaving the stringy pulp behind. The strands clinging to the inside walls are the reason home-made puree can come out fibrous. Scrape them out with a spoon rather than assuming the scoop got them all.
Blending too thin. That usually traces back to a carving pumpkin, which is bred for water and has thinner flesh and more fiber than a pie pumpkin. It also points to liquid added too fast during blending. Add it by the tablespoon and stop when it moves.
Storing it wrong. A jar filled to the top, a puree still warm when sealed, or a week in the fridge when three days is safer will all cost you. Cool it first, leave headspace, and refrigerate within two hours.
Two habits make the whole job easier. Roast extra wedges than you think you need, since roast leftovers freeze well and a spare portion covers an unplanned pie. And treat the decorative pumpkins as food: pumpkins bought for a porch that never got carved are the most common reason people make a big batch.
Frequently Asked Questions
Do I have to roast a fresh pumpkin before making puree?
No, but you have to cook it somehow. Roasting at 400u0026deg;F is the method worth using because it concentrates the pumpkin’s natural sugars and gives the puree a deeper, caramel-like flavor. Boiling and pressure cooking are faster, though boiling dilutes the sweetness and leaves a thinner puree.
Can I make pumpkin puree without peeling the skin?
Yes, and you should. Raw pumpkin skin is too dense to peel cleanly, so scraping it off before roasting just wastes flesh. Roast the wedges with the skin on, let them cool, then scrape the soft flesh off with a spoon. If a piece resists, it needs another few minutes in the oven.
What is the best type of fresh pumpkin for puree?
A sugar pumpkin or pie pumpkin, roughly 3 to 5 pounds. They have dense, sweet flesh that blends smooth and bakes well. Cinderella and other heirloom pumpkins are close cousins and work beautifully. Large jack-o-lantern carving pumpkins are watery and stringy, so they make thin puree that is better suited to bread or soup.
How long does homemade pumpkin puree last in the refrigerator?
Keep it 3 to 4 days in an airtight container, refrigerated within two hours of finishing. Cool the puree to room temperature first, because sealing a warm container creates condensation. Discard it if it smells fermented, shows any mold, or has a fizzy, oily surface when you open the lid.
Can I freeze pumpkin puree made from a fresh pumpkin?
Yes, and freezing is the safest way to keep it. Use it within 3 to 6 months for the best texture. Leave an inch of headspace in rigid containers because puree expands as it freezes, and glass jars filled to the brim can crack in the freezer. Thaw overnight in the refrigerator or warm gently in a saucepan.
Why is my pumpkin puree watery or stringy?
Watery puree usually means a carving pumpkin, under-roasted flesh, or too much liquid added while blending. Strain it through a fine-mesh sieve or cheesecloth, or simmer it for 10 to 15 minutes to reduce. Stringy bits come from leaving the inner pulp and seed strands on the walls, so scrape those out thoroughly before roasting.
Start with the pumpkin itself. A 3 to 5 pound sugar pumpkin with a hard shell and no soft spots, cut into even wedges and roasted cut-side down at 400°F for 35 to 45 minutes, gives you the best puree you will make from scratch. Everything after that is blending and storage, and both are quick once the oven door closes.