Making kombucha at home is mostly waiting. You sweeten strong black tea, cool it, add a starter of live bacteria and yeast, then let the jar sit at room temperature for roughly 7 to 14 days before it goes in the fridge. That’s the whole method: a clean glass jar, sugar, tea, and either a SCOBY or a bottle of plain store-bought kombucha is enough for a first batch.
This guide to how to make kombucha for beginners walks through a one-quart test batch and a full gallon, then shows how to do the optional second fermentation that gives you fizz. It also covers the two questions that worry almost every new brewer: whether the thing floating in the jar is mold, and whether the batch smells strange.
One safety note up front. Yeast turns sugar into alcohol first, and the alcohol content of an unfinished batch typically peaks somewhere around day six of the first fermentation before the bacteria convert it into acid. Treat the jar as an alcohol-containing liquid until it is thoroughly refrigerated and tart, keep it away from children and pets, and ask a doctor before drinking it if you are pregnant, immunocompromised, or on medication that interacts with alcohol.
Table of Contents
- What You Need
- How to Make Kombucha for Beginners
- Step 1: Make the Sweet Tea
- Step 2: Add the Kombucha Starter
- Step 3: Ferment Until It Tastes Right
- Step 4: Taste and Continue Fermenting
- Step 5: Refrigerate and Flavor
- Step 6: Know When to Discard It
- Common Mistakes
- Frequently Asked Questions
- Do I need a kombucha starter to make kombucha at home?
- How long should kombucha ferment at room temperature?
- Why is my kombucha fizzy, and is that normal?
- What is the white film or sediment at the bottom of my kombucha?
- Can I add fruit or herbs to homemade kombucha?
- How should I tell good kombucha from spoiled or contaminated kombucha?
What You Need
Kombucha is one of the cheapest ferments to start because the equipment list is short. None of it is specialty gear, and most kitchens already own three or four of these items.
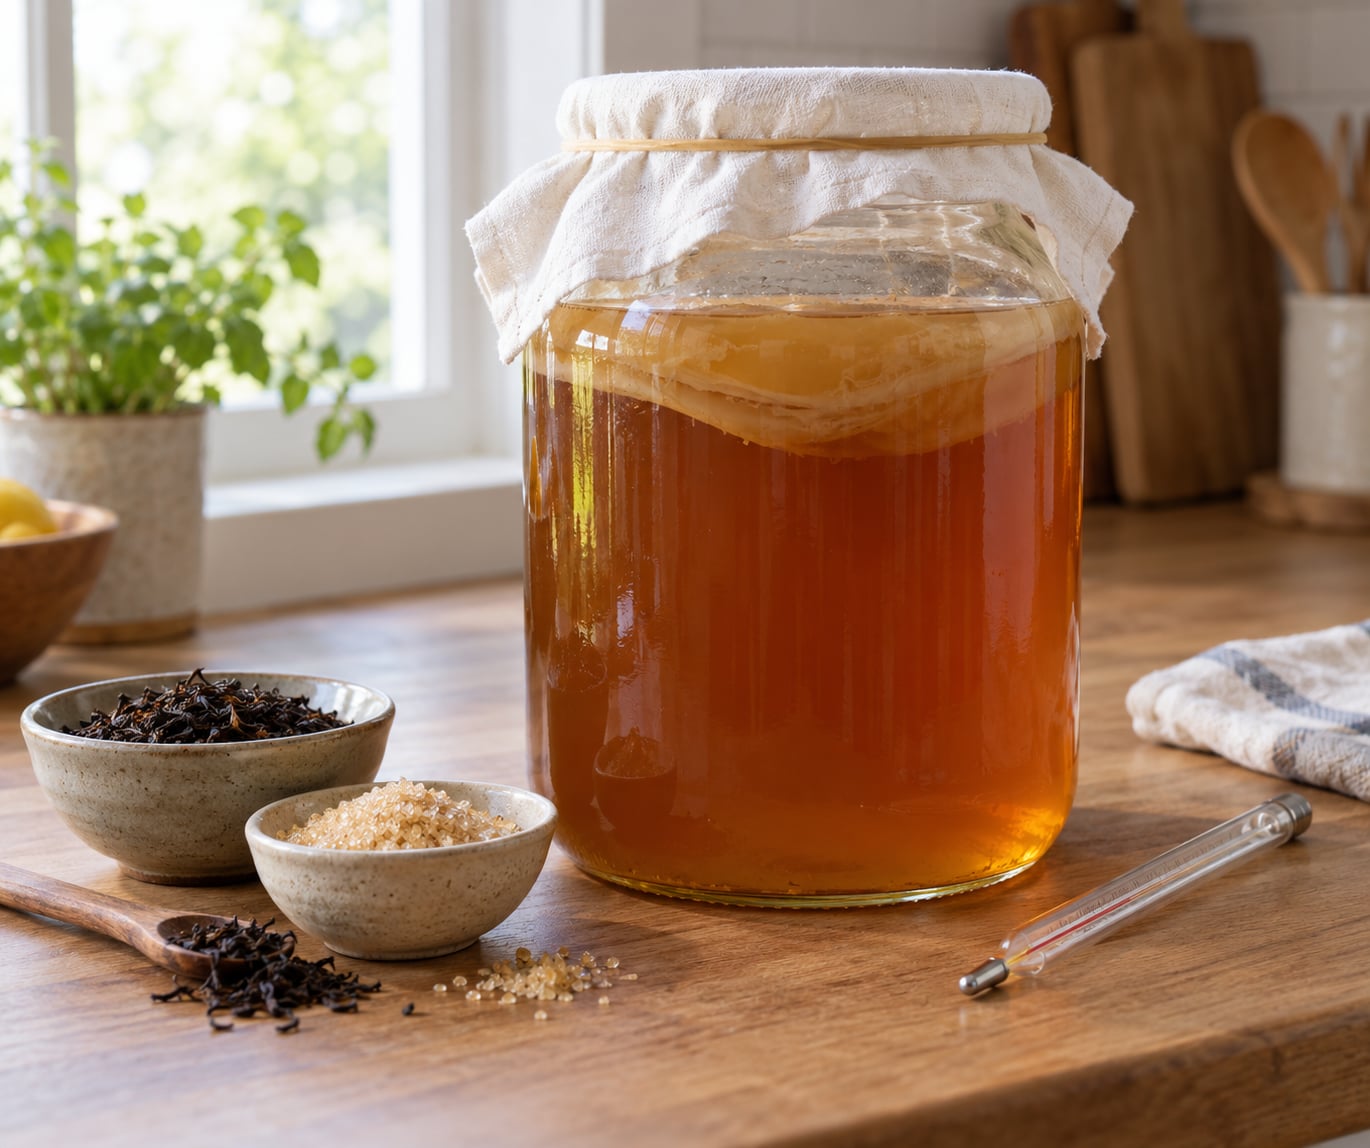
- A wide-mouth glass jar with no shoulder, one gallon for a full batch or a half-gallon for a test batch
- A lid or a piece of breathable cloth plus a rubber band to cover it
- A kettle or pot, plus a thermometer so you can judge the temperature of the tea
- A fine mesh strainer, a paper towel, or a bag-free teaball, for removing every last tea leaf
- Loose leaf black tea or plain black tea bags, unflavored
- Granulated cane sugar
- Filtered water, since chlorine in tap water can upset the culture
- A bottle of plain unsweetened kombucha from the store, or a SCOBY with a cup of starter liquid
- Optional: pH strips and plastic bottles with pressure ratings for the second fermentation
The amounts below cover both a small batch and a full one. Sugar and tea scale down cleanly, so the test batch is a real recipe and not a leftover scrap.
| Ingredient | One-quart test batch | One-gallon batch |
|---|---|---|
| Black tea | 2 bags or 1 tablespoon loose leaf | 8 to 10 bags or 2 tablespoons loose leaf |
| Cane sugar | 1/4 cup (about 50 g) | 1 cup (about 200 g) |
| Filtered water for the tea | 3 1/2 cups | 3 1/2 quarts (14 cups) |
| Plain store-bought kombucha as starter | 1/2 cup | 2 cups |
| Headspace at the top of the jar | 2 inches | 2 to 3 inches |
Skip herbal and flavored teas on a first batch. Mint and fruit blends carry oils that change the acidity balance, and the black tea tannins are what give kombucha its body once the culture starts working on them.
How to Make Kombucha for Beginners
The first fermentation, usually called F1, is a simple sequence. Tasting decides when it is finished, not the calendar.
Step 1: Make the Sweet Tea
Brew a concentrate rather than your whole batch of water at once. Bring about one cup of water to a boil for the test batch, two cups for the gallon. Add the tea, turn off the heat, and steep for roughly ten minutes, then pull every leaf out. Loose leaf left in the brew has caused plenty of mold problems, so strain through paper or a cloth if you are not sure.
In a second pot, bring the remaining water to a boil and stir in the sugar until it dissolves completely. Pour that hot water over the tea concentrate to bring your total volume to 3 1/2 cups or 3 1/2 quarts. A grainy bottom means undissolved sugar, and that will not dissolve later in the jar.
Step 2: Add the Kombucha Starter
Let the tea cool below 90 F. Above that, you are cooking the bacteria and yeast you just paid for, and a weaker starter means a batch more likely to be invaded by mold. An instant-read thermometer takes the guessing out of it.
Pour a cup of room temperature water into the empty jar first. This small trick keeps hot tea from thermal-shocking the glass, which is how jars crack. Add the tea, wait until it is comfortably below 85 F, then add the starter. Experienced brewers on r/Kombucha use roughly one part store-bought kombucha to three or four parts sweet tea, and most of them start with the fuller two cups per gallon as cheap insurance against a weak culture.
Stir once with a clean utensil, then cover the jar with a cloth and a rubber band. Breathable covers keep dust and fruit flies out while letting the carbon dioxide escape. Leave 2 to 3 inches of headspace because the culture produces gas as it works.
Step 3: Ferment Until It Tastes Right
Find a spot that stays between roughly 68 F and 85 F. That range is where both the yeast and the acetic acid bacteria work at a useful pace. A kitchen below about 65 F can stall for weeks, and a cupboard above 85 F is where mold trouble usually starts.
Most test batches taste like sweet tea for the first three or four days and then start turning. That shift from flat to faintly tart is the culture doing its job. Put the jar on a calendar and start tasting on day five rather than guessing.
Step 4: Taste and Continue Fermenting
Taste with a clean straw or a freshly washed spoon each time. You are looking for mild sweetness with a clear tartness, not a sharp vinegar bite. If a pH strip is handy, most brewers finish somewhere between 2.5 and 3.5 after starting near 4.5, but strips are a helpful second opinion, not the deciding vote.
Two things will surprise you and neither one is a problem. A brown layer of yeast sediment collects at the bottom during normal brewing. A translucent, rubbery pellicle often forms somewhere between day three and day seven, and beginners frequently post panicked photos because it floats, sinks, or lies flat on its side one day and is nowhere to be seen the next. The pellicle is a byproduct of the bacteria, not the culture itself. The living culture is in the liquid, which is exactly why many brewers toss the mat and reserve a cup of finished F1 as starter for the next batch.
Step 5: Refrigerate and Flavor
Once it tastes right, chill the jar for at least two hours. That slows the culture sharply, and the flavor stops moving. A batch kept cold in a wide-mouth jar usually drinks well for a few weeks, though it will keep drifting more tart the whole time.
For carbonation, do the second fermentation, or F2. Reserve some finished F1, bottle it with 1 to 2 teaspoons of sugar per 16-ounce bottle, leave 2 inches of headspace, and cap it loosely for the first day. Burp the bottles daily by loosening the cap and letting the pressure hiss out. Once the bottles are as fizzy as you want, which takes roughly two to three days at room temperature, move them into the fridge.
Flavoring belongs in this stage, never in F1. A splash of pure fruit juice, a few slices of fresh ginger, or a small handful of herbs goes into the bottle or a covered jar after the culture is finished. Fruit juice added to the first fermentation feeds whatever wild yeast and bacteria are in it, which is how people accidentally ruin a good batch and take the culture down with it.
Use bottles rated for pressure when you can, and never cap a plastic bottle tightly on day one. Under-carbonated drinks in ordinary glass bottles have a way of splitting a shelf.
Step 6: Know When to Discard It
Here is the rule that settles most arguments: fuzzy is mold. Dry, fuzzy patches in blue, green, black, or pink mean the batch goes down the drain, no tasting first.
Normal growth looks different. A wet pellicle is slick and translucent or tan, a plain film that looks like a skin on tea, and sediment that is brown and yeasty. When in doubt, smell it. A healthy batch smells mildly vinegary and fruity. A batch that smells like nail polish remover or chemicals has a yeast imbalance and is not worth drinking.
Never taste kombucha you are unsure about. Discard it, then wash the jar with hot soapy water and a splash of white vinegar before you start again.
Common Mistakes
Nearly every failed first batch traces back to one of a handful of avoidable habits.
- Adding starter to tea that is too hot. Anything over about 90 F weakens or kills the culture. Cool first, measure with a thermometer.
- Using too little starter. Too little starter means the pH does not drop fast enough to protect the batch. One part starter to three or four parts sweet tea is a solid starting ratio.
- Adding fruit juice during the first fermentation. Sugar and fruit feed contaminants and can contaminate the culture itself.
- Leaving loose tea leaves in the jar. Buried leaves are the most common home of visible mold in a brew.
- Fermenting somewhere too warm. Above 85 F, mold risk climbs sharply. Find a cabinet, closet, or corner that stays steady and out of direct sun.
- Tasting with a grimy spoon. Your spoon carries enough bacteria to sour a whole jar. Rinse and dry between every taste.
- Waiting too long before refrigerating. Left on the counter past the tartness you like, the batch keeps going to vinegar. Trust your mouth, not a date on the calendar.
- Treating fizz as proof of safety. Carbonation just means yeast made gas. It says nothing about alcohol, mold, or contamination.
- Sealing bottles tightly for the second fermentation. Trapped gas builds pressure, and ordinary jars and plastic bottles can burst.
The table below covers the failures people actually hit, mapped to a cause and a fix.
| Symptom | Likely cause | Fix |
|---|---|---|
| Tastes like vinegar | F1 ran long or the starter was too small | Refrigerate now, reserve a cup of the liquid as starter, and taste daily next time |
| No fizz after bottling | Under-primed, bottled too cold, or the batch had already lost its yeast | Add 1 to 2 teaspoons of sugar per bottle, hold at room temperature, burp daily |
| Nothing happened for weeks | Room is below about 65 F | Move the jar somewhere warmer, or wrap it in a clean towel away from direct sun |
| Pellicle is stringy or very thin | Young culture, or the mat got disturbed while moving the jar | Perfectly normal early on. Give the liquid, not the mat, to the next batch |
| No pellicle at all | The culture lives in the liquid, so a batch can ferment fine without ever forming one | Do not worry. Judge doneness by taste |
| Cloudy brew | Yeast suspended after stirring or moving | Settle for a few hours in the fridge and pour carefully |
| Fuzzy colored patches | Mold | Discard the entire batch and sanitize the jar |
Cold kitchens deserve their own note because they are the quietest failure. Fermentation slows down so much in a room under 65 F that beginners assume nothing is happening, then panic when the batch eventually comes alive. Put the jar somewhere with a little warmth, near but not touching a radiator or oven wall, and give it more days than the recipe suggests.
One habit fixes a surprising number of beginner problems. Reserve 1 to 2 cups of every finished batch as starter for the next one. That habit turns you into a continuous brewer, and it means a bad jar never costs you the culture.
Frequently Asked Questions
Do I need a kombucha starter to make kombucha at home?
You need live bacteria and yeast, but you do not need to buy a SCOBY. Two cups of plain, unsweetened store-bought kombucha per gallon will carry a working culture into your sweet tea. Avoid kombucha that is heavily flavored or blended, and check the label for live cultures. Many experienced brewers throw away the pellicle and keep only the liquid, because the liquid is where the culture actually lives.
How long should kombucha ferment at room temperature?
Most first batches run 7 to 14 days at about 68 F to 85 F. Taste every day starting on day five and stop when the sweetness has turned into a clean, pleasant tartness. Temperature changes the clock: a hot kitchen finishes in under a week, a cool room can take three weeks or more. When in doubt, keep tasting rather than following a calendar.
Why is my kombucha fizzy, and is that normal?
Fizz comes from yeast converting sugar into carbon dioxide, and it means the fermentation is working. A few bubbles in the jar during the first fermentation are normal, and a sealed second fermentation gives you the real fizz. Carbonation says nothing about safety, though. A fizzy batch can still contain alcohol and, if contaminated, mold.
What is the white film or sediment at the bottom of my kombucha?
Both are usually normal. The brown sediment is yeast that has settled out, and a translucent tan or white pellicle is a cellulose mat the bacteria produce as a byproduct of fermentation. A pellicle can float, sink, or lie on its side, and it may disappear from view without the culture being harmed. Fuzzy, dry patches in any color are different, and mean mold.
Can I add fruit or herbs to homemade kombucha?
Yes, but only after the first fermentation is finished and the batch is tart. Add pure fruit juice, fresh ginger, or herbs during the second fermentation or after refrigerating, using a covered jar so nothing gets in from the air. Fruit and juice in the first fermentation feed stray yeast and bacteria and can spoil the whole batch and the culture with it.
How should I tell good kombucha from spoiled or contaminated kombucha?
Good kombucha smells fruity and mildly vinegary, and it tastes sweet and tart in balance. Dry fuzzy patches in blue, green, black, or pink are mold, and a sharp chemical or nail polish remover smell signals a yeast imbalance. Never taste a batch you are unsure about. Throw it out, then clean the jar with hot soapy water and white vinegar before starting over.
Start with the one-quart batch on your counter and get the timing right before you scale up. Sweet tea cooled below 90 F, two cups of plain store-bought kombucha per gallon, a cloth cover, and a daily taste starting on day five will get you a drinkable jar of homemade kombucha, and once you keep a cup of every batch as starter you can brew without ever buying a SCOBY again.