How to dry herbs from the garden comes down to one habit: strip the moisture out slowly, in moving air, out of sunlight. Hang small bundles upside down in a cool, dark, well-ventilated room and most herbs crisp within three to seven days. A dehydrator or a low oven cuts that to under a day, and the whole job takes maybe ten minutes of actual work plus waiting.
I dry a ridiculous amount of basil, sage, and mint every August, mostly because I refuse to let a bed go to seed without getting it in the pantry. The method that wins every time is the boring one, and the mistakes that ruin batches are always the same handful.
Table of Contents
- What You Need
- Step-by-Step: How to Dry Herbs from the Garden
- Harvest and Prepare the Herbs
- Air-Dry Herbs in a Bundle or on a Screen
- Use a Dehydrator for Uniform Results
- Dry Herbs in the Oven
- Microwave Herbs in Short Bursts
- Check Doneness and Store the Dried Herbs
- Common Mistakes and How to Fix Them
- Frequently Asked Questions
- Which herbs are easiest to dry from a garden?
- How long does it take to air-dry fresh herbs?
- Can I dry herbs in the oven without losing their flavor?
- How do I know when garden herbs are completely dry?
- Should I wash herbs before drying them?
- How should dried herbs be stored to stay fresh?
- Conclusion: Label and Store Your Dried Herbs
What You Need
You do not need much for the air-drying method, and you can improvise most of it. What you cannot skip is airflow and darkness.
For air-drying:
- Small bunches of stems, tied with twine, cotton string, or even a strip of clean muslin
- A hook, a nail, a cabinet knob, or a drying rack frame
- A paper lunch bag or a brown paper bag per bundle, slipped over the top to keep dust off
- A closet, pantry, garage, or spare room that is dark, dry, and gets some moving air
For screen-drying wet or leafy herbs:
- A mesh drying rack, a cooling rack, an old window screen, or a baking sheet with a wire rack on top
- Enough trays to keep everything in a single layer without touching
For dehydrator drying:
- A food dehydrator with an adjustable thermostat that reaches 95F to 115F
- Parchment or plain trays, no rubber or plastic liners
For oven drying:
- An oven that holds a very low temperature, ideally with a pilot light you can leave on
- Baking sheets, a wooden spoon to wedge the door ajar, and parchment or silicone
For storage, once everything is dry:
- Glass Mason jars with tight lids, or airtight plastic tubs for bulky things like rosemary
- Small labels or masking tape and a pen, plus a date stamp if you can manage it
Step-by-Step: How to Dry Herbs from the Garden
Four methods work well, and the right one depends on how wet the herb is and what equipment you have. The table below is the short version; the sections after it walk through each one.
| Method | Typical time | Best for | Color retention |
|---|---|---|---|
| Hanging bundles | 3 to 7 days, sometimes 2 weeks for woody stems | Rosemary, thyme, oregano, sage, marjoram | Good |
| Screen or flat drying | 3 to 7 days | Mint, lemon balm, hyssop, stevia, parsley, cilantro | Good to fair |
| Food dehydrator | 4 to 24 hours | Anything, and large batches at once | Best |
| Oven on low | 2 to 4 hours | Small batches when you need them the same day | Fair |
| Microwave | Under 3 minutes total | Emergency small batches only | Fair, and uneven |
Harvest and Prepare the Herbs
Cut in the morning, after the dew has burned off but before the sun is high. Mid-morning is the sweet spot because the stems still hold some moisture but the leaves are no longer wet with dew, and cutting then keeps the most aromatic oils in the plant.
Rinse the herbs in a sink or a bowl of cool water and dry them properly. Rinse quickly, shake or spin the bunch in a salad spinner, then blot the leaves dry with a towel. Leftover surface water is the number one cause of mold, and a washed bunch that still holds water can go black in a day.
Drop anything bruised, yellowed, spotted, or soiled before you start. Insects hide deep in basil and cilantro, and a tray makes them easy to spot, so it is worth picking through your harvest twice.
Strip the lower leaves from each stem. They sit inside the bundle, they trap moisture, and they rot first, which is exactly the blackened base you have probably seen in someone else’s dried bunch.
For woody herbs like rosemary, thyme, and sage, pull the leaves off the stems entirely. Stems take days longer than leaves, and a bare rosemary stem makes a decent skewer or grill scenting stick all on its own. Mint, lemon balm, hyssop, and stevia hold moisture in a dense mat, so those go on a screen rather than in a bundle.
Air-Dry Herbs in a Bundle or on a Screen
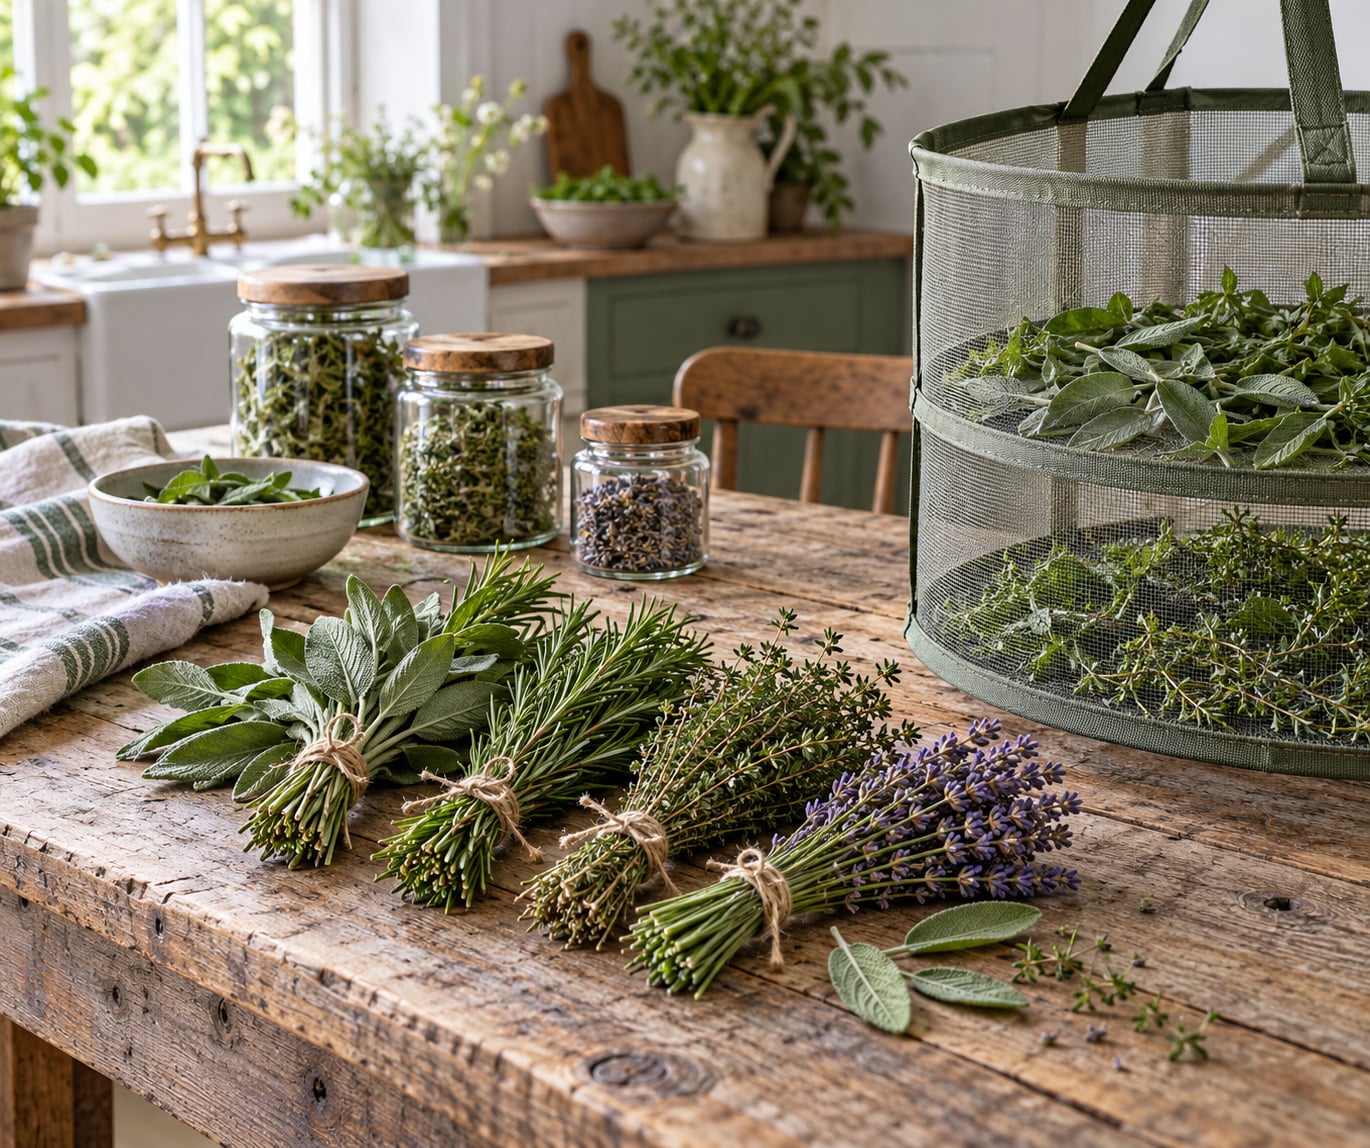
This is the best way to dry herbs from the garden if you have a dry room, a hook, and a week of patience. The core principle is a cool, dark, well-ventilated space. Sunlight fades green herbs to brown, and still, warm air moves water out slowly enough that mold never gets a foothold.
Make your bundles small, about a dozen stems, and thin enough that you can see light between the leaves. Big bunches are the most common failure, because the center of a fat bunch stays damp long after the outside looks ready. Tie them loosely with twine and hang them upside down, with enough space between bunches that air moves through them.
Slip a paper lunch bag over the top of each hanging bundle, with the bottom open. It keeps dust and kitchen splatter off while leaving the stems end free to breathe. Paper bags in a humid room slow things down badly, so use them in a dry house, and skip them entirely if you are somewhere damp.
Why hang them upside down at all? Gravity pulls whatever moisture is left in the stems toward the cut end, and that end is the part sticking out into the air. A bundle sitting upright in a jar traps that water in the middle of the mass.
Screen-drying handles the herbs bundles handle badly. Lay the leaves in a single layer on a mesh rack, mesh screen, or cooling rack with air moving on all sides, and turn the leaves once a day. Anything that is wet and dense, mint, lemon balm, hyssop, stevia, and thick parsley, belongs on a screen. Do not pile it two or three leaves deep; the bottom layer will never dry.
Expect three to seven days in a dry house and closer to two weeks for thick stems in a damp one. In the Southeast and along the Appalachians, especially in late summer, bundles that are not dry in four days have probably started to mold, and no amount of waiting will rescue them. Switch to a screen, a fan pointed at the rack, or the oven, and take the loss on the batch that went black.
Use a Dehydrator for Uniform Results
A dehydrator is the fastest and most consistent method, and the only one that reliably keeps herbs bright green. The trick is running it cool. Set it between 95F and 115F, which is warm enough to move water out of the leaf and slow enough that the volatile oils that give an herb its smell do not cook off.
Leafy herbs like basil, mint, and parsley finish in about four to six hours. Thyme, rosemary, and sage take eight to twelve. Dense or thick herbs can run up to 24 hours, and flowers take longer than leaves at the same setting.
Spread everything in a single layer with the leaves not touching, set trays on top of one another for the last few hours so the warm air can still move through, and rotate the trays once. Check at four hours, not at thirty minutes, and stop before things go brittle and shatter instead of bending.
If the edges start to look scorched or the leaves curl into dark chips, your unit runs hot. Drop the setting a notch, or finish the last hour in the open air rather than cooking what is left of the aroma out of it.
Dry Herbs in the Oven
Oven drying works, but only at the very bottom of the heat range. Set the oven to its lowest setting, 115F, and if the oven will not go that low, preheat to 400F, then turn it down to 250F and leave the door wedged open with a wooden spoon. That gap is the whole method, since it turns the oven into a slow warm chamber rather than a cooking box.
An oven with a pilot light works too. Turn the burner to the lowest setting, light the pilot, and let the pilot hold the temperature on its own. That is closer to how herbs were dried before electric dehydrators existed, and people still swear by it for rosemary and sage.
Line a baking sheet with parchment or a silicone mat, spread the leaves in one thin layer, and set the sheet in the center of the oven. Expect two to four hours, checking every 30 minutes and stirring the leaves. Herbs turn from green to olive to brown in a hurry once heat gets involved, and that color shift is your cue that the flavor is leaving with it.
The 170F and 400F temperatures you find online are a bad idea. Anything above about 115F pushes out the aromatic compounds you dried the herb to keep, and the finished jar tastes flat compared with a batch that dried in air. If your oven will not hold a low temperature, use the dehydrator or air-dry instead.
Microwave Herbs in Short Bursts
The microwave is a last resort for the tiniest batch, and it is the only method where the cooking happens from the inside out, so you get hot spots and cold damp patches in the same tray. Thirty seconds on high can cook a leaf while its neighbor is still wet.
Lay herbs in a single layer on a paper towel or a sheet of parchment, and cover it loosely so tiny pieces do not fly around. Heat in bursts of 20 to 30 seconds, then let the tray sit for a full minute. The resting time lets heat move into the leaves and keeps the drying even, and you repeat until the leaves crumble when you roll them between your fingers.
Finish in the open air for 15 minutes after the last burst. Residual steam keeps moving out of the leaf during that time, and herbs that feel dry straight out of the microwave are often still damp in the middle. The flavor is never quite as good as air-drying, so I use this when I need thyme in a stew tonight, not when I am filling the pantry.
Check Doneness and Store the Dried Herbs
How do you know when herbs are fully dry? Use your fingers, not the clock. Roll a single leaf between your thumb and forefinger, or try to crush it. If it crumbles into powder or flakes, it is done. If it bends, feels leathery, or your fingers pick up any cool or damp feeling, it needs more time, and packing it now is how you get a jar of green dust and a musty smell three weeks later.
Cool everything completely before it goes into a jar. Warm herbs trapped in a sealed container steam themselves, and that condensation brings the mold right back.
Store in airtight glass jars in a cool, dark cupboard away from the stove. Most leaf herbs keep good flavor for about six months to a year, and sturdy ones like rosemary, thyme, oregano, and sage hold their punch longer than tender herbs like basil, cilantro, and dill. Crushing the leaves right before you use them releases more aroma than a whole-leaf jar that has sat for months.
Label every jar with the herb, the garden, and the harvest date. This is the step people skip and then regret, because unlabeled jars turn into mystery gray flakes in a year. When you cook with dried herbs, start with about a third of the amount of fresh you would have used, then taste and add more.
Common Mistakes and How to Fix Them
Mold inside a bundle or on a screen is the failure everybody hits, and it always traces back to moisture and still air. A batch that feels slightly damp in the center, packed in a bag, or stacked in a corner with no movement is asking for it. Increase airflow first, spread things out, and if a batch is already showing fuzzy spots or a sour smell, throw it out rather than hoping heat kills it.
Black or completely brown leaves mean the leaves were wet when they went in, or the room was too warm and dark with no moving air. Wash herbs, dry them thoroughly before drying, and hang bunches where air passes through them. If a room is genuinely damp, air-drying may not work there at all, and no amount of technique will change that. Use a fan, a dehydrator, or the low oven.
Herbs that stay soft and bendy are the result of pulling them too early, which is the most common doubt in the whole process. Wait for the crumble test every time, and remember that thick stems and dense herbs take a week or two longer than thin leaves. Forgetting to test until day ten is why people throw good herbs out early.
Overcrowding slows everything and traps moisture. One layer, always, with space around and between the pieces. A single crowded tray in the middle of a dehydrator dries at roughly half the rate of two thin trays.
Unlabeled and undated jars are the quiet loss. Two minutes writing the label when the herbs are still warm and fragrant is all it takes, and it is the difference between a spice shelf you use and a spice shelf you clean out.
If you have no drying space at all, the workaround people in r/gardening describe most often is old pizza cartons. Open up the corrugated layers, spread the leaves over newspaper, and stack the trays loosely in a warm dry spot, with something between each layer to keep air moving. A paper lunch bag over each bundle, or an old window screen propped in a corner, works for the same reason: airflow without a room dedicated to it.
And for a summer of basil specifically, freezing often beats drying. Blend the leaves with olive oil and freeze them in ice cube trays for pesto, or chop and freeze them flat on a sheet tray for cooking. Fresh basil dried at home is a lovely idea in theory, and it turns brown and tastes like cardboard far more often than it does not.
Frequently Asked Questions
Which herbs are easiest to dry from a garden?
Rosemary, thyme, oregano, sage, and marjoram are the easiest because they have narrow, waxy leaves that shed water fast and hold little of it. Mint and lemon balm dry quickly too, but they are thick and wet, so put them on a screen rather than in a bundle. Lavender holds up well if you strip the flowers from the stems. Avoid hanging large, dense bunches of anything, since the middle of the bundle stays damp.
How long does it take to air-dry fresh herbs?
Most garden herbs are dry in three to seven days in a dry, ventilated room, and thin-stemmed herbs can be ready in three days. Woody stems like rosemary and sage can take two weeks. In a humid climate, expect the slow end of that range or switch methods. The clock is only a guide, though: the real test is whether a leaf crumbles when you roll it between your fingers.
Can I dry herbs in the oven without losing their flavor?
Yes, as long as the oven stays very low and the door is left ajar. Aim for 115F, or preheat to 400F and turn it down to 250F, and wedge the door open so heat and moisture can escape. Small batches dry in two to four hours. Going above about 115F drives off the volatile oils that carry the aroma, which is why most people find oven-dried herbs flat next to air-dried ones.
How do I know when garden herbs are completely dry?
Roll one leaf between your thumb and forefinger. If it crumbles into flakes or powder, it is fully dry and safe to store. If it bends without breaking or feels cool and leathery, moisture is still inside. Check the thickest stems, not just a leaf from the outside of the bundle, and let everything cool to room temperature before sealing it into a jar.
Should I wash herbs before drying them?
Wash them, and then dry them very well. Rinse garden herbs in cool water to remove soil and insects, then shake or spin the bunch and blot the leaves with a towel. Any surface water left on the leaves is the main reason batches mold in a day or two. The rule is simple: if you would not eat the leaf straight from the plant, do not skip the rinse, and do not skip the towel.
How should dried herbs be stored to stay fresh?
Keep them in airtight glass jars in a cool, dark cupboard away from heat and sunlight. Most leaf herbs stay aromatic for six months to a year, and hardy herbs like rosemary and thyme last longer. Label every jar with the herb and the harvest date, since a jar of mystery flakes is no use to anyone. Crush leaves just before using them for the strongest flavor.
Conclusion: Label and Store Your Dried Herbs
Start by cutting one small bundle this week: about a dozen stems, washed, blotted dry, lower leaves stripped, tied with twine, and hung upside down in a dark room with air moving through it. That is the whole method, and it works for most herbs without spending anything.
Match the method to the herb. Bundles for rosemary, thyme, and oregano; a mesh screen for mint, lemon balm, hyssop, and anything thick and wet; a dehydrator at 95F to 115F when you want the color kept and the batch finished in a day; the low oven only for small urgent batches.
Pick one herb and learn how long that one takes before you commit a whole bed to it. Everything about how to dry herbs from the garden safely comes down to the same rule each time: nothing goes into a sealed jar until it crumbles.