You can build a simple root cellar in a basement without digging anything. Frame a small insulated room in the coolest corner, line the interior partition walls and the ceiling (never the foundation wall), and cut two vents: a low air inlet near the floor and a high exhaust near the ceiling. The earth around your basement already holds a steady cool temperature and damp air, and that is the whole trick.
A corner cellar like this is a weekend project for a competent DIYer, and most people can finish the framing in a day and the shelving in another. This guide walks through how to build a simple root cellar in a basement, from a two-week test of your basement’s conditions through stocking the shelves with your fall harvest.
One thing to know before you buy lumber: many conditioned basements run 55-65°F with a dehumidifier on year round. That is a cool pantry, not a cellar. If your basement will not hold below 50°F in the fall, a converted closet or an extra refrigerator will serve you better than a framed room.
Table of Contents
- What You Need
- Start with the testing kit
- Framing and moisture control
- Ventilation hardware
- Storage gear and safety equipment
- Step-by-Step
- How to build a simple root cellar in a basement: test the corner first
- How to build a simple root cellar in a basement: choose the location
- How to build a simple root cellar in a basement: create ventilation
- How to build a simple root cellar in a basement: install shelves and bins
- How to build a simple root cellar in a basement: control temperature and moisture
- How to build a simple root cellar in a basement: stock and maintain it
- How to Build a Simple Root Cellar in a Basement: Finished Setup
- Common Mistakes
- Frequently Asked Questions
- Do I need to insulate a basement root cellar?
- How humid should a basement root cellar be?
- What can I store in a simple basement root cellar?
- Is it safe to run a fan in a basement root cellar?
- Can I use my crawl space instead of a basement root cellar?
- What to Do First This Weekend
What You Need
A basement root cellar is a small, insulated, ventilated room built inside the coolest corner of an existing basement. What you need falls into four groups: gauges for testing, framing and insulation materials, ventilation hardware, and washable storage gear.
Start with the testing kit
Buy a combination thermometer and hygrometer, or two cheap separate ones. Cheap is fine here, because you are buying accuracy over months, not precision over hours. A mechanical dial unit in the 40-65°F band is enough to tell you whether a corner is worth framing.
Framing and moisture control
- 2×4 or 2×6 studs for the partition walls
- Composite decking or rot-resistant untreated lumber for any plate touching the floor
- Fiberglass or cellulose insulation for the interior walls and ceiling
- Polyethylene vapor barrier for the warm side of the framing
- Exterior-grade plywood or sealed masonry coating for the walls
- Insulated steel door with a tight seal
Skip pressure-treated lumber anywhere produce sits or air circulates. Waterproofing treatments off-gas, and the last thing you want next to a winter’s supply of potatoes is a chemical odor.
Ventilation hardware
Two 4-inch pipes, one for the inlet and one for the exhaust. Add insect screen or hardware cloth over both ends, a fan if you want active circulation, and a small drain hole or hose bib so you can wash the floor out at the end of the season.
Storage gear and safety equipment
Washable shelving in wood, composite, or sealed metal. Plastic crates, mesh bags, or perforated bins rather than solid tubs. A headlamp, gloves, eye protection, a dust mask for cutting insulation, and a shop vac. Skip the dehumidifier at first; add one later only if a gauge tells you the room runs wet.
You do not need a sawhorse collection, a nail gun, or anything else that costs more than it earns here. A circular saw, a drill, a level, and a tape measure cover the whole job.
Step-by-Step
The sequence below matters more than any single technique. Test first, then frame, then insulate, then vent, then furnish. If you jump straight to shelves, you will build storage for a room that turns out to be too warm or too wet.
How to build a simple root cellar in a basement: test the corner first
Log temperature and relative humidity for two weeks before you build anything. Set the hygrometer at shelf height in the corner you have in mind, note both readings each morning and evening, and write them down.
You are looking for four things. Winter-level cool: below 50°F on most readings. Damp air: above 60% RH. Stability: swing of no more than about 5°F between day and night. And no mustiness, dampness, or salt bloom on the walls. A corner that fails any one of these is the wrong corner.
If your basement is warm and dry because a dehumidifier runs constantly, turn the dehumidifier off for the test week and re-read the gauge. A great many basements are only dry because somebody is paying to make them that way.
How to build a simple root cellar in a basement: choose the location
Pick the corner with the deepest soil contact on the outside of the foundation, ideally a north-facing exterior wall, and keep it clear of the furnace, water heater, dryer, wood stove, sump pump, and any sunlit window. The sun and heat sources are what will spoil the temperature; the earth is what will hold it.
Keep clear of support columns, ductwork, and anything structural. You are framing a partition, not moving a load-bearing wall. If anything is unclear about what carries the house above you, have a structural engineer or licensed contractor look at it before you cut.
Size it for what you actually grow. Around 8 by 8 feet is plenty for an average household, and roughly 5.5 feet square is enough for most people. If you want to store onions and winter squash alongside damp root crops, build a short warmer foyer at the door so you have a dry chamber and a humid chamber.
How to build a simple root cellar in a basement: create ventilation
Air enters low and leaves high, and that single rule is the whole ventilation system. Cut the 4-inch inlet through the low exterior wall a few inches above the floor. Cut the exhaust through the upper part of an opposite or adjacent wall, as close to the ceiling as you can get.
Screen both openings. A mouse will find an unscreened vent, and mice find potatoes before you do. The height difference between inlet and exhaust is what moves air, so do not put both pipes at the same level expecting the layout to work on its own.
A small exhaust fan on a timer speeds things along, but keep it away from dust, chemicals, and damp outdoor air. Wire it on a GFCI-protected circuit following local code, and if you are not comfortable with that, hire an electrician. A fan that pulls humid summer air into a 40°F room will condense water on every surface in there.
Cut a small drain hole in the floor or add a hose bib to the drain pan. You will want to hose the whole room out once before you pack it full.
How to build a simple root cellar in a basement: install shelves and bins
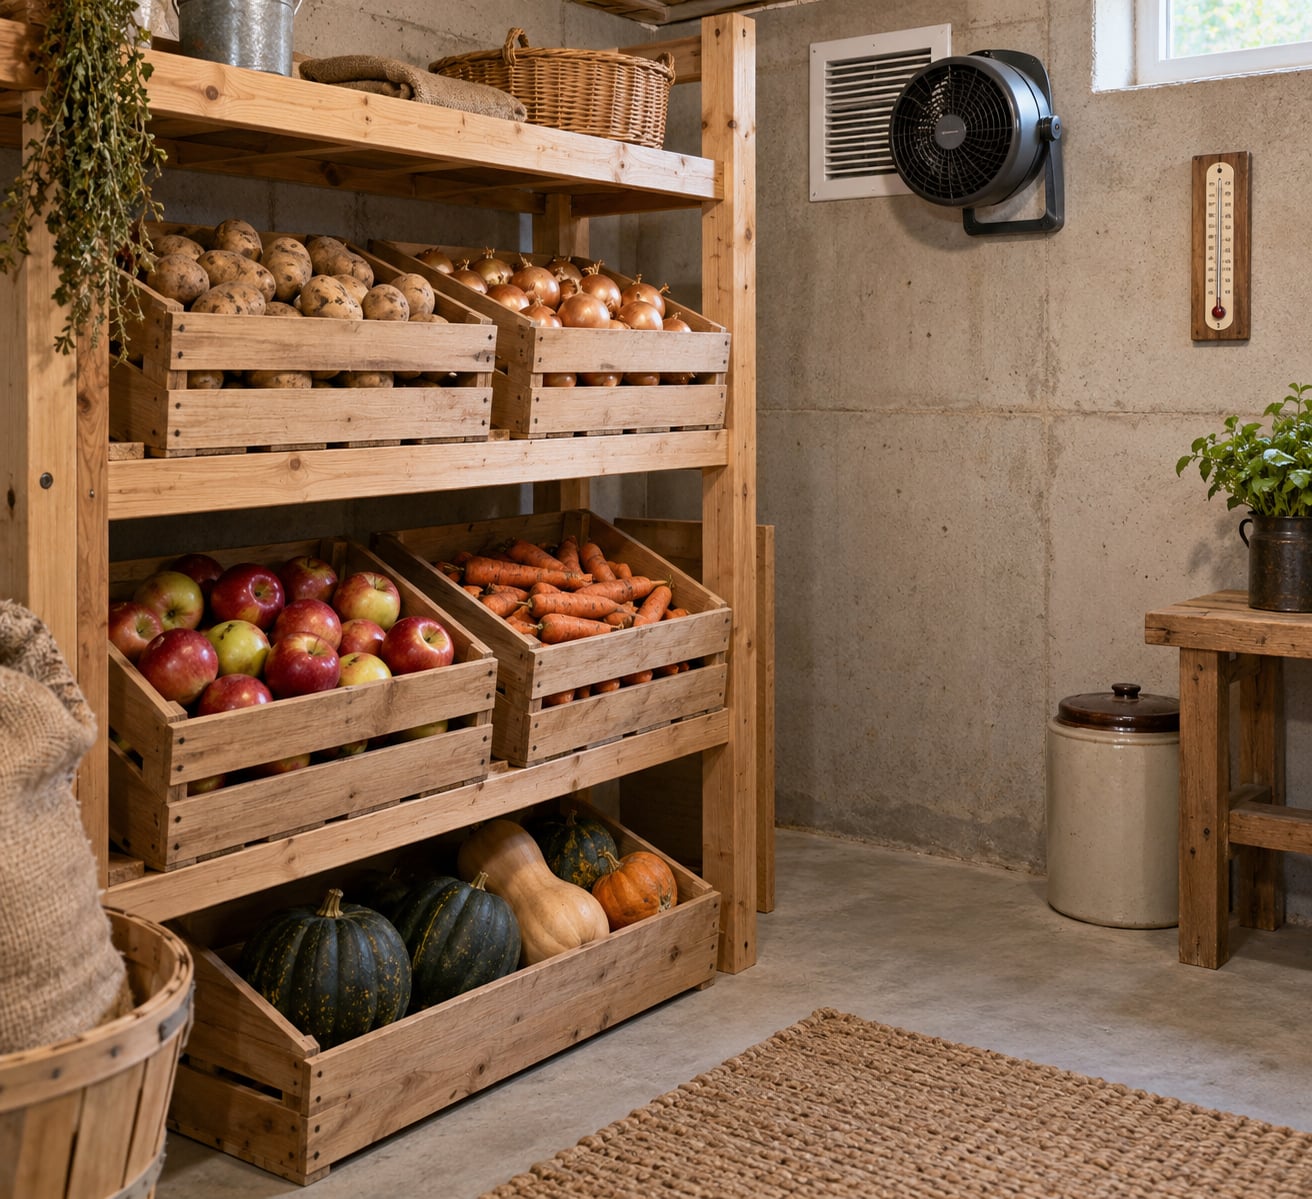
Build sturdy, washable shelving out of sealed lumber or painted steel, not raw particleboard, which swells and flakes when it gets wet. Anchor the units to the studs and leave an inch or two of clearance behind them so air can move along the wall and you can get a brush back there.
Match the container to the crop. Mesh bags, slatted crates, and perforated bins hold potatoes, onions, garlic, carrots, beets, turnips, cabbages, and apples, which all need moving air. Do not seal those in solid plastic; condensation collects and mold follows.
Winter squash and pumpkins want the opposite. Keep them on a solid shelf, unwashed, off the bare floor, and away from the damp root crops. Put labels on the shelf edge with the variety name and the date you stored it.
How to build a simple root cellar in a basement: control temperature and moisture
The target is 32-40°F (0-4°C) for most root crops at roughly 90-95% relative humidity, and a cooler, drier 50-55°F at about 50% RH for onions, garlic, and winter squash. Below 32°F, potatoes turn to sugar and go mushy when you cook them. Above 50°F and humid, you are inviting mold instead.
- 32-40°F and 90-95% RH: potatoes, carrots, beets, turnips, rutabagas, parsnips, cabbage
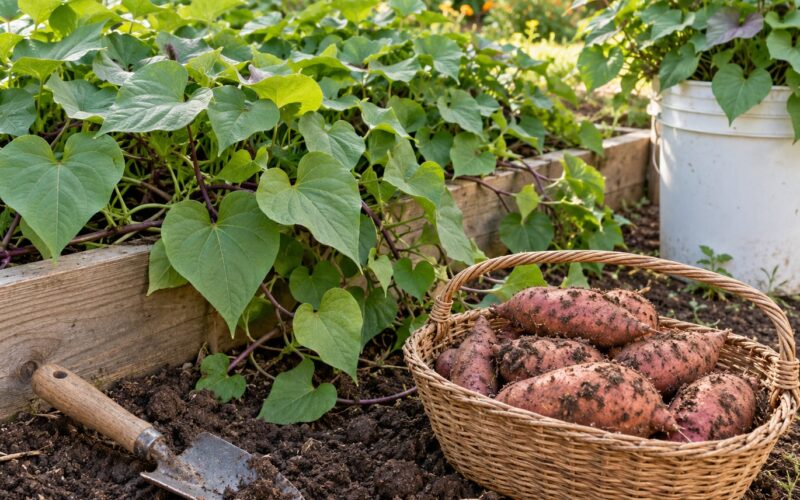
- 38-45°F and 85-90% RH: sweet potatoes, apples, pears, chestnuts
- 50-55°F and about 50% RH: onions, garlic, winter squash, pumpkins, dried shell beans and corn
Insulate the interior partition walls and the ceiling. Leave the foundation wall alone. Wrapping the concrete wall in insulation cuts off the earth’s cool stability and leaves you with a warmer, more humid box where condensation forms in the framing instead.
Put the vapor barrier on the warm side of the wall, which is the basement side facing your finished room. Warm room air carrying moisture meets cold soil-backed concrete and condenses; the barrier belongs where that air stops. Seal seams and run it behind the shelving so condensation drains down the wall rather than into the studs.
How to build a simple root cellar in a basement: stock and maintain it
Cure what you can before it goes in. Potatoes and sweet potatoes want a week or two in a warm, dark, humid room. Onions and garlic want three weeks of dry curing with good airflow. Squash wants a couple of weeks at room temperature until the skins harden and the stems dry up.
Sort every item as it goes in. Anything bruised, soft, or already showing spots goes into the compost, not the cellar. One bad potato invites its neighbors within weeks, and roots need air pockets around them, so do not pile them in solid bins.
Keep apples and pears apart from everything else. They give off ethylene gas, which makes potatoes sprout and other crops deteriorate faster. Store each crop in its own labeled bin, and log the date on the shelf edge.
Check the room weekly and the produce every seven to ten days. Cull anything soft, sprouted, or moldy immediately. A basement corner, a spare closet, and a converted crawl space under a deck all store a typical household fall harvest for several months.
How to Build a Simple Root Cellar in a Basement: Finished Setup
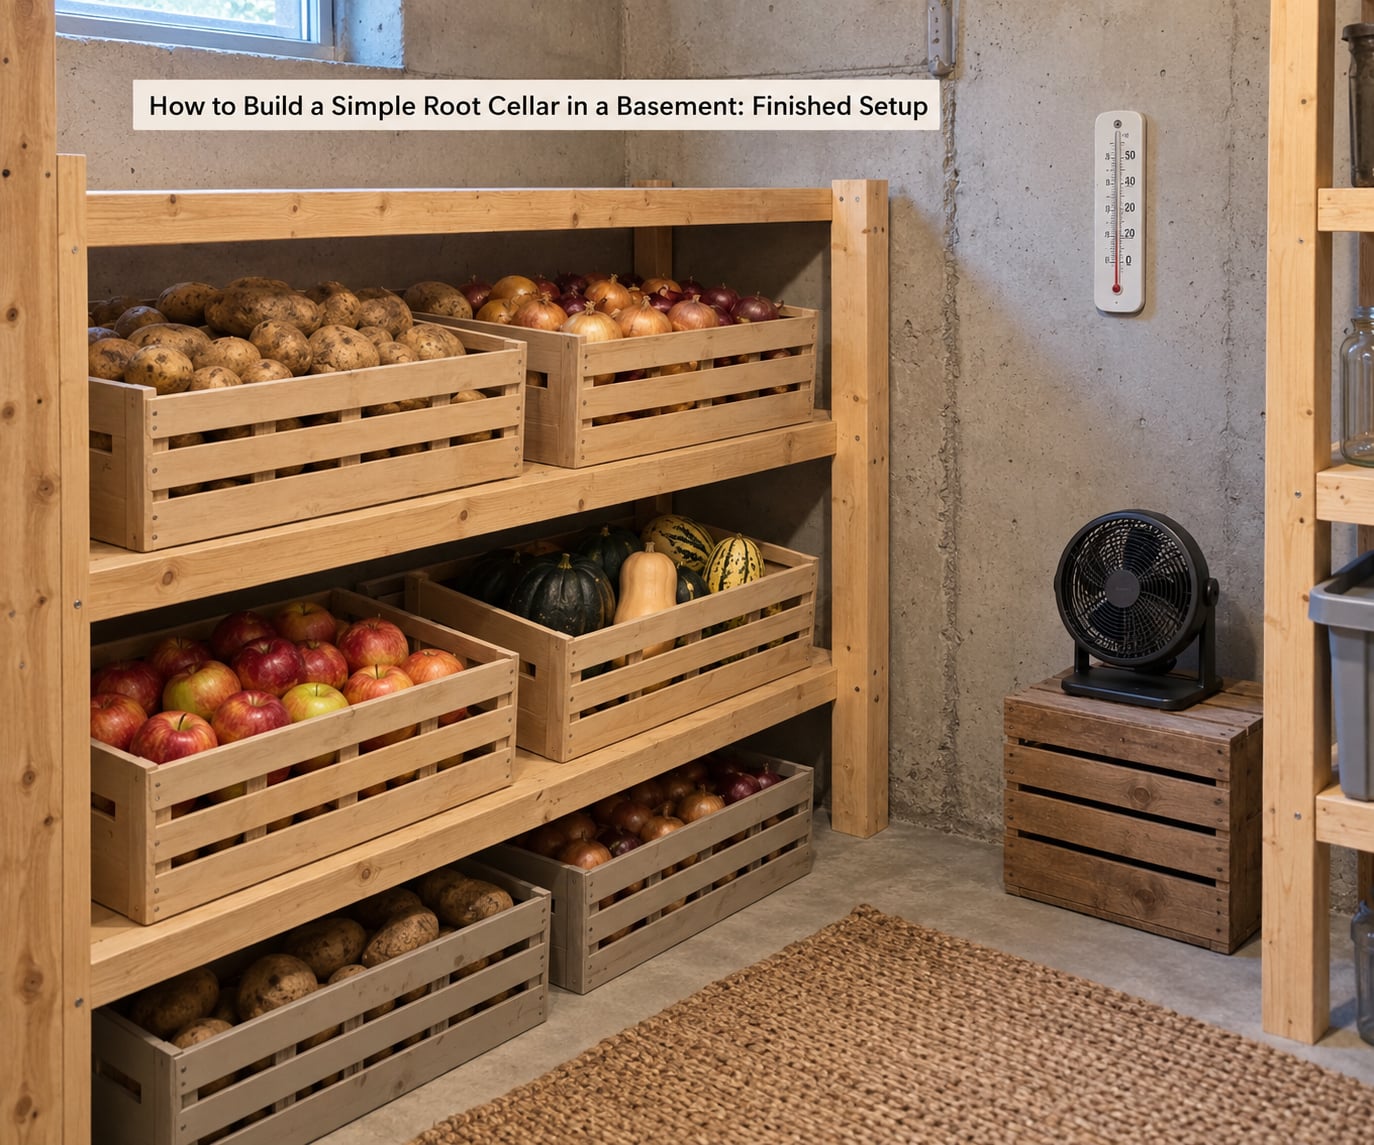
A finished cellar looks boring on purpose: a clean, organized, ventilated space with labeled produce bins on washable shelves, room behind them for airflow, and a thermometer and hygrometer where you can read them when you open the door.
Add a second gauge at floor level. If the two readings drift more than a few degrees, you have a cold spot and a warm spot, and the crates sitting on the warm one will age faster than you expect. Once the door has stayed closed a full day, check the reading again. If the temp holds within a few degrees and RH stays where you set it, the cellar is doing its job.
Common Mistakes
Almost every failed basement cellar I have seen traces back to one of a handful of fixable mistakes. Here they are with the correction.
Insulating the foundation wall. This cuts the cellar off from the earth’s stable cool temperature and traps condensation inside the framing. Insulate the partition walls and ceiling instead, and put the vapor barrier on the warm, basement-facing side.
Using pressure-treated lumber near produce. The waterproofing treatment off-gasses an odor into a space you eat from. Use composite decking or untreated rot-resistant stock for plates and shelving.
One vent, or two vents at the same height. Air needs somewhere to enter low and somewhere to leave high. Same-height pipes move almost nothing, and a stagnant cellar spoils produce faster than a warm one.
Sealing everything in plastic. Airtight bins trap condensation and grow mold. Use mesh, crates, and perforated bins, and keep onions and squash on their own dry shelf.
Forgetting to test the corner first. Two weeks of readings will save you the cost of materials you cannot use. If the room will not hold below 50°F and above 60% RH, build a pantry or use the closet.
Storing everything at one temperature. Root crops and squash want opposite conditions. One room at one setting for every crop means some items go bad before the others do.
Overcrowding the shelves. Produce needs air moving around it. Leave gaps between bins and space between the bins and the wall.
Skipping the weekly walk-through. Mold spreads quietly. A quick weekly check with a headlamp catches one soft apple long before it reaches the crate next to it.
Storing produce without curing or culling. Uncured potatoes sprout, squash skins scar, and bruised items rot in place. Cure first, sort second, store third.
Skipping the vent screens and the rodent check. A mouse enters through a 4-inch pipe and moves through the whole harvest. Screen both openings and check for droppings at every visit.
Frequently Asked Questions
Do I need to insulate a basement root cellar?
A simple basement root cellar usually does not need added insulation if the corner already stays cool and steady. Focus first on shade, ventilation, moisture control, and keeping the room dark, then check with a thermometer and hygrometer before adding material. If the corner runs 55°F or warmer in fall, insulate the new interior partition walls and the ceiling, never the foundation wall.
How humid should a basement root cellar be?
It depends on what you are storing. Root vegetables do best in the cold and damp range, roughly 90-95% relative humidity at 32-40°F. Onions, garlic, and winter squash need it much drier, around 50% relative humidity at 50-55°F. Track both with a hygrometer and hold each crop in its own zone rather than aiming for one number for the whole room.
What can I store in a simple basement root cellar?
Good choices include potatoes, onions, garlic, carrots, beets, turnips, cabbages, sweet potatoes, apples, pears, winter squash, and chestnuts. Dried shell beans and cured corn keep well in the drier zone. Store each crop separately in breathable crates or mesh bags, keep apples away from other vegetables because of ethylene gas, and inspect everything weekly for softness, sprouts, or mold.
Is it safe to run a fan in a basement root cellar?
A fan improves airflow, but it has to be rated for the space and positioned so it does not pull in dust, chemicals, or damp outdoor air. A fan pulling humid summer air into a 40°F room drives condensation onto every surface. Run any wiring on a GFCI-protected circuit per local code, and hire an electrician if you are not confident with the electrical work.
Can I use my crawl space instead of a basement root cellar?
A crawl space works only if it stays cool, dry enough to prevent mold, and free of standing water and chemical odors. Many crawl spaces run too warm and too damp in summer and freeze solid in winter, which ruins both the produce and the structure. Insulate and vent it first, test it with a hygrometer for two weeks, and treat an untested crawl space as a place not to store food.
What to Do First This Weekend
Skip the lumber for now and buy a hygrometer. Set it in the coolest corner you have, turn off the dehumidifier for a week, and see what the numbers do. That single afternoon of data tells you whether learning how to build a simple root cellar in a basement is a project you should finish this season or a closet project you skip.
When the readings look good, frame the partition, insulate the interior walls and ceiling, cut the low inlet and high exhaust, screen them, and hang two gauges. Fill it with the crops that want matching conditions, label everything, and check it weekly. Updated for 2026, this guide reflects what consistently shows up in homesteading forums and extension guidance on storing a fall harvest without electricity.