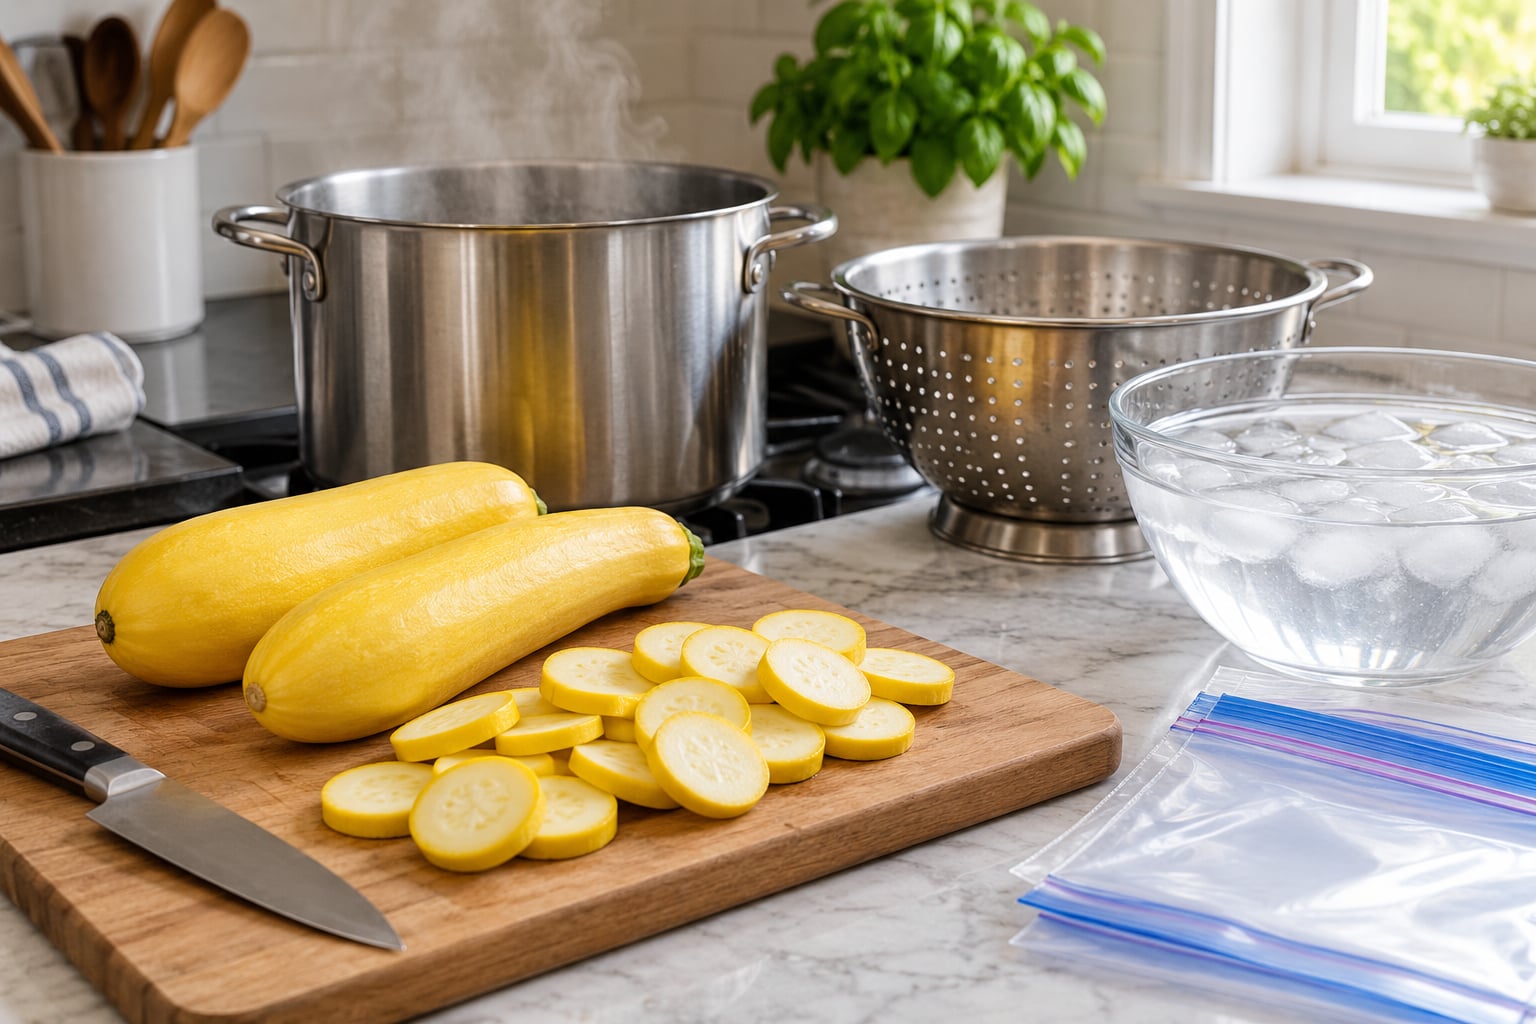
Blanching is the step that keeps frozen summer squash from turning to mush: cut it into even slices, boil 3 to 4 minutes, shock it in ice water, dry it completely, then flash freeze it before bagging. Budget 30 to 45 minutes for a couple of pounds, plus freezing time. If you are freezing squash for bread, grate it raw and skip the pot entirely.
I freeze a lot of squash in late summer, and the batches that come out usable are always the ones where I did not rush the drying step. Squash is around 94 to 95 percent water, so anything left on the surface ends up as ice crystals and freezer burn by November.
This guide covers zucchini, yellow squash, patty pan and crookneck. Winter squash follows different rules, so keep the two separate in your head.
Table of Contents
- What You Need
- Step-by-Step: How to Freeze Summer Squash Without It Getting Mushy
- 1. Choose Fresh, Firm Squash and Cut It Uniformly
- 2. Blanch the Squash to Stop Texture Loss
- 3. Chill, Drain, and Dry: The Step That Actually Stops the Mush
- 4. Season Only What Needs It
- 5. Pack, Label, and Freeze in a Single Layer
- 6. Thaw and Use Without Making It Mushy
- Common Mistakes
- Skipping the blanch
- Crowding the pot
- Cooling in warm water
- Packing while the squash is wet
- Thawing slowly at room temperature
- Reheating for too long
- Freezing seasoned squash
- Frequently Asked Questions
- What type of summer squash freezes best?
- Can I freeze summer squash without blanching it first?
- How much summer squash should I freeze for a family?
- Should I freeze squash in parchment paper?
- Can I bread or bake summer squash after freezing it?
What You Need
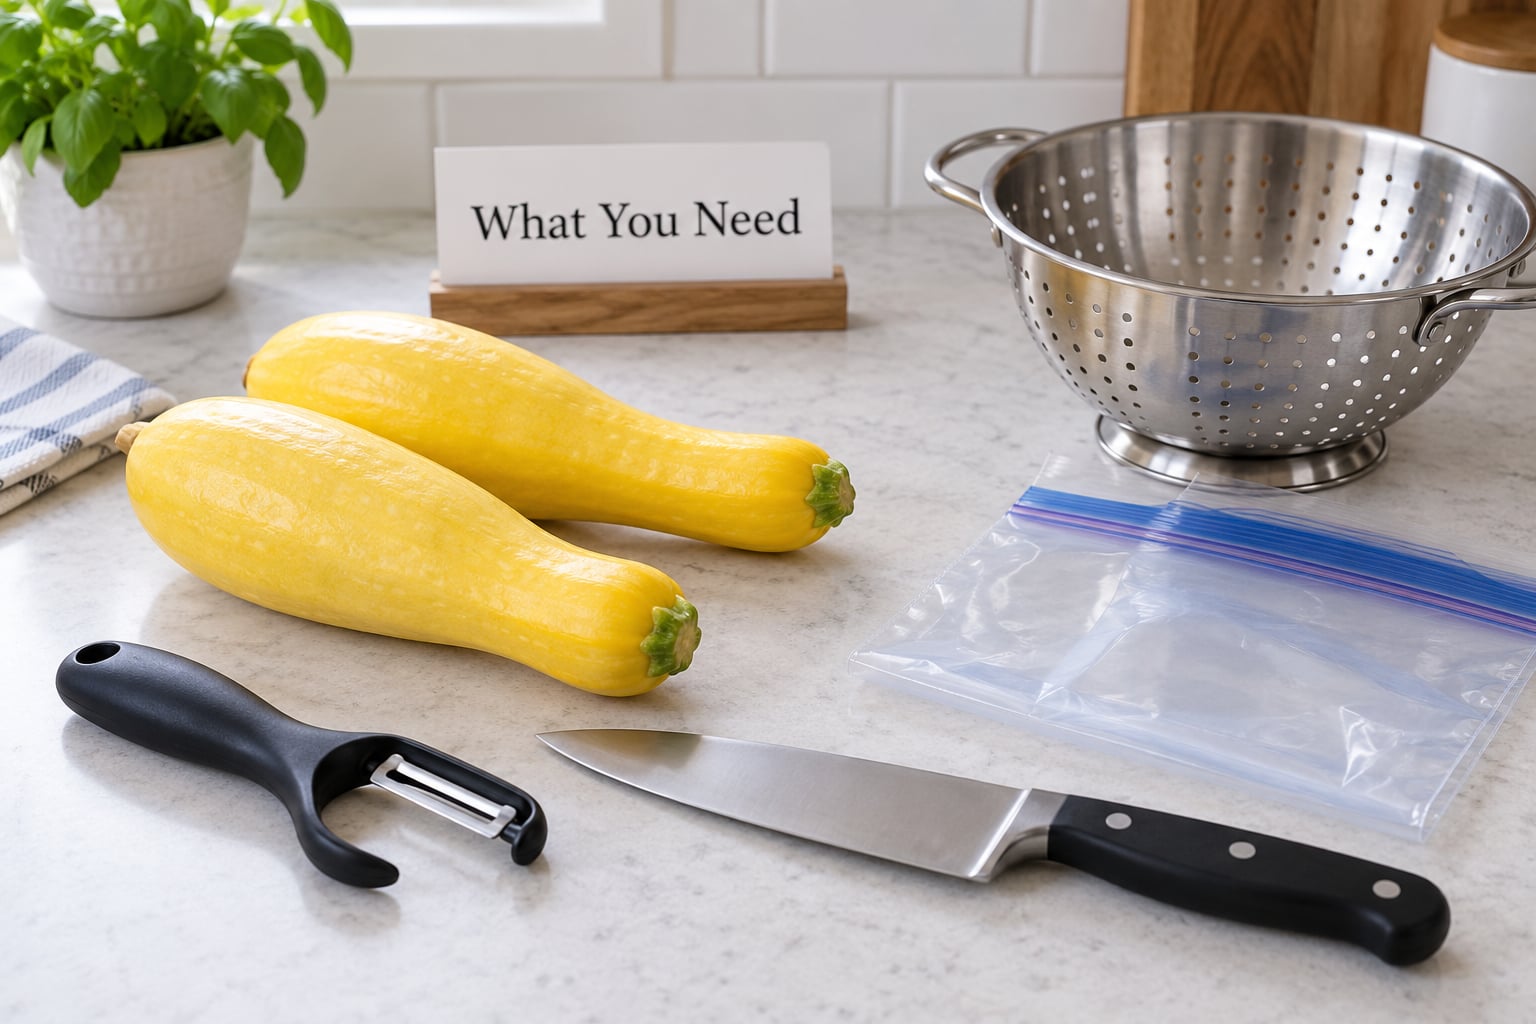
You do not need anything unusual. A stockpot, a steamer basket or a clean colander that fits inside it, a bowl of ice water, and freezer bags cover the whole process.
- Fresh, firm summer squash with no soft spots or wrinkled skin
- A vegetable peeler or a paring knife, plus a chef’s knife or mandoline for even cuts
- A large stockpot and a steamer basket or clean colander
- A bowl of ice water and plenty of ice
- Freezer bags or rigid freezer-safe containers
- Parchment paper or a silicone mat for the single-layer pre-freeze
- Clean labels and a pen, plus a kitchen timer
- Optional: a squeeze bottle of lemon juice or a splash of mild vinegar
The parchment is worth keeping on hand. Pieces that touch while they freeze come out as one solid clump, and no amount of thawing separates them cleanly.
Use a salad spinner or a clean towel for drying if you have one. Squash holds a surprising amount of surface water, and a spinner cuts the drying step down to a minute.
Step-by-Step: How to Freeze Summer Squash Without It Getting Mushy
Blanch the cut squash in boiling water for 3 to 4 minutes, cool it in ice water for about 3 minutes, drain and dry it well, then freeze it in a single layer on a lined baking sheet before moving it into portioned freezer bags. Grated squash for baking skips the blanching step entirely. Every stage below exists to remove water or stop the cooking enzymes, so follow them in order.
1. Choose Fresh, Firm Squash and Cut It Uniformly
Pick squash that feels heavy for its size and has dry, unblemished skin. If you squeeze it and it gives, or the skin has gone dull and wrinkled, put it aside; that squash has already lost the structure you are trying to preserve.
Wash it under cool running water and trim both ends. Peel if you like, though peeling is optional for most varieties since the skin softens during blanching.
Cut into even slices, ideally 1/4 inch thick, or into 1/2 inch cubes. Uniform thickness is what makes blanching work: a thin round and a thick cube cannot share the same three minutes.
You will know the cut is right when a raw piece stands unsupported on the counter without leaning. For watery zucchini, scooping out the seed center before cutting removes a surprising amount of moisture.
2. Blanch the Squash to Stop Texture Loss
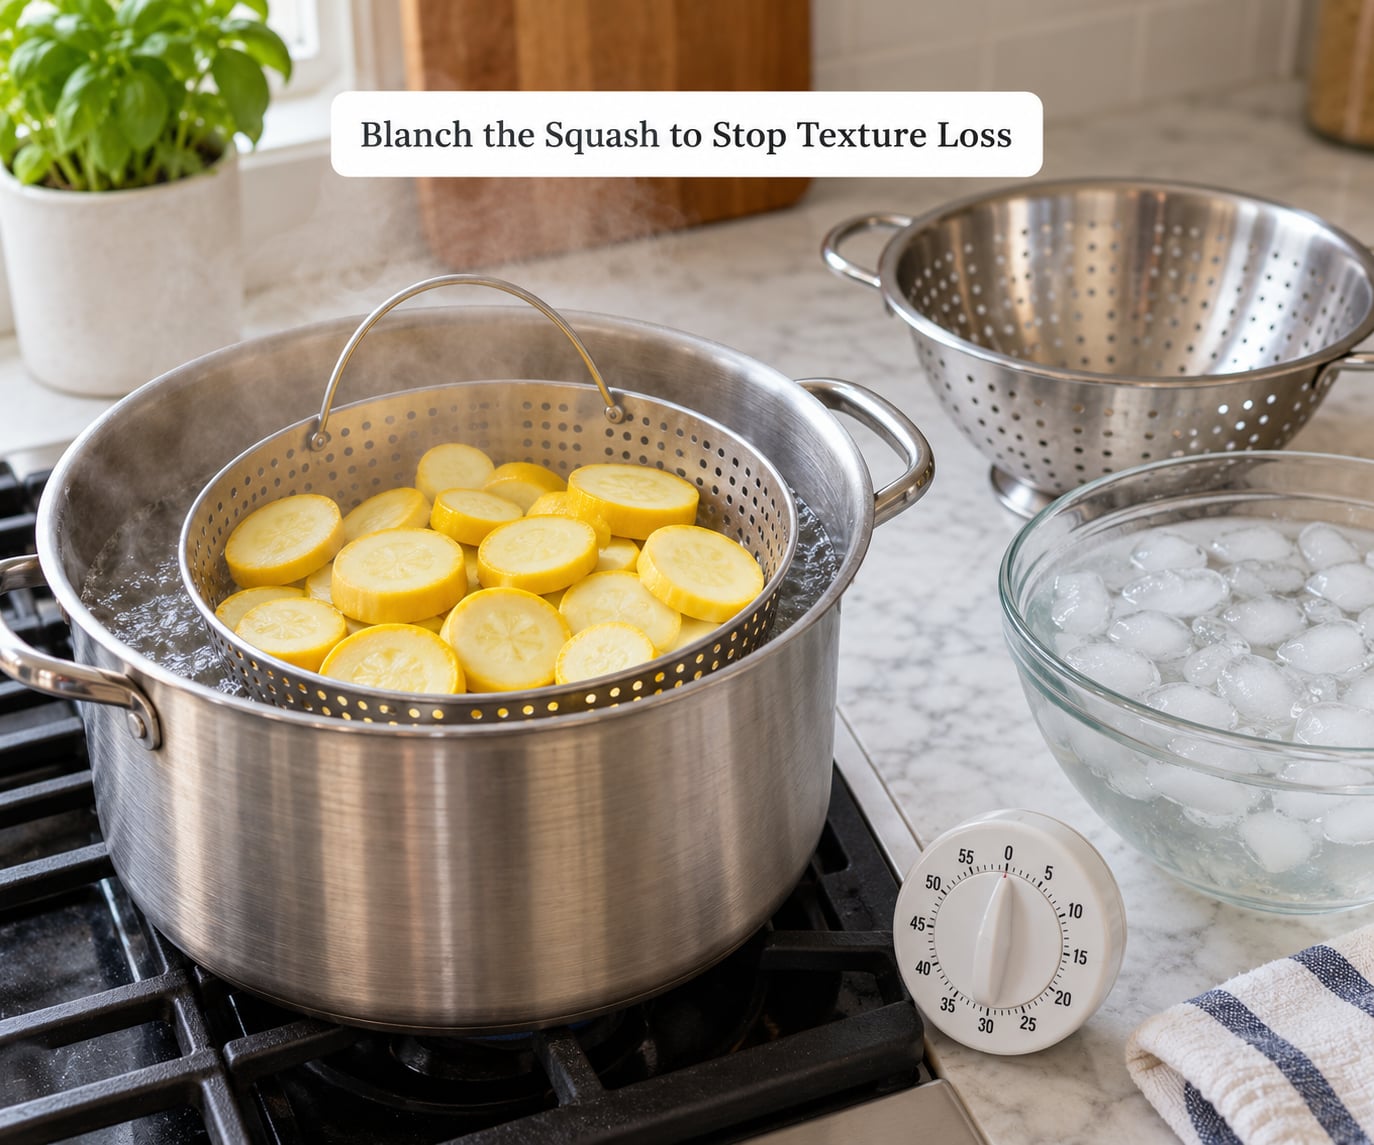
Bring a large pot of water to a full rolling boil. Follow the standard ratio of 1 gallon of water for every 1 pound of squash, and keep batches to 1 pound or less so the water stays hot enough to act quickly.
Lower the squash into the boiling water using a steamer basket or a clean colander. Start your timer the moment the squash goes in.
- 1/4 inch rounds: 3 minutes, until a fork slides through easily but the piece still holds a round shape.
- 1/2 inch slices: 3 to 4 minutes, tender at the center with edges that are not fraying apart.
- 1/2 inch cubes: 4 minutes, firm at the corners and not collapsing.
- Grated squash: no blanching at all, packed raw with the liquid pressed out later.
Yellow squash and zucchini need about three minutes. Patty pan and crookneck, which are denser, take closer to four. At high altitude the boiling point is lower, so give everything an extra 30 to 60 seconds.
Stop short of limp. Squash that has gone soft during blanching is already halfway to mush, and it will not recover in the freezer.
A note on safety: steam burns faster than you expect and the pot will be at a full boil. Use long tongs, keep the basket handle turned away from you, and lift the lid away from your face.
3. Chill, Drain, and Dry: The Step That Actually Stops the Mush
Move the blanched squash straight into an ice bath for about 3 minutes, using roughly 1 pound of ice for every 1 pound of squash. The goal is to halt cooking where the pieces are, so the texture sets before the freezer gets hold of them.
Drain in a colander, then spread the pieces on a clean towel or a sheet pan and pat the surfaces dry. Sandwiching the squash between folded paper towels for 10 minutes pulls off a surprising amount of water.
You will know the squash is dry when the pieces look matte rather than glossy and a towel pressed on top comes away without leaving a wet patch.
Skipping this is the single most common reason frozen squash ends up in a watery pile. Trapped water freezes into crystals, the crystals push against cell walls, and thawed squash releases water it can no longer hold.
4. Season Only What Needs It
Skip the salt, the butter and the herbs before freezing. Salt draws moisture out of the squash, and anything you season now tastes stronger once the piece thaws and its water has leached away.
A light squeeze of lemon juice or a splash of mild vinegar is the one exception, and it is useful for pale zucchini that tends to brown. Use it sparingly, mixed through the drained pieces, and skip it entirely for yellow squash, patty pan and crookneck.
The usual rule is to season after thawing, right before the pan hits the heat. Grated squash destined for bread goes in plain, with no liquid at all.
5. Pack, Label, and Freeze in a Single Layer
Freeze the dried pieces in a single layer on a parchment-lined baking sheet, leaving a little space between them so nothing touches. Thirty to sixty minutes is enough for most pieces to firm up, and a quick-touch test tells you when they are solid at the center.
While they set, prepare your bags or containers. Portion toward the recipes you actually cook: one cup for stir-fries, two cups for soups, four cups for casseroles and gratins.
Transfer the frozen pieces into the bag, press out as much air as you can, seal it, and lay it flat. Rigid containers need headspace, roughly half an inch, for the contents to expand. Write the variety, the cut, the portion size, and the date on the label.
When I have a glut, I double-bag or run the vacuum sealer on the sealed bag. Squeezing the air out by hand is nearly as effective and costs nothing, which matters when you are freezing a full garden bed at once.
6. Thaw and Use Without Making It Mushy
Thaw in the refrigerator, not on the counter. Move the bag to a colander set in a bowl or the sink so the released liquid drains away instead of pooling around the pieces, and give it several hours or overnight.
Draining during the thaw matters as much as draining before the freeze. Squash that sits in its own water while thawing loses the texture you just protected.
Cook only until heated through. Soups, stews, chili, curries, pasta sauce, risotto, casseroles, gratins, stir-fries, quick breads, muffins and zucchini fritters all have somewhere for frozen squash to land well.
For the best quality, use frozen squash within about 6 to 8 months, and always check the package and your local extension guidance for current food-safety recommendations.
Microwaving thawed squash is the fastest route back to sogginess, because the water turns to steam inside the piece. A skillet or a pot moves that moisture out instead.
Common Mistakes
Almost every watery bag of frozen squash traces back to one of these. The fix for each is quick once you know what went wrong.
Skipping the blanch
Unblanched squash keeps cooking slowly at freezer temperatures. Enzymes stay active, the flesh softens over months, and color and flavor fade. Blanch 3 to 4 minutes unless the squash is grated for baking, where raw is the correct choice.
Crowding the pot
Ten pounds of squash dropped into a small pot drops the water temperature fast, so the pieces cook unevenly and sit in tepid water. Blanch in batches of 1 pound or less and bring the water back to a boil between batches.
Cooling in warm water
An ice bath that starts warm does not stop the cooking, it only slows it. Keep the bath at 60 degrees F or below with plenty of ice, and move the squash straight in rather than letting it sit on the counter first.
Packing while the squash is wet
Surface water freezes into ice crystals that cause freezer burn and make pieces clump. Pat dry, use a salad spinner, or sandwich the squash between paper towels before it goes anywhere near a bag.
Thawing slowly at room temperature
A slow thaw lets the released water sit against the flesh and the texture flatten out. Thaw in the refrigerator, in a colander, and use the squash the same day.
Reheating for too long
Any vegetable reheated past the point of steaming loses water it cannot get back. Heat only until the center is hot, then pull it off the heat.
Freezing seasoned squash
Salt and strong seasonings concentrate as ice leaves the flesh. Freeze plain and season at the table.
One last thing on the cut itself. Uniform 1/4 inch rounds are the most forgiving option because they blanch evenly, freeze quickly, and hold their shape in a soup the way a thick cube never quite does.
If a bag has already thawed soft, do not discard it. Squeeze out the water and use it in soup, stir it into a rice casserole, or cook it down with onion and broth into a sauce. Mushy squash is a poor candidate for frying and a perfectly good one for a pot of soup.
Frequently Asked Questions
What type of summer squash freezes best?
Firm zucchini and yellow squash with dry, unblemished skin freeze best, and smaller squash generally hold their shape better than large, seedy ones. Patty pan and crookneck are denser, so give them an extra minute of blanching. Skip any squash that feels soft or shows wrinkled skin, because that structure will not come back. Grated zucchini freezes well raw for baking, with no blanching step at all.
Can I freeze summer squash without blanching it first?
You can, and for grated squash meant for bread you should, because you will squeeze out the liquid anyway. For slices and cubes destined for soups, stir-fries or casseroles, blanching is what stops the enzymes that turn frozen summer squash into mush, and skipping it costs you color and flavor. Raw packing works best for short-term storage of roughly three months.
How much summer squash should I freeze for a family?
For a family of four, two to three pounds per person over the season usually covers it. That works out to roughly a pound per person per month. Portion by the recipe you cook: one cup bags for stir-fries, four cup containers for casseroles and soups. A whole frozen zucchini holds about three cups of sliced pieces once trimmed and cooked.
Should I freeze squash in parchment paper?
Use parchment paper for the single-layer pre-freeze on the baking sheet, then move the frozen pieces into bags once they are solid. Parchment inside the bag adds bulk for no benefit. Leaving a little space between pieces during that first freeze is what stops them from welding into one block, and bags never achieve that on their own.
Can I bread or bake summer squash after freezing it?
Breaded and fried squash does not work well from the freezer, because the thawed flesh releases too much water for a crisp crust. Baking is different: frozen squash is excellent in muffins, quick breads and zucchini cake, especially when grated raw and frozen in measured cup portions. Roast it at high heat rather than steaming it, so the water can escape the pan.
Start with one pound this week. Blanch for three minutes, ice bath for three, dry it properly, and flash freeze on a lined sheet before bagging. That single routine fixes most of what goes wrong with freezing summer squash, and the same pot of boiling water does double duty for whatever else the garden handed you.