Roast butternut squash for soup at 400°F to 425°F until it is fork-tender: 45 to 60 minutes for halves set cut-side down, or 25 to 35 minutes for one-inch cubes. That high heat cooks off water and caramelizes the cut surfaces, which is where the sweet, nutty depth comes from. Follow this method and the soup needs no cream and no sugar.
Roasting first is the step most recipes rush past. Squash simmered straight into broth releases water as it cooks, so the pot ends up thin and mildly flavored. In a hot oven the same squash loses that water, browns, and blends creamy on its own.
Table of Contents
- What You Need
- Step-by-Step
- Step 1: Preheat the Oven and Choose Your Pan
- Step 2: Cut the Butternut Squash Into Even Pieces
- Step 3: Season the Squash Before Roasting
- Step 4: Roast Until Tender and Caramelized
- Step 5: Use the Roasted Squash in Soup
- Common Mistakes
- Frequently Asked Questions
- Do I need to peel butternut squash before roasting it for soup?
- What is the best temperature for roasting butternut squash for soup?
- How long does it take to roast butternut squash until tender?
- Should I cover the butternut squash while roasting it?
- Can I roast frozen butternut squash for soup?
- How do I get caramelized squash without burning it?
- Conclusion
What You Need
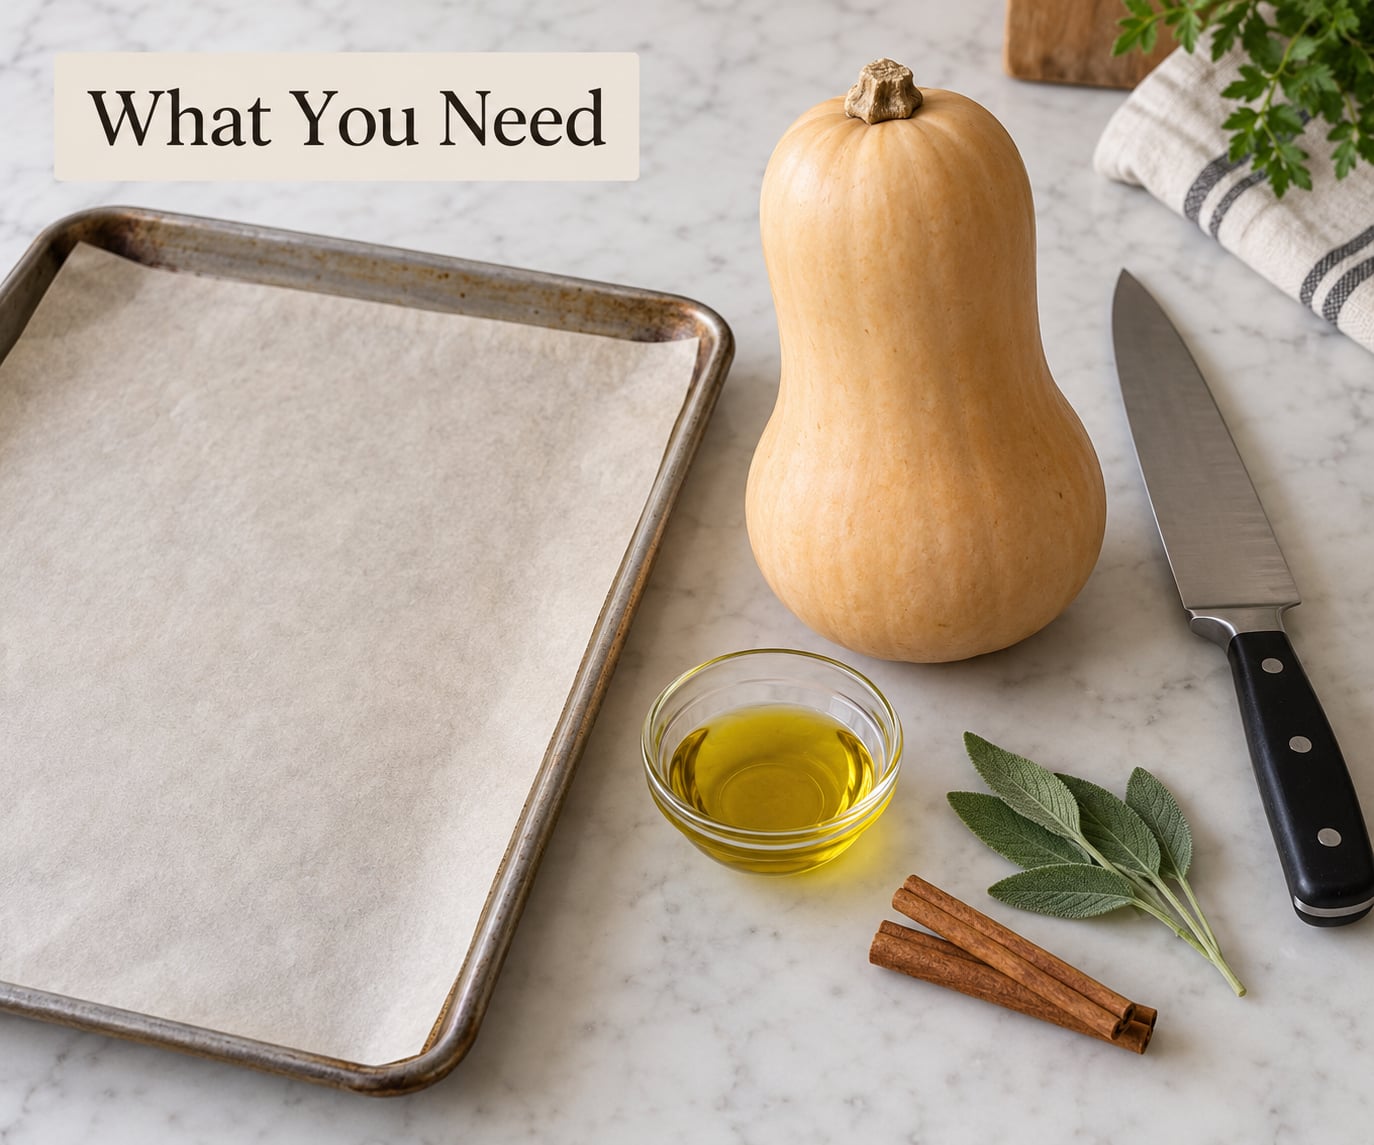
You need a sheet pan, a sharp knife, oil, salt, and squash. Everything else is optional seasoning, and none of it is required for a good pot of soup.
- 1 to 2 butternut squash (about 2 to 3 pounds), or one large winter squash of your choice if butternut is out of reach
- A rimmed half-sheet pan, the flat kind with a low lip, so the juices do not run onto the oven floor
- Parchment paper, or a well-oiled pan if you prefer to scrub less. Parchment makes cleanup quick and stops the cut faces from sticking
- A sharp chef’s knife and a sturdy cutting board with a damp towel underneath so it does not slide
- 2 to 3 tablespoons olive oil, or melted butter, avocado oil, or even a slick of bacon fat
- Kosher salt and black pepper, more than feels generous
- Optional aromatics: a whole garlic head wrapped in foil, a sliced yellow onion, sage leaves, thyme sprigs, rosemary, ground cinnamon, nutmeg, ground ginger, or a pinch of cayenne
Home cooks in cooking forums say the part that scares them most is not the oven, it is the cutting. That is fair, the squash is hard and oddly shaped, so the next section starts there.
Step-by-Step
Step 1: Preheat the Oven and Choose Your Pan
Preheat to 425°F (218°C) and give it a full 10 to 15 minutes. A properly preheated oven browns the squash from the first minute, while a half-cold one starts steaming it and the caramelization never happens.
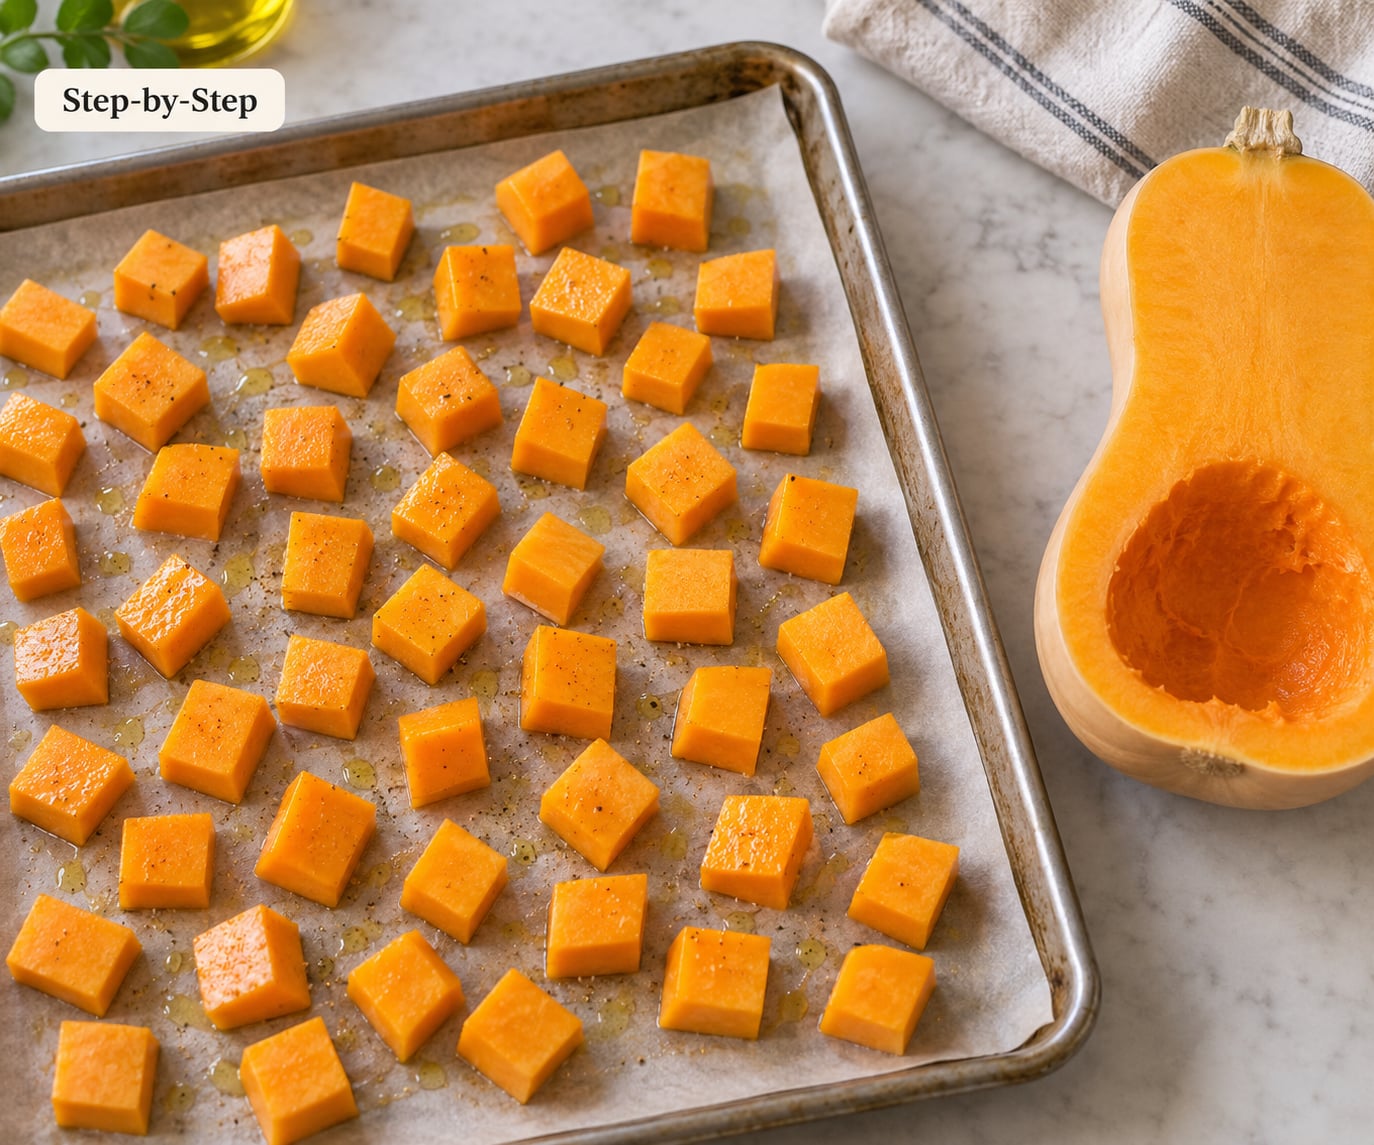
Line the sheet pan and keep the squash in a single layer with space between the pieces. Crowding is the number one reason squash comes out pale. If one squash will not fit, use two pans rather than piling pieces on top of each other.
Step 2: Cut the Butternut Squash Into Even Pieces
Leave the skin on. You can roast with the skin and scoop the flesh out afterward, which removes the most tedious part of prep entirely.
For the halved method, stand the squash on one flat end, cut it in half crosswise through the narrow middle, then cut each half in half lengthwise to get four wedges. Scoop out the seeds and stringy pulp with a spoon and save the seeds if you want to roast them as a garnish.
For the cubed method, peel the squash if you like, then cut it into one-inch pieces. Consistency matters more than size. A few 1.5-inch chunks sitting next to thin coins will be mush before the coins are cooked, so trim the big ones down to match.
Step 3: Season the Squash Before Roasting
Coat the pieces with oil first, then salt and pepper. Oil goes on before the dry seasoning so it can grip the surface and turn crisp rather than powdery.
A good starting point for a two-pound squash is two tablespoons of oil, a teaspoon of kosher salt, and several grinds of pepper, plus a half teaspoon of cinnamon, a pinch of nutmeg, and a pinch of ground ginger if you want a warm, holiday-leaning soup. Woodier herbs like sage, thyme, and rosemary go on as loose leaves and sprigs so you can pull them out before blending.
Toss everything in a bowl or a rimmed pan rather than on the baking sheet, so every face gets coated. A minute of tossing saves uneven seasoning later.
Step 4: Roast Until Tender and Caramelized
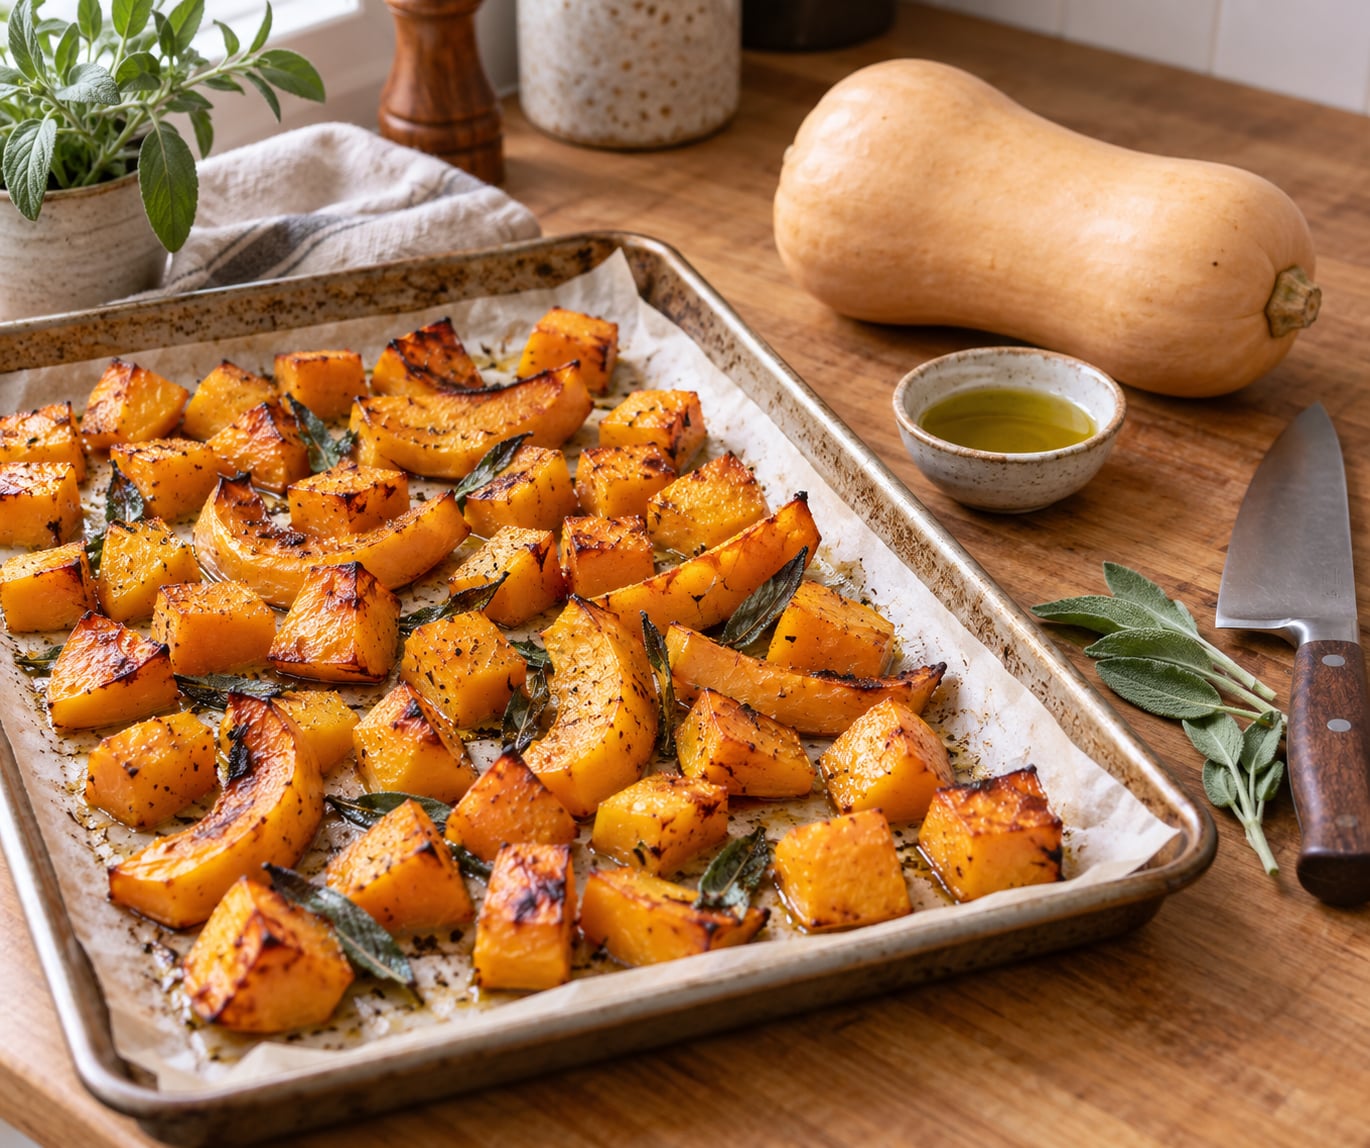
Halves or wedges take 45 to 60 minutes at 425°F. One-inch cubes take 25 to 35 minutes. Halfway through, pull the pan out and turn the pieces with a spatula so the undersides brown too.
Watch for the finish line, not the clock. A fork should slide into the thickest part of a piece with no resistance at all, and a sharp knife should pierce the flesh without much drag. Those two tests beat any timer, because ovens and squash sizes both vary.
Light golden edges mean good caramelization. Deep brown edges mean the sugars have gone past nutty into bitter, and a few burnt bits can make the whole pot taste acrid. Pull them off before blending if you see them.
Step 5: Use the Roasted Squash in Soup
Let the pan cool about ten minutes, then scrape the flesh off the skin with a spoon and drop it into a pot. A medium two-pound squash plus four to five cups of vegetable broth or chicken broth makes about six servings.
Add a sautéed onion and garlic if you did not roast them, pour in the broth, and simmer for five minutes. Deglaze the roasting pan with a cup of the broth, scrape up the browned bits, and add that too. It is the single best flavor move in this whole process and almost nobody mentions it.
Blend with an immersion blender right in the pot, which is the easy path. If you use a countertop blender, work in small batches with the lid vented, fill it no more than a third full, and start on low. Hot liquid expands and it will find the lid.
Thin with more broth, or reduce it for a few minutes if you want it thick enough for a bowl. Season again at the end, because roasted squash eats salt. Finish with a drizzle of cream or coconut milk, a scatter of roasted seeds, and a crack of pepper.
Common Mistakes
Nearly every disappointing squash soup traces back to one of five fixable problems.
- Pale, steamed squash. The pan was crowded or the oven was not fully preheated. Use one layer with gaps and give the oven 15 minutes.
- Uneven cooking. Your pieces were different sizes. Cut everything to roughly one inch so nothing overcooks before the rest is done.
- No browning at all. The oil went on after the salt, or the pan was lined with a damp sheet of parchment that pooled water underneath. Oil first, dry pan.
- Burnt edges, raw centers. The pan sat too close to the heating element or you ran it at 450°F for the full time. Move the rack to the middle and check the squash at the short end of the time range.
- Thin, weak soup. The squash was simmered raw instead of roasted, or you blended and then simmered for 20 minutes. Roast first, and keep the post-blend simmer short.
- Bitter soup. Burnt squash went into the pot. Remove anything dark brown and toasty before blending.
One more habit worth keeping: roast the seeds you scoop out. Toss them with a little oil and salt and roast them at 350°F for 15 to 20 minutes until they pop. They turn into a crunchy topping for about two minutes of oven time, and they cost you nothing.
Frequently Asked Questions
Do I need to peel butternut squash before roasting it for soup?
No, and leaving the skin on is the easier path. Roast the squash whole or in wedges with the skin intact, then let it cool about ten minutes and scoop the roasted flesh off with a spoon. The skin softens in the oven and lifts away cleanly. Peeling first works too, but it is an extra step and there is no flavor gain. Just remove the seeds and stringy pulp before roasting, since those burn.
What is the best temperature for roasting butternut squash for soup?
425°F (218°C) is the sweet spot for soup. It is hot enough to drive water out of the squash and brown the sugars within the time most people are willing to wait. 400°F works and is gentler, but expect softer color and slightly less depth. Pushing to 450°F gets you caramelized edges faster, and it also burns thin pieces before the thick ones cook through, so it needs a close eye.
How long does it take to roast butternut squash until tender?
Halves and wedges take 45 to 60 minutes at 425°F. One-inch cubes take 25 to 35 minutes. A medium butternut squash, roughly two pounds, sits between those. Judge by texture rather than the clock: a fork should slide into the thickest piece with no resistance. A sharp knife should pierce the flesh with almost no drag. Both tests are more reliable than any timer.
Should I cover the butternut squash while roasting it?
No. Covering traps steam, and steam is the opposite of what you want here. The whole point of roasting is driving moisture out so the cut surfaces can brown. Uncovered squash caramelizes, concentrates, and blends into a thick, sweet purée. Foil belongs in this recipe only for a whole garlic head you want to roast alongside the squash and later squeeze into the pot.
Can I roast frozen butternut squash for soup?
You can, but thaw it first and spread it out properly. Frozen squash arrives clumped and wet, so it steams instead of roasting and b unevenly. Thaw it in the refrigerator overnight, or in a colander at room temperature for an hour or two, then pat it dry and spread it in a single layer. Roast it 5 minutes shorter than fresh squash and check it early, since thawed pieces go soft fast.
How do I get caramelized squash without burning it?
Give the pieces space and cut them evenly. A crowded pan traps moisture, the moisture never leaves, and the squash stays pale. Put one layer on a rimmed sheet pan, use two pans instead of stacking, and coat with oil before seasoning. At 425°F, start checking at 30 minutes for cubes and 40 minutes for halves. Golden-brown edges are the target; dark brown and toasty is past it.
Conclusion
Start by preheating the oven to 425°F and lining a rimmed sheet pan. Cut the squash into even one-inch pieces or wedges with the skin on, coat them in oil, salt, and pepper, and spread them in a single layer with space between. Roast until a fork slides through with no resistance and the edges turn golden brown, then scoop the flesh and blend it with broth. That browned, concentrated squash is what makes the soup taste like more than three ingredients.