Gluten-free breading goes soggy for one reason: there is no gluten to hold the crust rigid, so a coating made only of flour or starch drinks up oil and collapses as it cools. Knowing how to fry food gluten free without soggy breading comes down to three levers: a starch-forward coating, oil held between 350 and 375°F, and a wire rack for draining. The whole thing takes about 30 minutes plus rest time, and the biggest adjustment from a wheat-breading kitchen is using a thermometer instead of guessing.
I learned this the slow way, with more than one batch of dense, greasy crumbs going in the trash. Once the coating set, the oil temperature was right, and the pieces landed on a rack instead of a plate, the same recipe turned out like restaurant fried chicken. Nothing about it is fussy. It is four variables moving in the same direction, and this guide walks through each one.
Table of Contents
- What You Need
- Step-by-Step: How to Fry Food Gluten Free Without Soggy Breading
- Step 1: Choose a Gluten-Free Breading That Stays Crisp
- Step 2: Dry and Season the Food
- Step 3: Set Up a Three-Part Breading Station
- Step 4: Heat the Oil Correctly
- Step 5: Fry Until the Coating Is Firm and Golden
- Step 6: Drain Without Steaming
- Common Mistakes
- Frequently Asked Questions
- What is the best gluten-free breading for frying without getting soggy?
- Can I use cornstarch or flour instead of breadcrumbs when frying gluten-free food?
- Why does my gluten-free breading fall off in the oil?
- How do I keep frozen breaded food from becoming soft after frying?
- Can I reheat gluten-free fried food and keep the coating crisp?
- Conclusion
What You Need
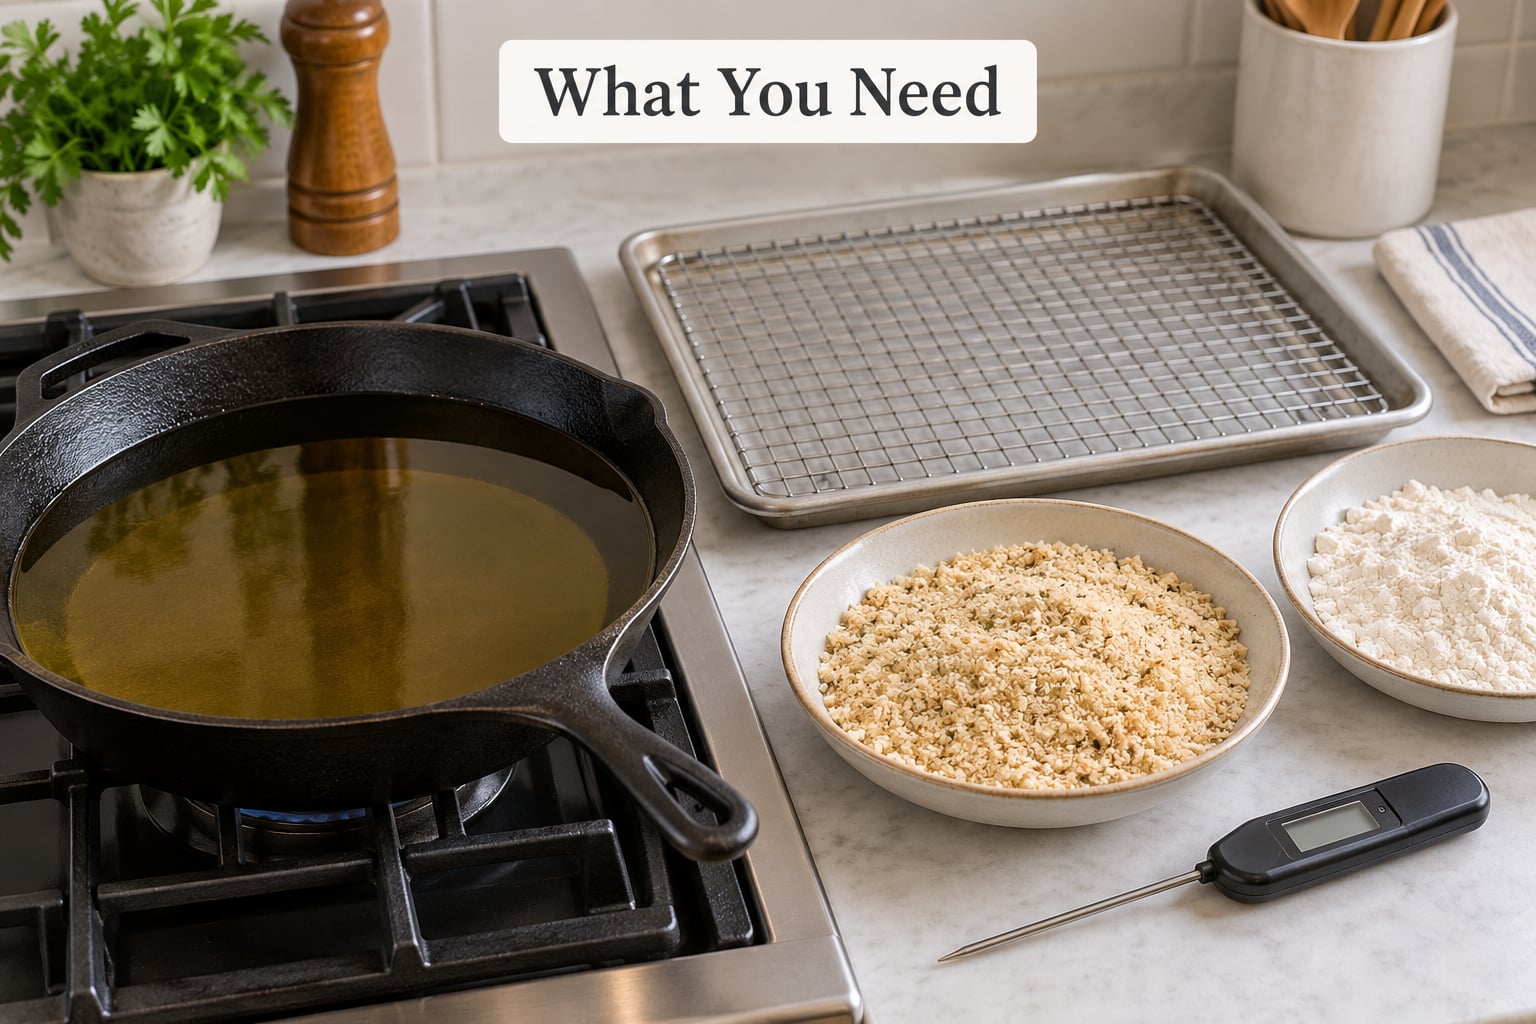
The method is a dry dredge, a wet bind, a dry crumb, then a hot fry with a rack finish. Everything else on this list is there to support one of those four stages.
- Frying oil with a high smoke point: peanut, canola, sunflower, or a refined olive oil. Avoid olive oils with a peppery or grassy taste; they turn bitter at frying temperatures.
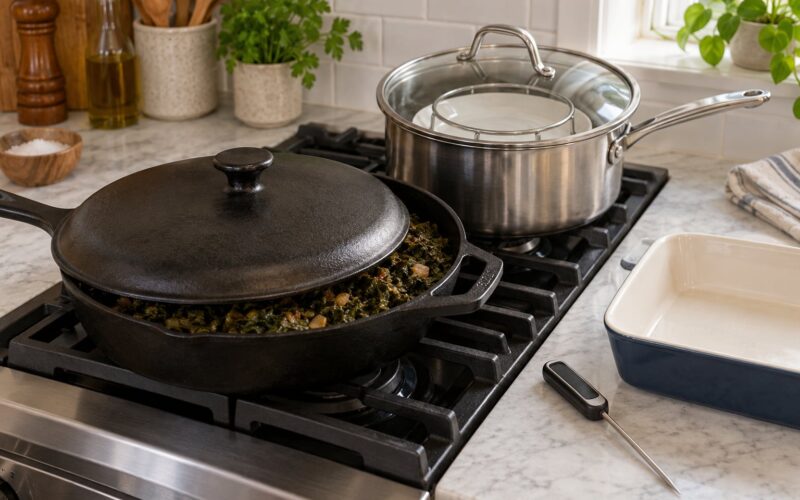
- A heavy pan — a cast-iron skillet, a Dutch oven, or a dedicated deep fryer. Heavy metal holds temperature when cold food hits it. Thin sheet pans lose heat fast.
- Oil at least 2 to 3 inches deep so pieces float rather than sit on the pan bottom.
- An instant-read thermometer. This is the single tool that separates crisp food from soggy food.
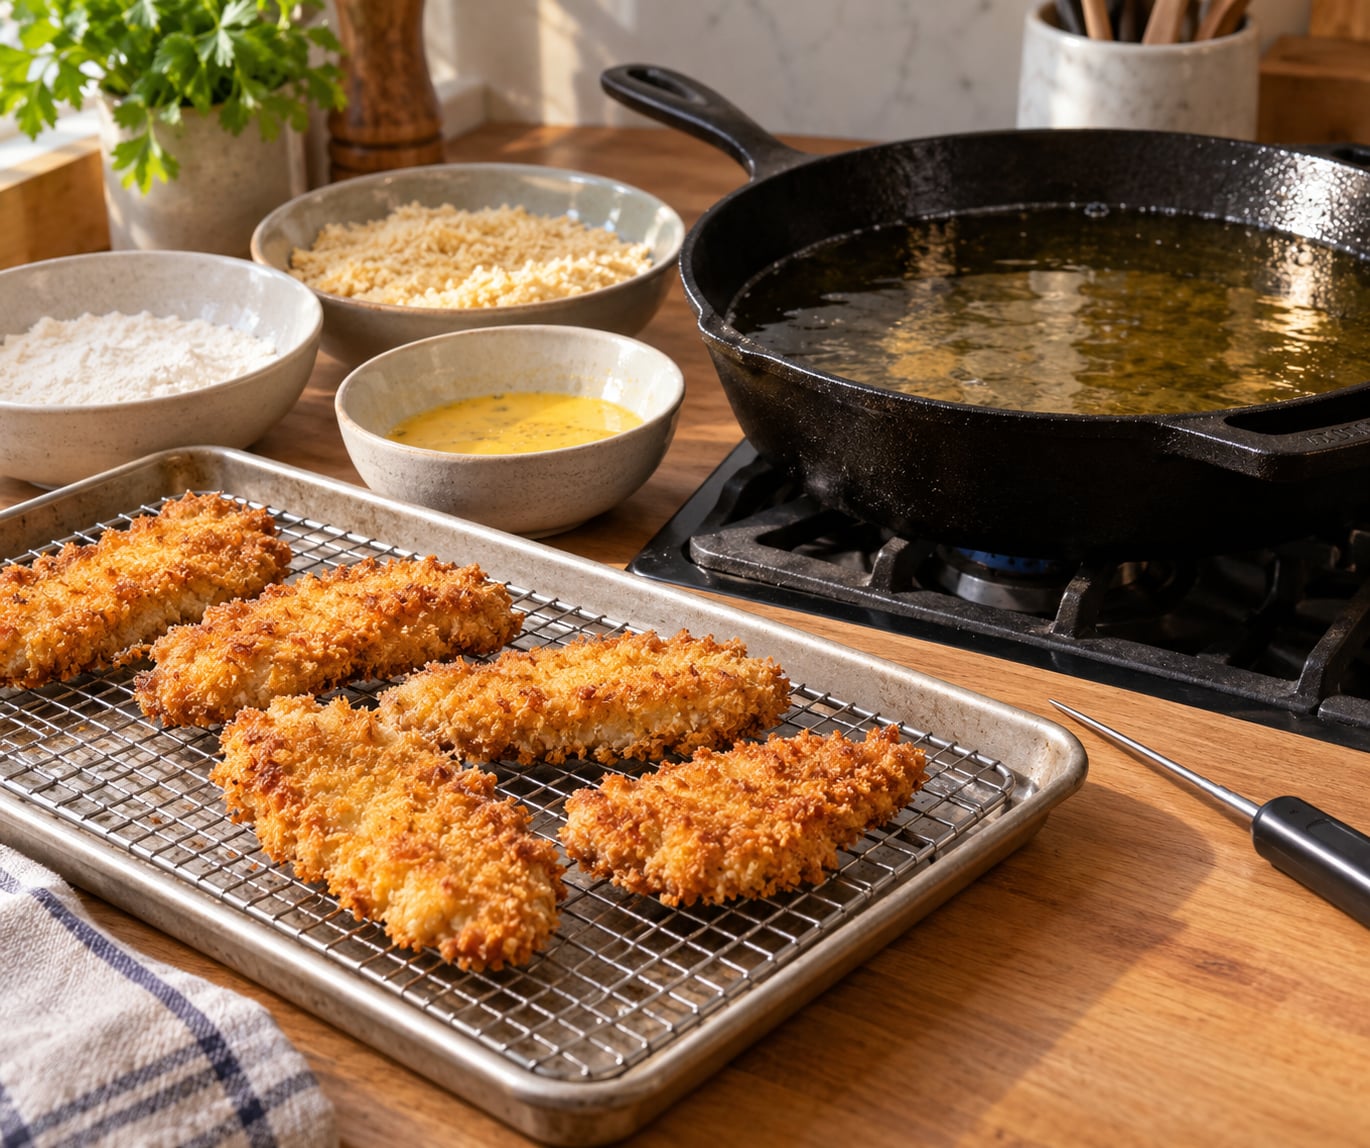
- A wire cooling rack set over a sheet pan. This is not optional if you want a crisp bottom.
- Three shallow bowls or shallow plates for the dredge station.
- Coating: plain breadcrumbs made in a dedicated gluten-free facility, certified gluten-free panko or oat crumbs, crushed rice cereal, coarse rice flour, or a potato starch and cornstarch blend.
- A binder — an egg beaten with a splash of milk or water, plus a small bowl of flour or cornstarch for the first dip. Egg-free binders work too, and are covered below.
Keep every coating bowl shallow. A deep bowl of crumbs turns into a cement mixer when you dredge the third piece, and that heavy wet clump is one of the most common reasons breading slides off in the oil.
Step-by-Step: How to Fry Food Gluten Free Without Soggy Breading
Step 1: Choose a Gluten-Free Breading That Stays Crisp
Pick a coating with starch in it, because starch is what resists soaking up oil once it has set. Plain breadcrumbs labeled gluten-free work well. Oat-based and panko-style crumbs certified gluten-free give a lighter, more fragmented crust with less density.
Coarse rice flour is underrated for this. Pulverizing leftover rice cereal in a food processor gives hard, angular pieces that crunch. Rice cereal also loses flavor fast once ground, so season it heavily with salt, paprika, garlic powder, and black pepper before it goes near the food.
Instant potato flakes are the sleeper option. They are entirely gluten-free, they brown deeply, and a handful of finely grated Parmesan mixed into them pushes the crunch further. That combination circulates widely in gluten-free cooking forums and it earns its reputation.
What to avoid: standard supermarket breadcrumbs, unless the package states they were made in a dedicated gluten-free facility. Shared dry goods and bulk bins carry real cross-contact risk, and cross-contact is a bigger problem for celiacs than an ingredient list ever suggests.
Do not rely on chickpea flour or sorghum flour alone for deep frying. Both are fine bakers, but they brown fast and taste earthy once fried. A cornstarch or potato starch blend is the more reliable base.
Step 2: Dry and Season the Food
Surface moisture is the enemy. A damp piece of chicken turns the first flour dip into paste, the paste grabs loose clumps, and the whole thing arrives in the oil heavier than it should be. Pat every piece dry with paper towels, then let them sit uncovered for ten minutes if you have the time.
Season the food directly with salt and pepper before any coating goes on. Gluten-free coatings are bland on their own, and seasoning the meat rather than the crumb means the flavor survives even where the coating thins out.
For bone-in pieces like fried chicken, a brine does two jobs at once: it seasons all the way to the bone and it leaves the surface tacky enough to grip the flour. Overnight in the refrigerator is standard, and an hour at minimum still helps.
Step 3: Set Up a Three-Part Breading Station
Line up three shallow dishes left to right: flour or starch, then the wet bind, then the seasoned crumb. Work in that order without skipping ahead, and keep one hand dry or use tongs so the binder stays clean.
- Dry dip in flour or cornstarch, patted thin. This is the layer that grips, and it should look like a fine dust, not a shell.
- Wet dip in the beaten egg. Let it run off for a second so the piece is damp, not dripping.
- Crumb dip in the seasoned coating. Press the crumb on firmly with your fingertips — a light touch is how you end up with bare patches.
- Double-dip optional for extra-thick crust: back into the egg, then the crumb again. A spoon of oil stirred into the egg mixture gives the crust an even crisper finish.
Then rest the breaded pieces on a wire rack or a parchment-lined sheet, spaced apart so nothing touches. Ten minutes in the refrigerator lets the coating hydrate and set, and it is the step that stops pieces from sticking together in the pan.
The same rest window is where a brief freeze helps. Home cooks report freezing breaded pieces for 15 to 30 minutes before frying, which firms the coating enough to survive the oil without sloughing off. It is not a deep freeze, just enough chill to set the starch.
Step 4: Heat the Oil Correctly
Heat the oil to 350°F for vegetables and delicate items such as pickles, green tomatoes, and okra. Move to 360 to 375°F for chicken, fish, shrimp, and hush puppies. The temperature should come back up to target between batches; if it will not, your batch is too full.
Why the range matters: below roughly 325°F, the coating soaks up oil faster than the food cooks, so it turns greasy before it browns. Above about 385°F, the outside darkens before the inside finishes, and starch-heavy coatings scorch because there is no gluten to buffer the heat.
Without a thermometer, drop a small cube of bread into the oil. It should sizzle steadily and turn golden within about a minute. No bubbles means the oil is too cold. Aggressive smoking and darkening within seconds means it is far too hot, so pull the pan off the heat and let it settle.
Fill no more than a third of the pan surface. Crowding drops the temperature fast, and the coating pays for it every time.
Safety matters here. Use a heavy pan with high sides, never fill it more than halfway with oil, keep a lid nearby, keep paper towels and a metal slotted spoon within reach but not in your hands, and never leave hot oil unattended. Hot oil fires happen fast and go bad fast.
Step 5: Fry Until the Coating Is Firm and Golden
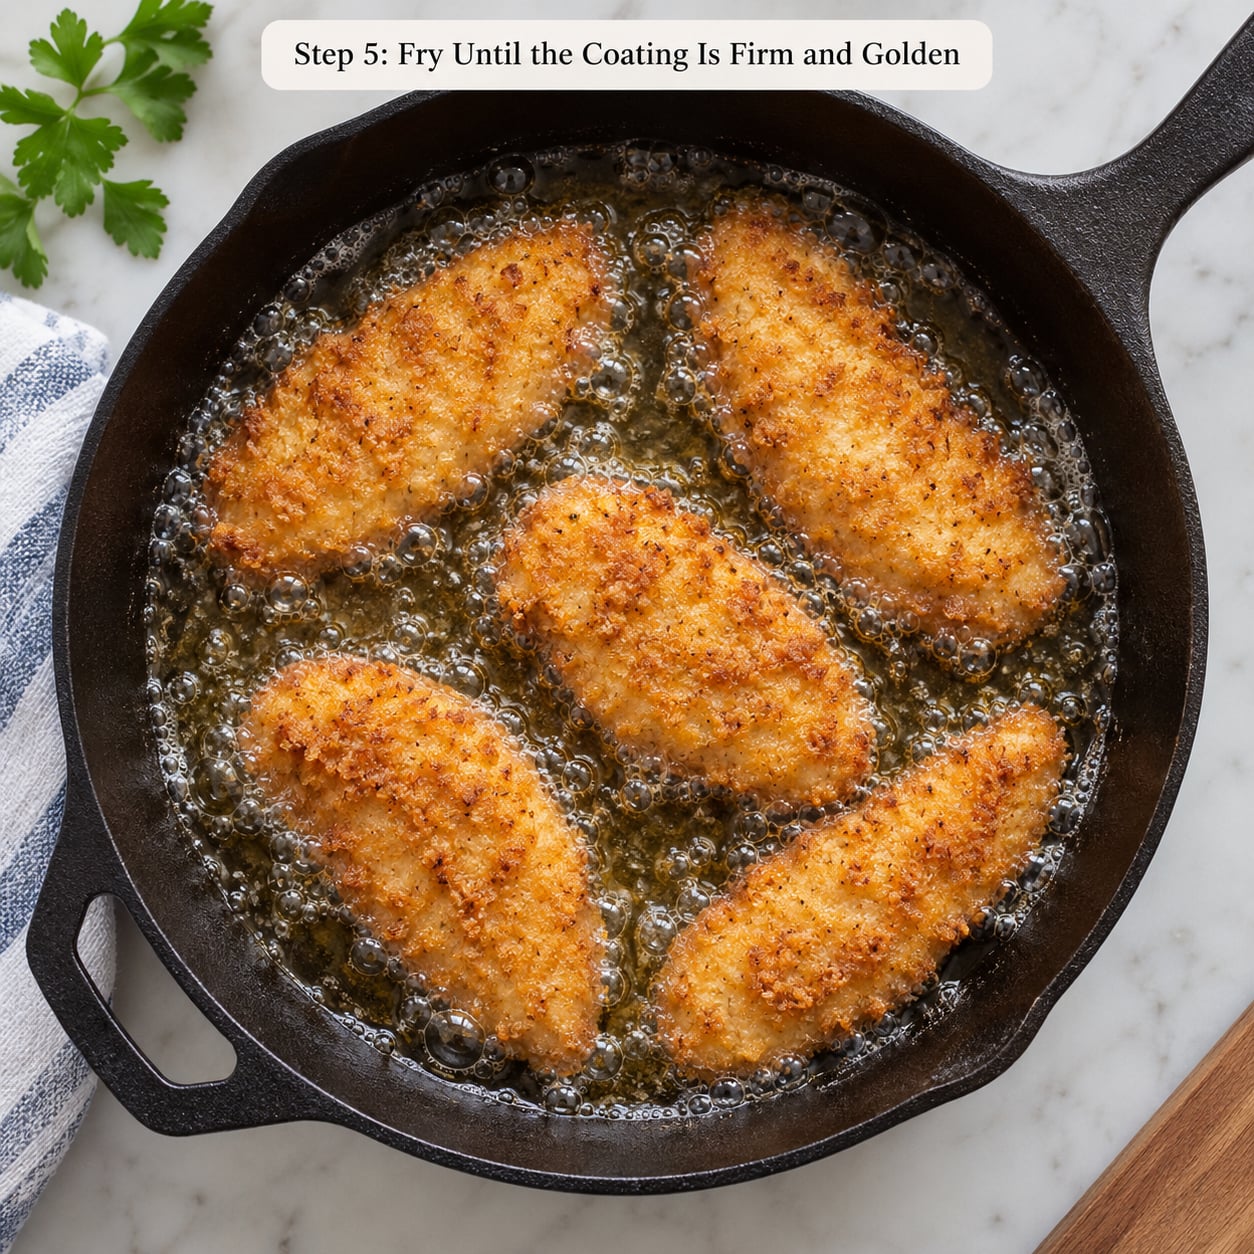
Lower each piece away from you and let it cook without moving it for the first minute or two. Moving breading before it sets is what makes it fall off. The crust should look matte-dry at first, then turn golden and firm as starch gelatinizes and browning kicks in.
Turn once, halfway through, only if the pieces need it. Use tongs and lift rather than shake.
- Chicken pieces: about 12 to 15 minutes depending on thickness, until the coating is deep golden and the thickest part is opaque.
- Fish fillets and shrimp: 3 to 5 minutes, until the crumb is set and the fish flakes at the thickest point.
- Vegetable slices: 2 to 4 minutes, until crisp at the edge.
Check doneness with a thermometer, not color alone. The USDA recommends a minimum internal temperature of 165°F for poultry, 160°F for ground meat, and 145°F for whole cuts of meat and fish. A piece can look finished and still be underdone inside, and breading makes color a poor proxy.
Step 6: Drain Without Steaming
Move fried food to a wire rack over a sheet pan. A paper towel is fine on top of the rack to catch drips, but a paper plate underneath traps steam directly under each piece and softens the bottom within minutes. A folded paper towel on a plate traps the same amount of steam.
Do not pile pieces on top of each other. One layer, spaced out, keeps every underside exposed to air.
Serve within a few minutes if you can. For holding, set the rack in a 200°F oven with the door cracked, and hold for no more than about 30 minutes; beyond that the crust starts losing its edge even on a rack.
Refrigerate leftovers on the rack or a plate with a paper towel, uncovered at the fridge level, and use them within three to four days. Let them sit uncovered briefly rather than sealing them in a container, where condensation re-creates the same problem as the plate.
Common Mistakes
Almost every soggy batch traces back to one of seven things. Work down this list and the fix usually shows up in the next attempt.
- The food was wet. Pat dry thoroughly. Surface moisture pastes the coating on too heavily.
- The breading was too thick. A chalky, thick coating fries into a dense shell. Press on a thin, even layer and let loose crumbs fall away.
- The crumb itself was damp. Sifted crumbs fry up lighter. Pour stale crumbs back into their bag and use a fresh batch next time.
- The coating was structurally weak. Flour-only coatings have nothing holding them together. Add starch, or double-dip for a thicker shell.
- The oil was too cool. Below 325°F the crust absorbs oil before it browns. Use a thermometer.
- The pan was crowded. Overcrowding drops the temperature and raises the steaming. Fry in smaller batches and let the oil recover.
- The food drained on paper. Steam cycles back into the crust. Use a wire rack.
The same causes show up in symptoms. If you recognize one of these, the fix is right behind it.
- Crumbs fall off in the oil: the coating was pressed on lightly, or the oil was too cool so the crust never set. Press firmly, rest the pieces 10 minutes, and hold 350°F.
- Pale and soft crust: the oil sat below 335°F. Use a thermometer and fry in smaller batches.
- Greasy crumb: overcrowding, or oil that never recovered between batches. Keep the pan one-third full at most and wait for the temperature to climb back.
- Pieces stuck together: breaded food was touching during the rest. Space pieces on a rack for 10 minutes and drop the oil 10°F.
- Soggy bottom with a crisp top: the food drained on a plate or paper towel. Use a wire rack over a sheet pan, one layer.
- Soft after reheating: it went back into a closed container. Re-crisp uncovered in a 400°F oven for 10 to 15 minutes.
Two adjustments worth knowing. For an egg-free version, a thick blended flax and water mixture, or unsweetened plant milk thickened with cornstarch, works as the wet bind; keep it slightly thicker than egg so it does not run off. And for reheating, put food on a rack in a 400°F oven or a toaster oven for 10 to 15 minutes. The dry heat drives moisture back out, and the rack keeps the underside from re-softening.
Frequently Asked Questions
What is the best gluten-free breading for frying without getting soggy?
A coating that combines starch with crumbs is the most reliable option. Plain breadcrumbs labeled gluten-free, certified gluten-free panko or oat crumbs, and crushed rice cereal all stay crisp at 350 to 375°F. A cornstarch and potato starch blend fries lighter and crunchier than flour alone, and seasoned instant potato flakes are a strong gluten-free alternative. Whatever you choose, season it well and press it on firmly.
Can I use cornstarch or flour instead of breadcrumbs when frying gluten-free food?
Yes, and for many foods it works better. Cornstarch fries very crisp and light, though it needs salt and works best as part of a blend with potato starch or a small amount of flour for structure. Use it for shrimp, vegetables, and thin fish. Skip straight cornstarch for larger cuts like fried chicken, where the coating can slide off if it is not double-dipped.
Why does my gluten-free breading fall off in the oil?
Usually the coating was not pressed on, or the oil was not hot enough to set it. Pat the food dry, dust it with cornstarch or flour, dip in egg, then press the crumb on firmly with your fingertips. Rest the breaded pieces spaced apart for 10 minutes before frying so the coating sets. Keep the oil between 350 and 375°F, and do not move the pieces during the first minute or two.
How do I keep frozen breaded food from becoming soft after frying?
Frozen breaded food picks up extra moisture from thawing in the pan, and that steam softens the crust. Fry it from frozen without thawing, at the lower end of the temperature range so the outside sets before the inside steams. Do not overcrowd, and move the pieces straight to a wire rack. If the pieces are frozen solid, give them five extra minutes to cook through.
Can I reheat gluten-free fried food and keep the coating crisp?
Yes, as long as you reheat it uncovered and dry. A microwave reheats the crust unevenly and leaves it soft. Instead, place the food on a wire rack in a 400°F oven for 10 to 15 minutes, or use a toaster oven for smaller pieces. Store leftovers in the refrigerator on a paper towel rather than a sealed container so condensation does not undo the crust.
Conclusion
Start with three changes on your next batch. Use a coating that has starch in it, or double-dip a crumb that does not. Hold the oil between 350 and 375°F with a thermometer instead of trusting the look of the smoke. Drain on a wire rack in a single layer, never a paper plate.
Everything else is detail. Once those three are right, the soggy, dense crust stops being a gluten-free limitation and becomes something you can fix.