If you want to know how to make gluten free pizza dough without a stand mixer, it takes about ten minutes of mixing and then some waiting. Whisk a certified gluten-free flour blend with starch, a binder, yeast, warm water, salt, and a little olive oil, knead it briefly, and give it a rise before you shape and bake it. No mixer, no stretching, no tears.
Gluten-free pizza dough is built from scratch rather than kneaded into shape, because wheat dough gets its structure from two proteins, glutenin and gliadin, that link into an elastic web when water and yeast come together. Take that web away and you get a softer, stickier, more fragile mixture that has to be assembled instead: a base flour for body, starches such as tapioca or potato starch for chew and crisping, and a binder like xanthan gum or psyllium husk to hold the crumb together. The binder is doing the job gluten used to do, and getting that ratio right is the single biggest lever in the whole recipe.
This method is beginner-friendly and mostly passive. Total time from bowl to pizza is roughly two and a half hours, but most of that is waiting, and the dough can also be mixed the night before. If you have never baked with gluten-free flour before, read the shaping section twice. Pressing, not rolling, is the habit that keeps a first crust intact.
Table of Contents
- What You Need to Make Gluten Free Pizza Dough
- Step-by-Step
- How to make gluten free pizza dough with yeast
- How long should gluten free pizza dough rise?
- How to shape gluten free pizza dough without tearing
- How to bake gluten free pizza dough for a crisp crust
- Common Mistakes
- Frequently Asked Questions
- Can I make gluten free pizza dough without yeast?
- Why is my gluten free pizza dough so sticky?
- What is the best gluten-free flour for pizza dough?
- How do I keep gluten free pizza crust from drying out?
- Can I freeze unbaked gluten free pizza dough?
- How should I reheat leftover gluten-free pizza?
- What can I use instead of a pizza stone or steel?
- Conclusion
What You Need to Make Gluten Free Pizza Dough
Everything for a 12-inch crust comes out of a normal pantry except the flour blend and the binder. Measure by weight where you can. Gluten-free flour is thirsty and unforgiving, and a two-tablespoon swing in water decides whether the dough cooperates or fights you.
- 300 g (about 2 2/3 cups) certified gluten-free all-purpose flour blend — look for a certified label if anyone in the house has celiac disease, since blends vary in how they are milled and whether cross-contact is addressed.
- 1 tsp instant yeast, or 1 1/2 tsp active dry yeast if that is all you have.
- 1 tsp fine sea salt.
- 1 tsp sugar or honey — yeast eats this first and wakes up faster in a cold kitchen.
- 240 ml (1 cup) warm water, about 105°F / 40°C, plus 1 to 3 tablespoons extra for adjusting.
- 2 tbsp olive oil, divided: 1 tbsp in the dough, 1 tbsp for the pan and your hands.
- Baking powder is not needed for a yeasted dough. Skip it unless you are making the quick crust variation below.
The binder is the part people leave out. Most commercial gluten-free blends already contain one, so read the label before you add more. If the blend does not list xanthan gum, add 1 1/2 teaspoons per 300 g of flour, roughly 1 teaspoon per cup. If it already contains xanthan, add nothing at all. Doubling it up is the fastest way to turn a good dough into chewing gum.
Psyllium husk is the alternative binder and the one people ask about most. It forms a gel rather than a gum, so the crust comes out with a softer, more flexible crumb instead of a tight one. Replace the xanthan with 2 tablespoons of psyllium husk powder per 300 g of flour, stir it into the dry ingredients, and expect a stickier dough that relaxes more as it rests. You can also use both at half the listed amount, which gives you structure and a little chew at the same time.
Tools are modest: a large bowl, a whisk or fork, a rimmed baking sheet, and a sheet of parchment. A digital scale and a baking stone or steel are nice to have, not required.
Step-by-Step
How to make gluten free pizza dough with yeast
Warm the water first and put it in a small bowl. If you are using instant yeast, sprinkle it straight into the flour. If you are using active dry yeast, stir it into the warm water, add the sugar, and wait five minutes until the surface looks frothy and smells sweet. No froth means the yeast is dead or the water was too hot, so start again.
Whisk the flour blend, salt, and any binder you are adding into a large bowl. Make a well in the center and pour in the water with the yeast. Stir with a fork until no dry pockets remain, then add the tablespoon of olive oil.
The dough will look shaggy and slightly tacky, and it should not look like bread dough. That is correct. Knead by hand for two to three minutes: press the ball down with the heel of your hand, fold it over, turn it, repeat. You are looking for a cohesive mass that holds together when you squeeze it, not a smooth, springy ball.
If it tears as you squeeze, add water a tablespoon at a time. If it clings to your hands and spreads across the counter like wet plaster, dust a little flour over the surface rather than adding more to the bowl. Once mixed, cover the bowl and let it rest.
How long should gluten free pizza dough rise?
At room temperature, 70°F / 21°C, expect a bulk rise of 60 to 90 minutes. The dough is ready when it has nearly doubled in height and shows bubbles along the sides of the bowl. Mark the level with a piece of tape so you can see the change.
Poke test: press a floured finger in about half an inch. If the dent springs back fully, it needs more time. If it stays but the dough feels airy and light, move on. Gluten-free dough often rises fast in the first thirty minutes and then stalls, so trust the doubling more than the clock.
Punch it down, reshape into a ball, cover, and let it rest another 15 to 30 minutes before shaping. This final rest is what relaxes the starches and makes the dough workable rather than brittle.
For a deeper, chewier crust with more flavor, cold-ferment the dough instead: refrigerate it covered for 24 to 48 hours after the bulk rise, then bring it to room temperature for about an hour before shaping. Home bakers posting in r/glutenfree call the long cold ferment the biggest single upgrade for chew and flavor, and it is the method behind most Neapolitan-style gluten-free attempts.
Raw dough keeps in the refrigerator for two days in a sealed container or bag. Baked crust wrapped tightly keeps three to four days. Freeze unbaked shaped dough on a tray first, then stack in a bag with parchment between, for up to a month.
How to shape gluten free pizza dough without tearing
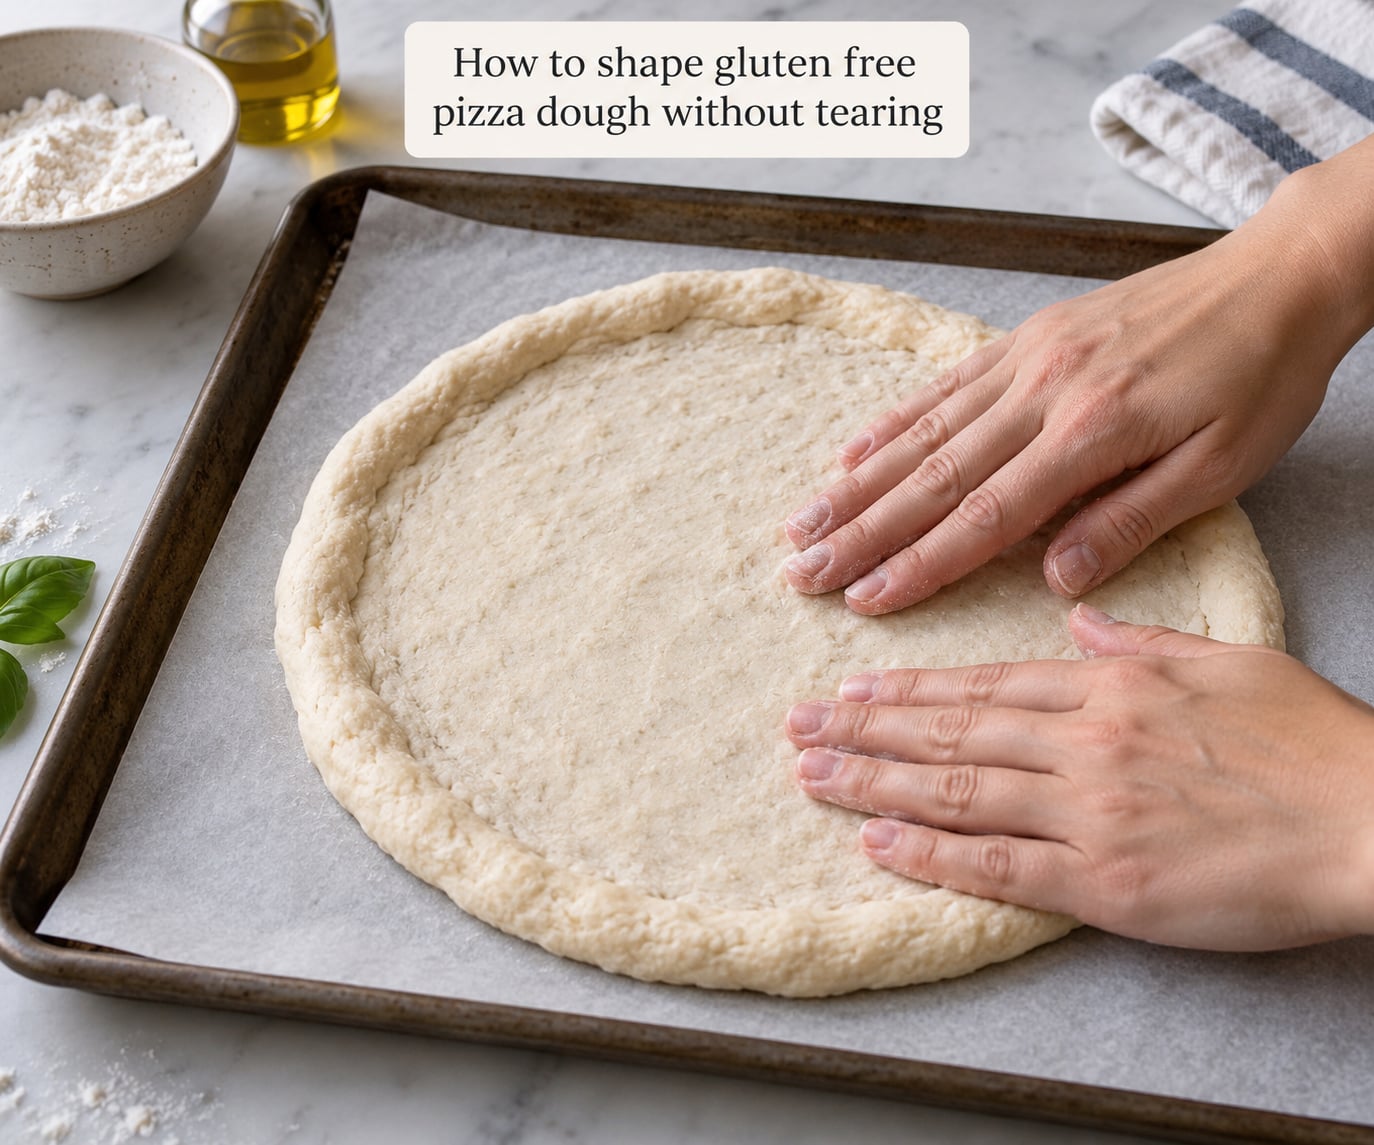
This is where most first attempts fail, because the instinct is to roll the dough and stretch it over your knuckles. Gluten-free dough has no elastic web, so it tears instead of stretching. Press it instead.
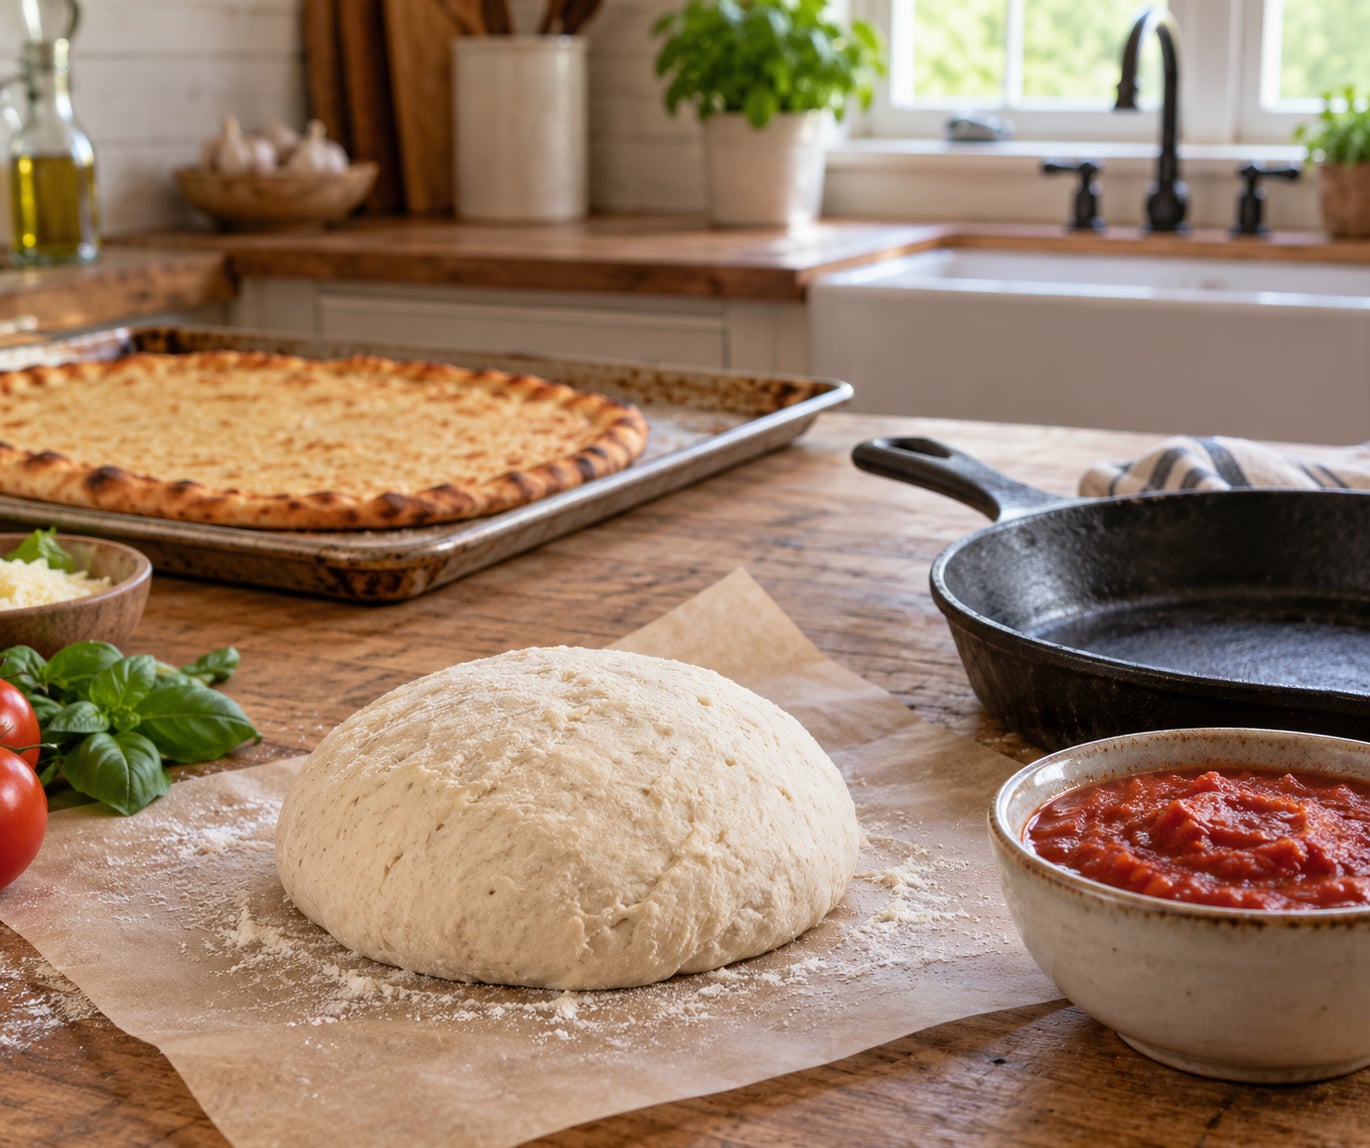
Drizzle a tablespoon of olive oil on the baking sheet and spread it around. Lay a sheet of parchment on top, then turn the dough out onto the parchment and dust it lightly with flour.
Starting at the center, press outward with your fingertips in small circles, flattening a round about 12 inches across. Work from the middle every time, and stop pushing once you reach the edge. The rim puffs up on its own from the gas trapped near the outside, so leaving it thicker is what produces that raised, crisp edge.
If a crack opens along the edge, pinch it closed and brush a little water over the seam. If the whole thing tears, patch it with a scrap of dough rather than trying to stretch the sheet back together.
Do not stretch the base once it is topped. To transfer, lift the parchment by its corners and set it directly on the baking surface. Everything you need is on the sheet already, so the dough never has to be handled twice.
How to bake gluten free pizza dough for a crisp crust
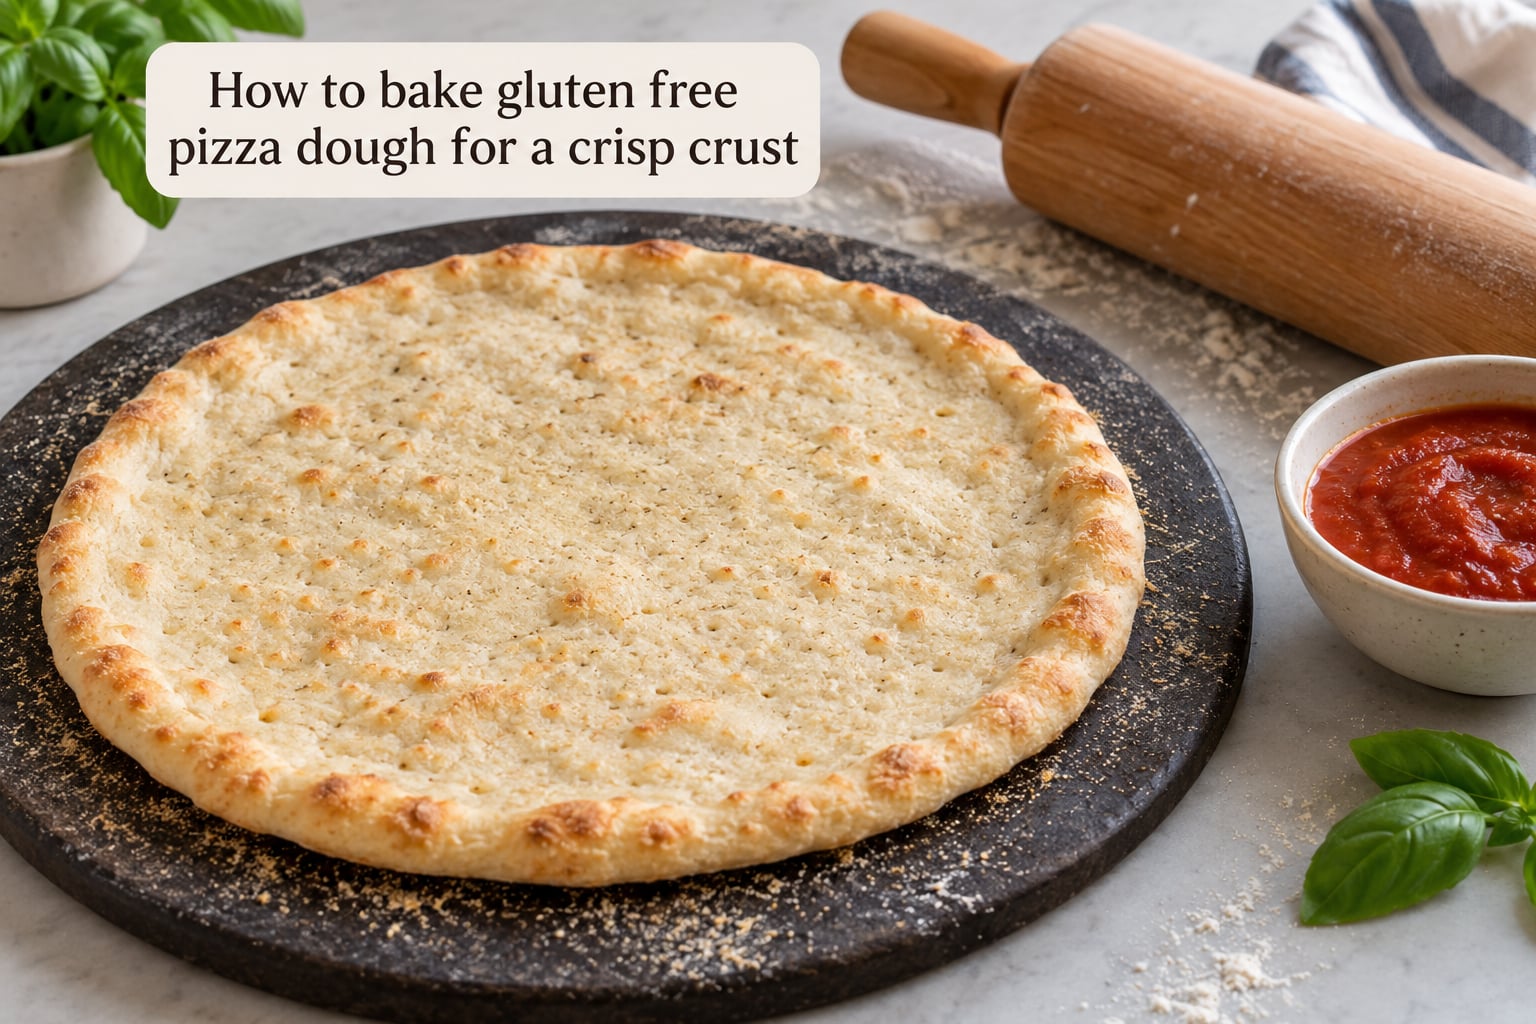
Heat is what separates a crisp gluten-free crust from a soft one. Put the oven at its highest setting with the door closed, 500°F / 260°C for most home ovens, and let it run for at least 45 minutes with the stone or steel inside. A cold surface is the reason so many first bakes come out pale and limp in the middle.
If you have no stone or steel, an upside-down heavy baking sheet works nearly as well, and a cast-iron skillet on the oven floor is a good substitute. For a skillet, oil the pan, set it over medium heat until it is too hot to touch, then lower the parchment round into it and cover.
Par-bake before you top. This is the single most useful technique in gluten-free pizza and the one most often skipped. Bake the bare base for 3 to 5 minutes on the hot surface, until the edges look set and dry and the center no longer looks wet. Take it out, add sauce and toppings, and bake again until the cheese melts and the crust is browned at the edges. Home cooks report noticeably crisper, less gummy results from par-baking than from topping raw dough.
Keep the topping load honest. Sauce goes on thin, maybe two tablespoons, and wet toppings like fresh tomato or mushrooms release water that turns a delicate center into sludge. Pre-cook or drain anything watery.
Look for deep golden edges with a few darker blisters and a center that springs back when you press it. Gluten-free crust has no oven spring from gluten, so it browns in the time it takes rather than expanding after, and it will not brown while the center is still pale. Let a hot pizza sit two or three minutes before slicing so the crumb sets.
For food safety, cook poultry toppings to 165°F / 74°C, ground meat to 160°F / 71°C, and whole cuts and fish to 145°F / 63°C, measured at the thickest part. Vegetable toppings cook through during the second bake, so heat them first if they are raw.
Common Mistakes
- Dough is dry and crumbly and cracks when you shape it. You are short on water or long on flour. Gluten-free flour absorbs more than wheat does. Add water a tablespoon at a time and press rather than knead, and check that your binder is actually in the bowl.
- Dough is unpleasantly sticky and clings to everything. Most often this is over-hydrated or over-bindered. Dust a light layer of flour over the surface and let it rest ten minutes, which lets the starches hydrate and the dough relax. If it stays wet, add flour by the tablespoon next time rather than dusting repeatedly at the shaping stage.
- The base tears or shatters. You stretched it. Press from the center outward on parchment, and shape while the dough is still cool from the refrigerator, not straight off a warm proof.
- The rim balloons into a huge flat disc. You stretched the outer edge or overproofed it. Leave the rim untouched and thicker than the center, and check the dough an hour early, because gluten-free dough can go from risen to collapsed quickly.
- The center is dense or gummy. Three likely causes: underproofed dough, a cold baking surface, or skipping the par-bake. Work through them in that order.
- The crust browns before the center cooks. Lower the rack one position, tent loosely with foil after four minutes, and trim the toppings back.
- The bottom is soggy under heavy toppings. Bake on the lowest rack for the par-bake, use a perforated baking surface if you have one, and do not stack slices to cool.
Three habits fix most of the above before you even start. Weigh your flour. Use parchment as your work surface and your handle. Change one variable at a time, usually the flour blend or the hydration, rather than tweaking everything at once.
One honest expectation: gluten-free dough will not stretch, hold a raised edge like wheat dough, or slice cleanly straight out of the oven. It bakes flatter and crisper. If you want chew and an oven-sprung rim, that comes from a 48-hour cold ferment and a blend built around tapioca or potato starch, not from more kneading.
Frequently Asked Questions
Can I make gluten free pizza dough without yeast?
Yes, and it is the fastest route on a weeknight. Skip the yeast and add 1 teaspoon of baking powder per cup of flour plus a pinch of sugar, then rest the dough for 15 minutes so the starches hydrate. Press and bake immediately. You get a thinner, cracker-like crust rather than a chewy one, and it will not rise. Keep your binder ratio the same as the yeasted version.
Why is my gluten free pizza dough so sticky?
Sticky dough is normal and fixable. Gluten-free flour absorbs water unevenly, so the outside hydrates before the center does. Resting the mixed dough for ten minutes lets the remaining starch drink up moisture and the dough relax. If it still sticks, dust the surface lightly with flour rather than adding more to the bowl. Too much xanthan gum is the other common cause, so check the blend label before you add any.
What is the best gluten-free flour for pizza dough?
A certified gluten-free all-purpose blend is the safest starting point, especially for beginners. For chew and better browning, build your own from two parts base flour, such as sorghum or millet, to one part tapioca or potato starch, then add about one teaspoon of xanthan gum per cup. Bob’s Red Mill GF all-purpose and Caputo Fioreglut are the two blends most often recommended in r/glutenfree for general pizza and Ooni-oven results.
How do I keep gluten free pizza crust from drying out?
Store baked crust wrapped tightly in foil or a sealed bag in the refrigerator, where it keeps three to four days, rather than leaving it on the counter. A slice of bread in the bag helps a whole crust stay soft. Reheat it in a dry skillet or a hot oven for a few minutes so the surface re-crisps, and skip the microwave, which makes gluten-free crust leathery.
Can I freeze unbaked gluten free pizza dough?
Yes, and it freezes better than most wheat dough. Shape the base on parchment, freeze it flat until solid, then move it into a freezer bag with parchment between the layers. It keeps up to a month. Thaw it in the refrigerator overnight and bake straight from cold; do not let it come to room temperature, or the soft center will spread before the oven can set it.
How should I reheat leftover gluten-free pizza?
Run the skillet over medium heat with a little olive oil and warm the slice for two or three minutes a side, pressing it down with a spatula. A toaster oven at 375°F / 190°C for five to eight minutes works just as well. The microwave is the one method to skip, because it steams the crumb and leaves the crust tough. The cast-iron skillet is the best reheat surface too, since it re-crisps the base the same way it did in the oven.
What can I use instead of a pizza stone or steel?
An upside-down heavy baking sheet is the closest substitute, preheated in the oven for at least 45 minutes so the metal holds heat. A cast-iron skillet on the oven floor also works, though you cook the pizza in batches because the pan is small. A preheated griddle or a bread steel all share one purpose: taking heat away from the dough the instant it lands, which is what crisps the bottom while the center finishes setting.
Conclusion
Gluten free pizza dough is a short ingredient list and a forgiving process, as long as you stop treating it like wheat dough. Measure the flour accurately, hydrate it gradually, and judge the dough by texture rather than appearance: shaggy and slightly tacky after mixing, doubled and airy after the rise, workable after a short rest.
Start tonight. Weigh 300 g of a certified gluten-free blend, check the label for an included binder, and mix it with 240 ml of warm water, 1 tsp instant yeast, 1 tsp salt, and a tablespoon of olive oil. Rest it covered while a long cold ferment gets going, and tomorrow night you can shape and bake a crust that holds together.